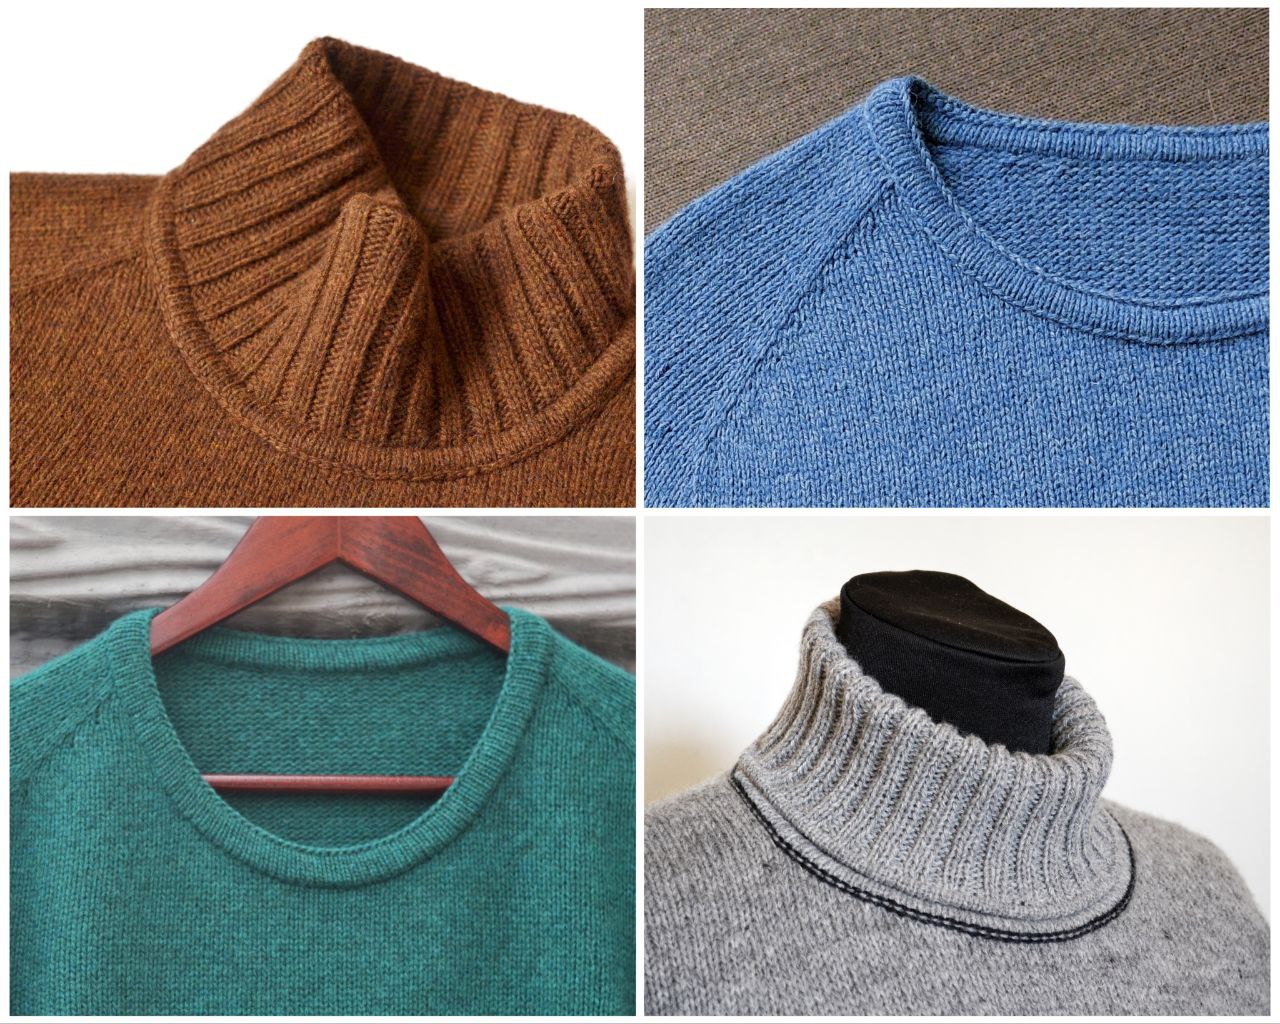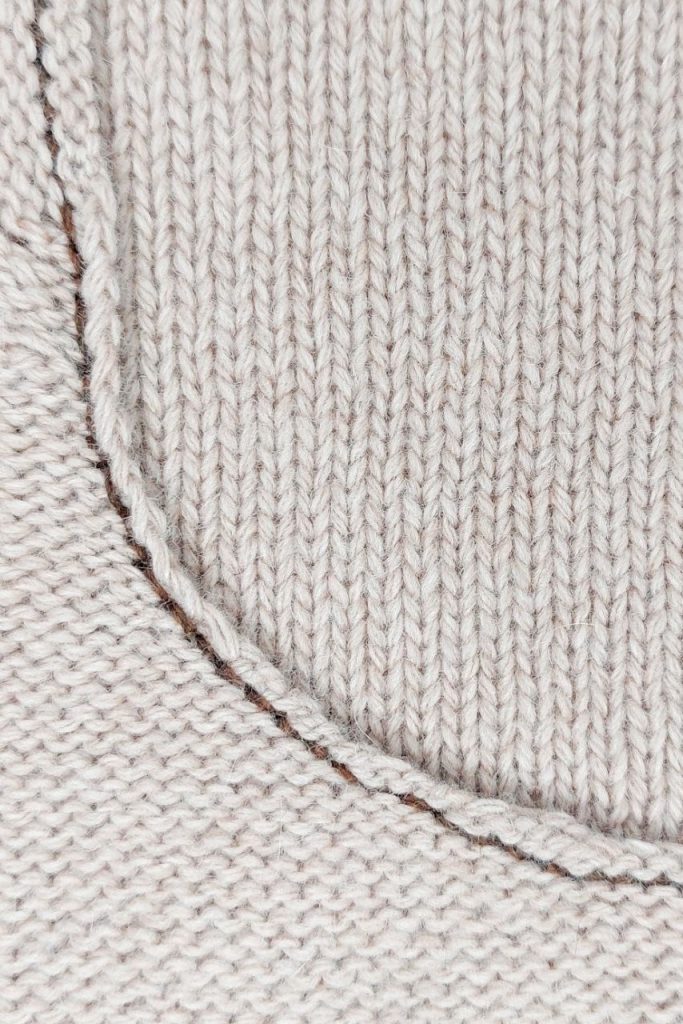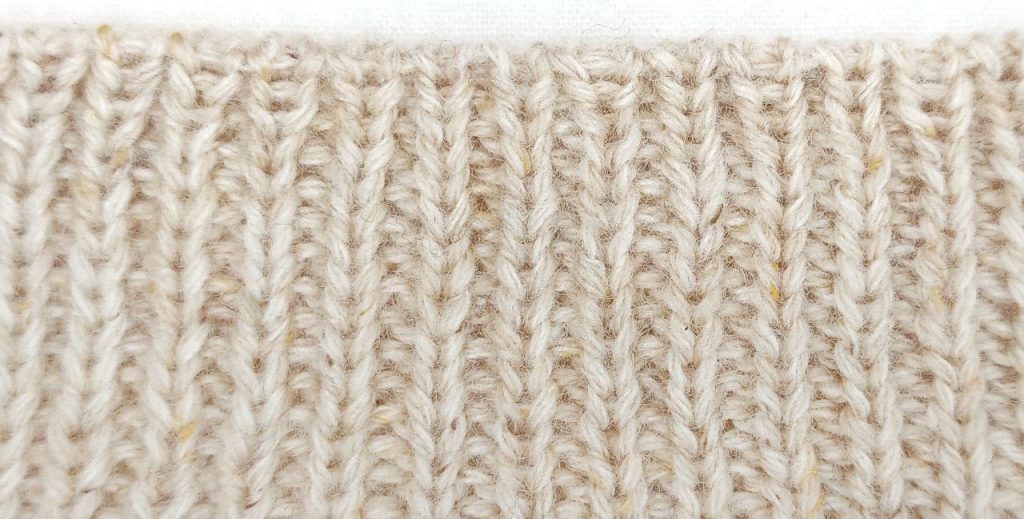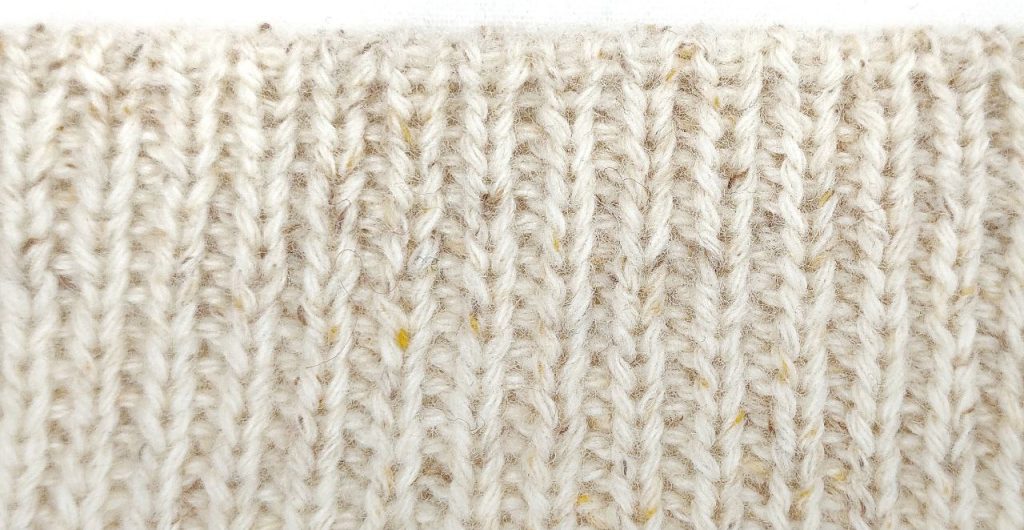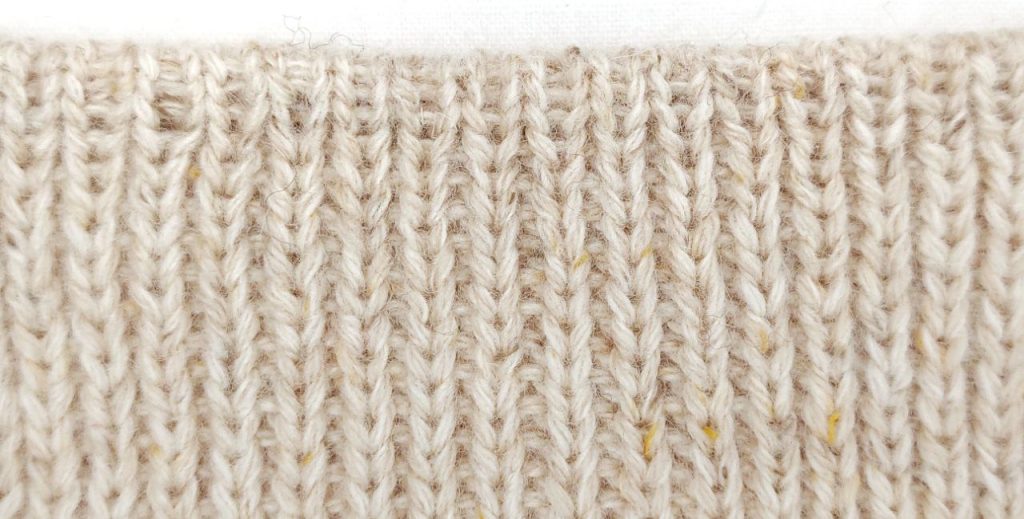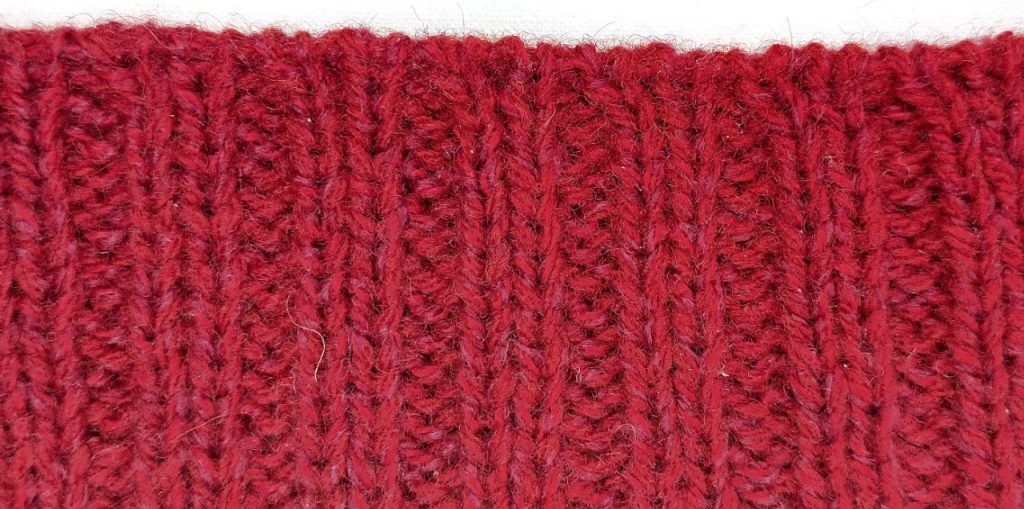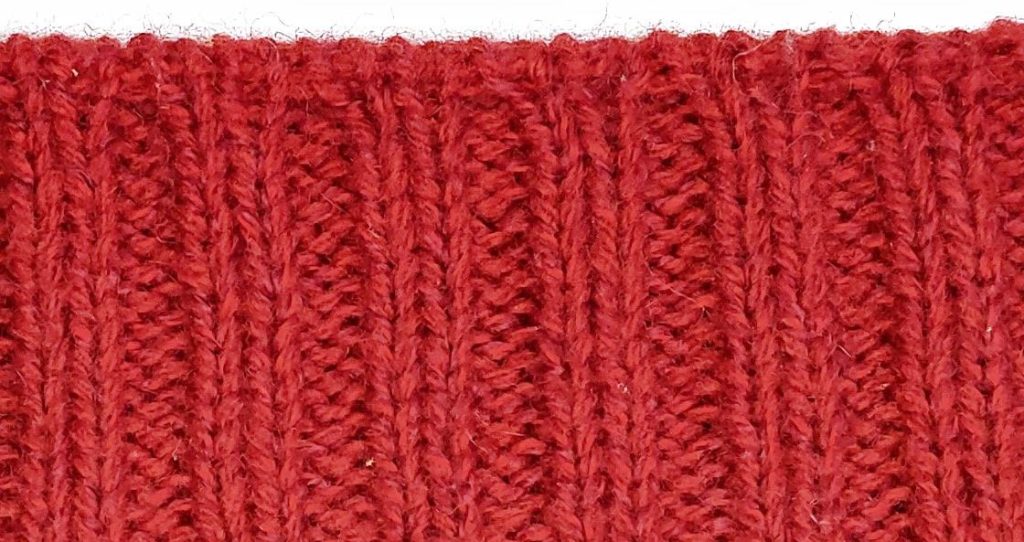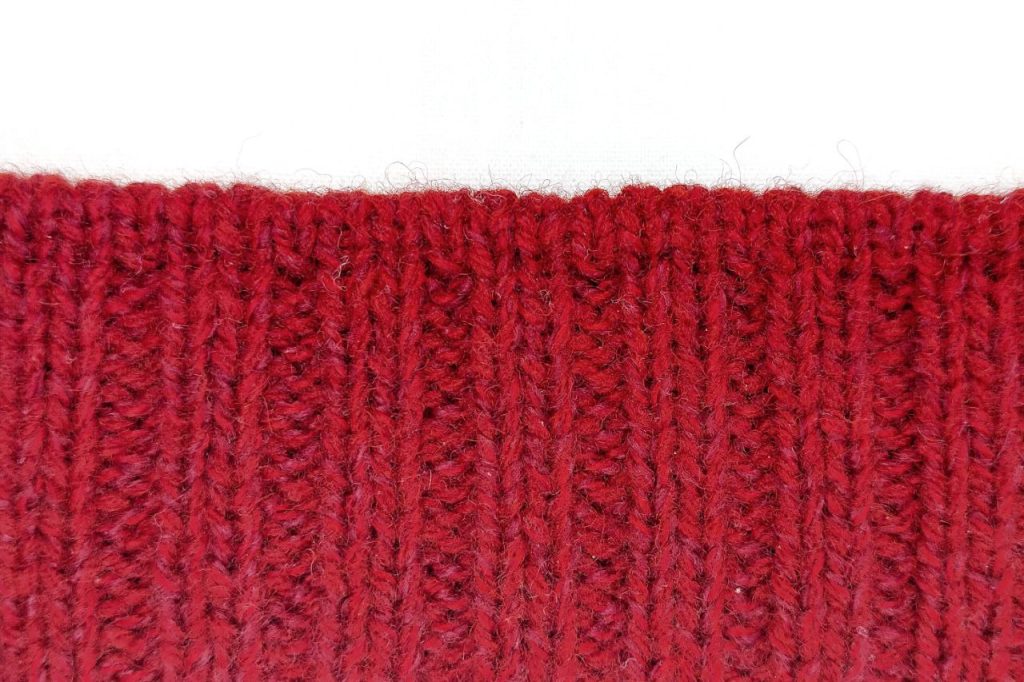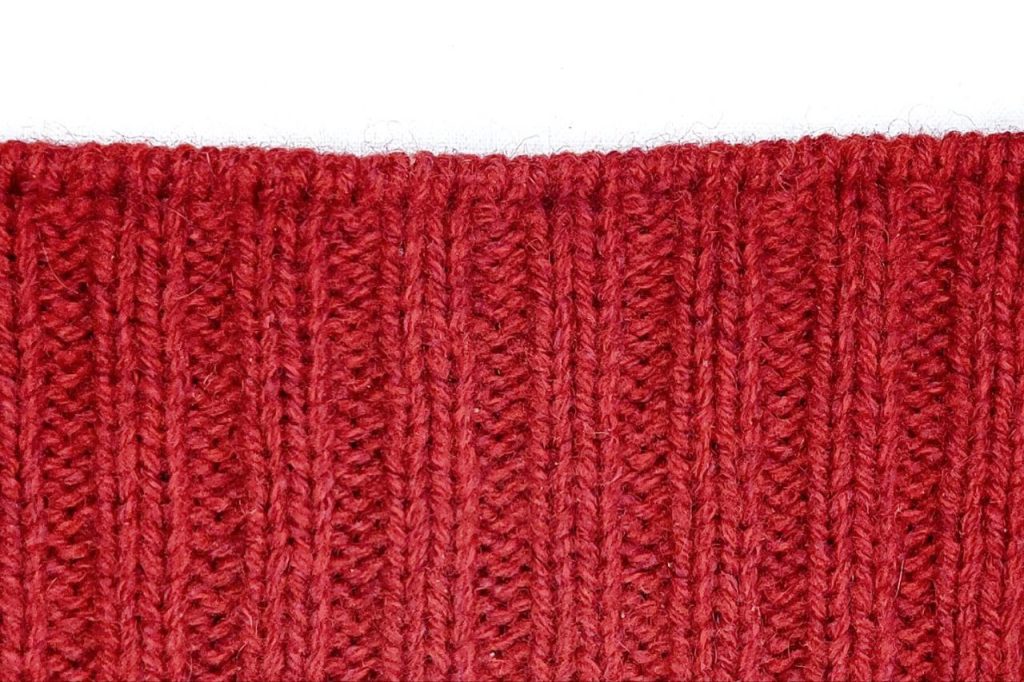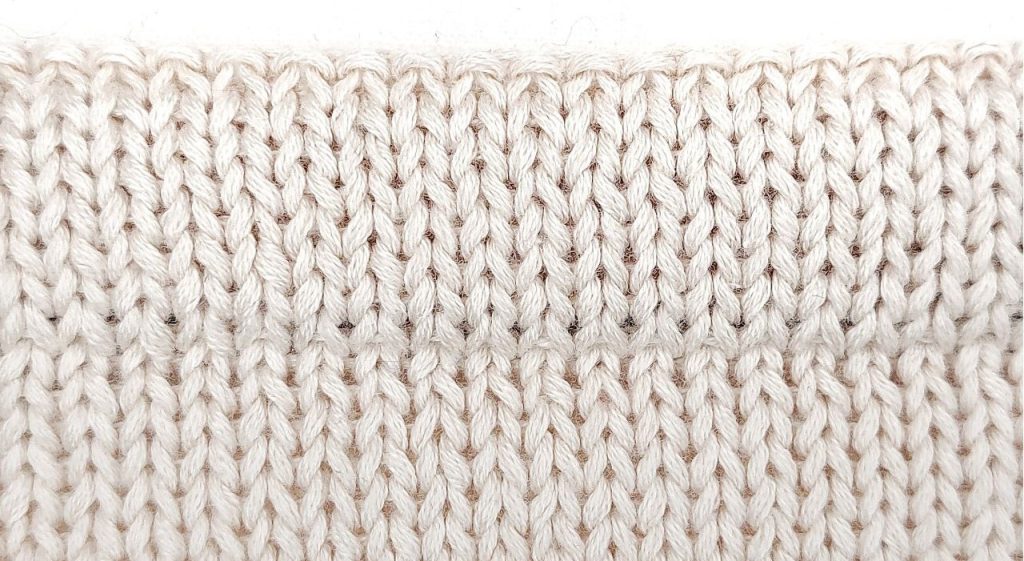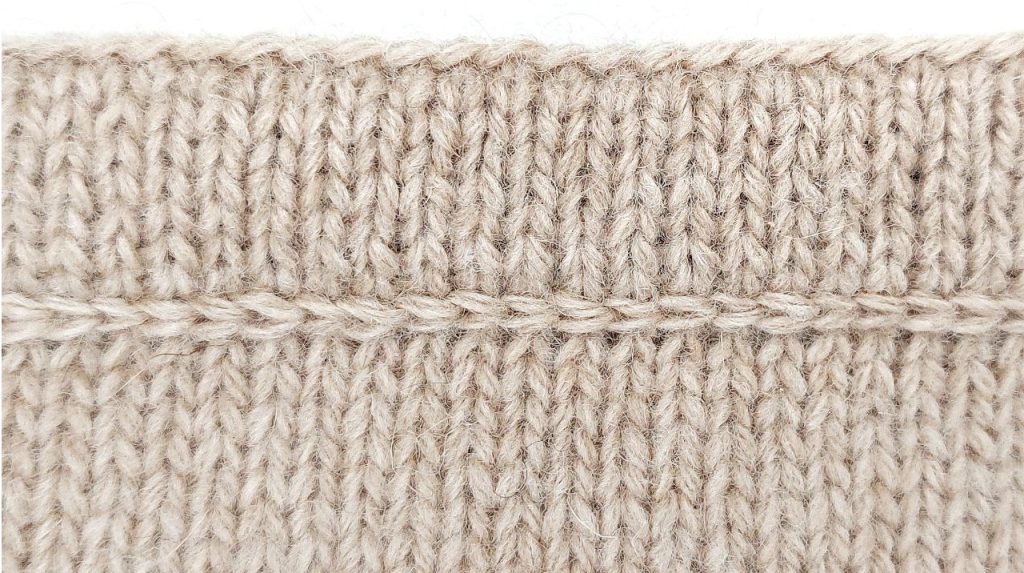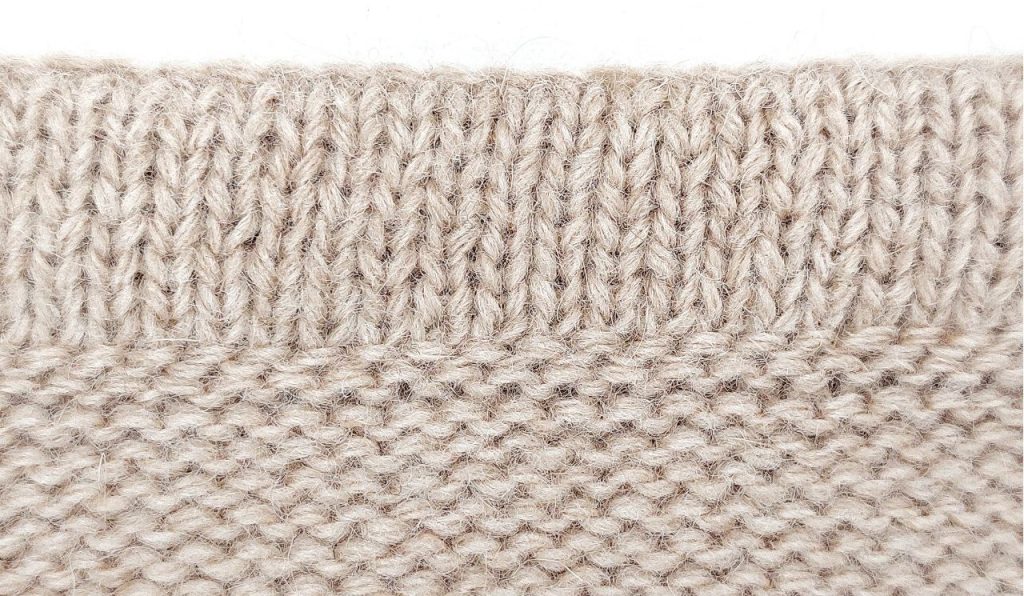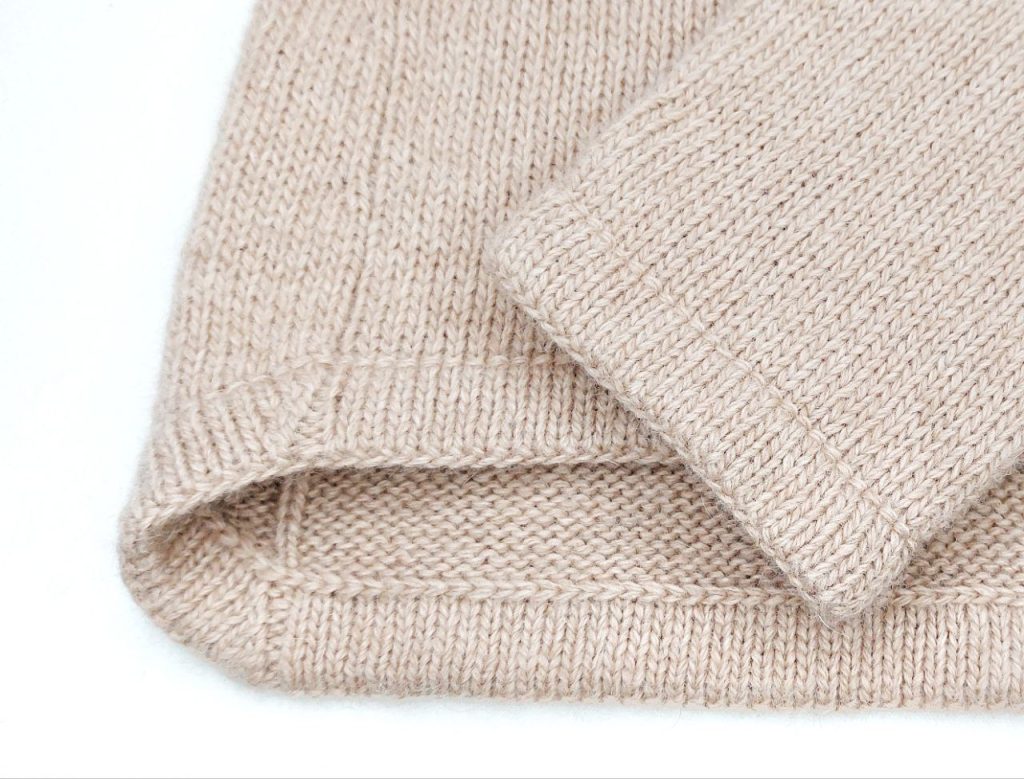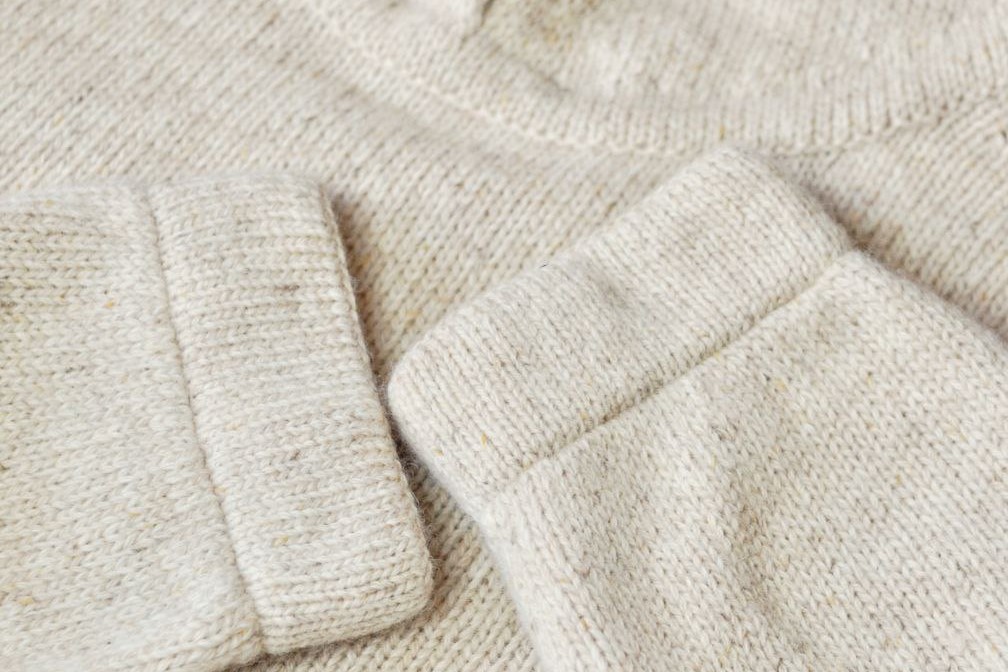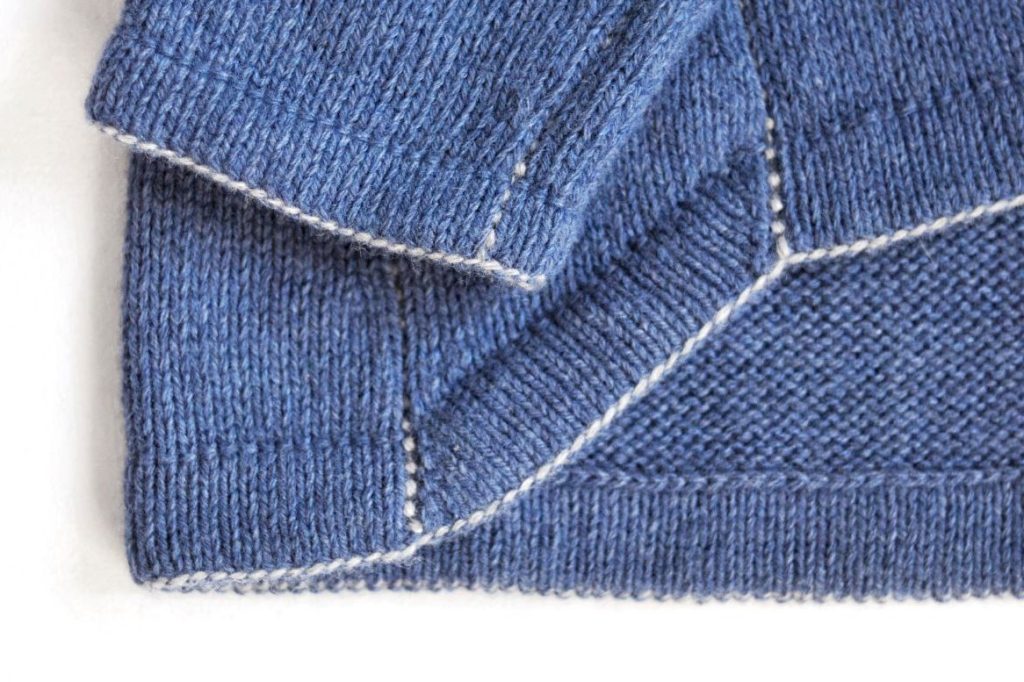
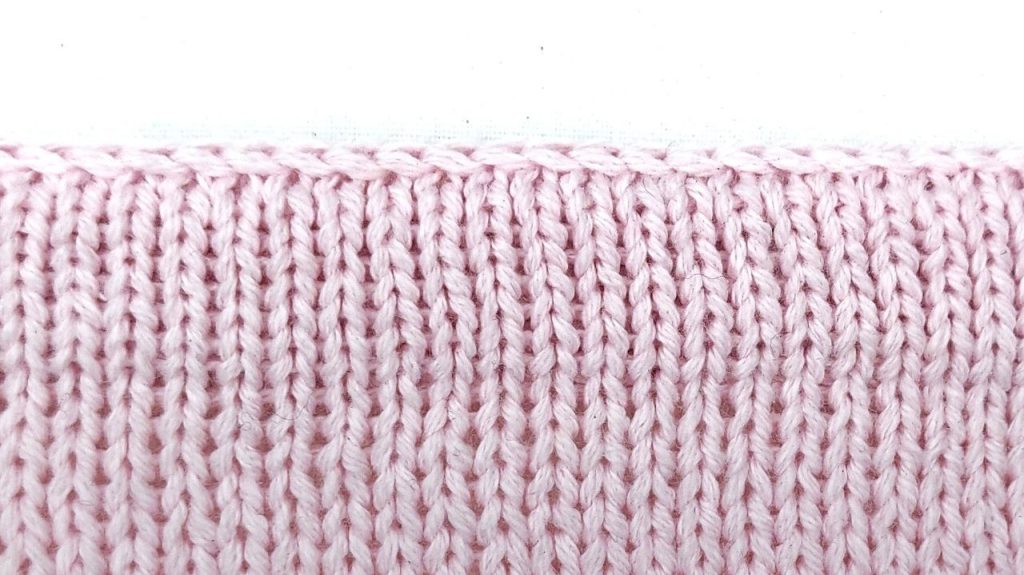
Double (or hollow) ribbing is a pattern consisting of two sections of stockinette stitch, where the stitches are held on the needles simultaneously but knitted alternately. Double ribbing can be used as an edging for garments, a waistband, a collar, etc. Unlike regular ribbing, double ribbing does not have elastic properties but stabilizes the fabric and prevents the edges of the main piece from curling.


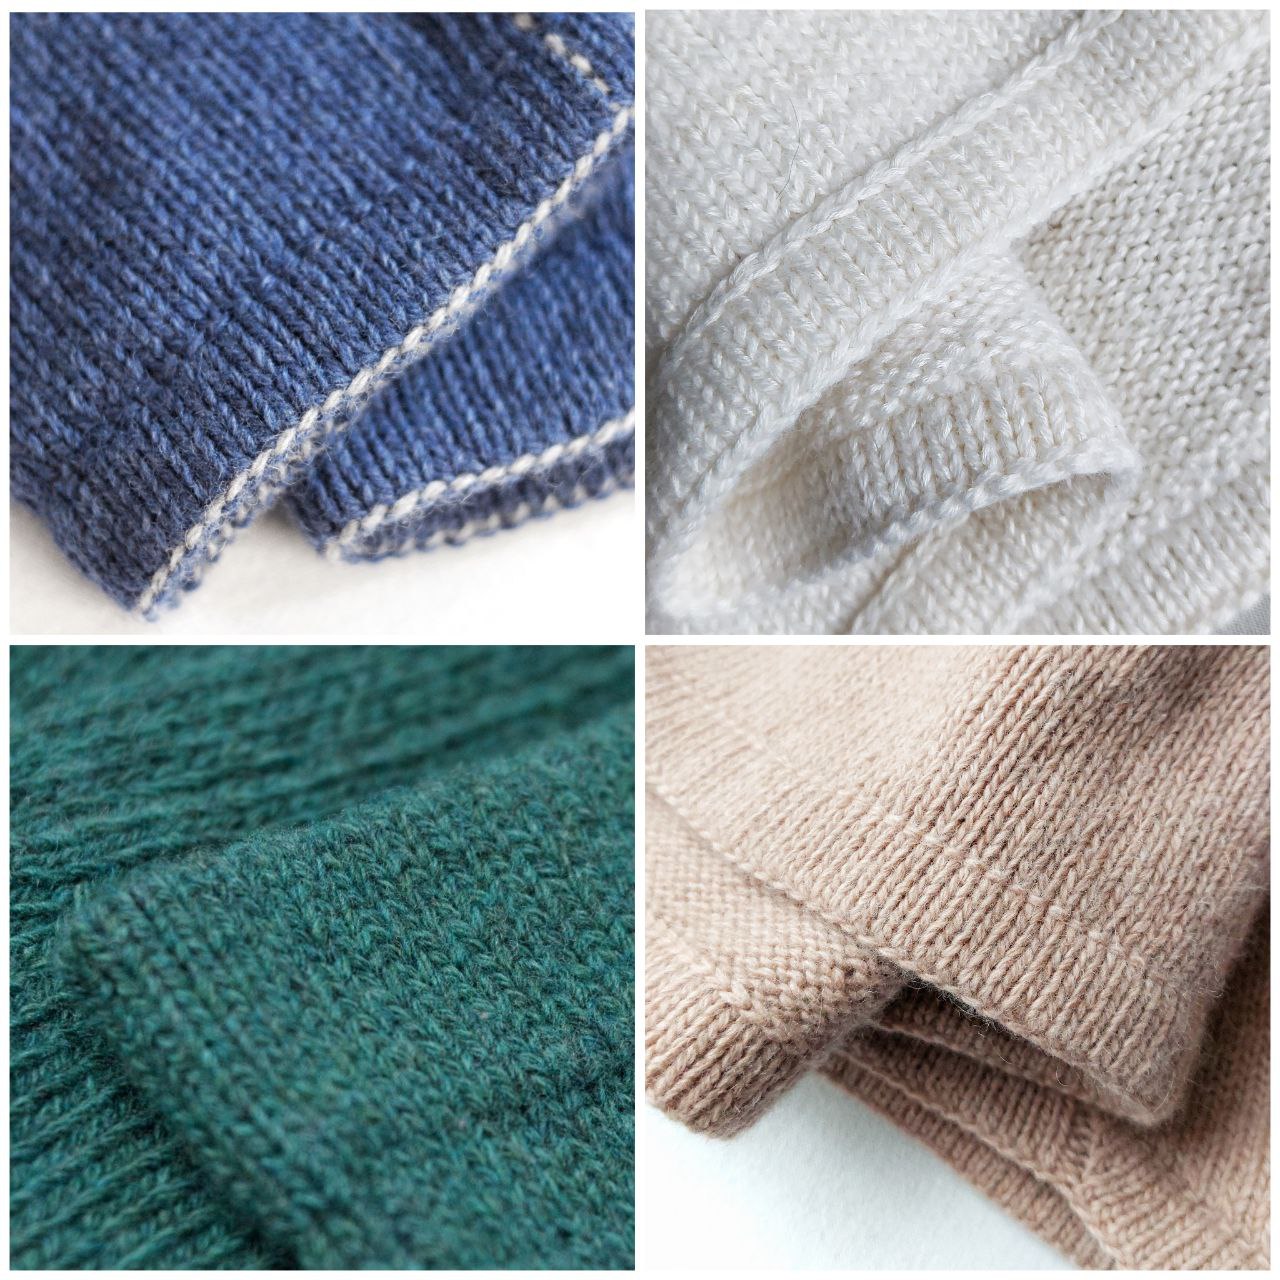
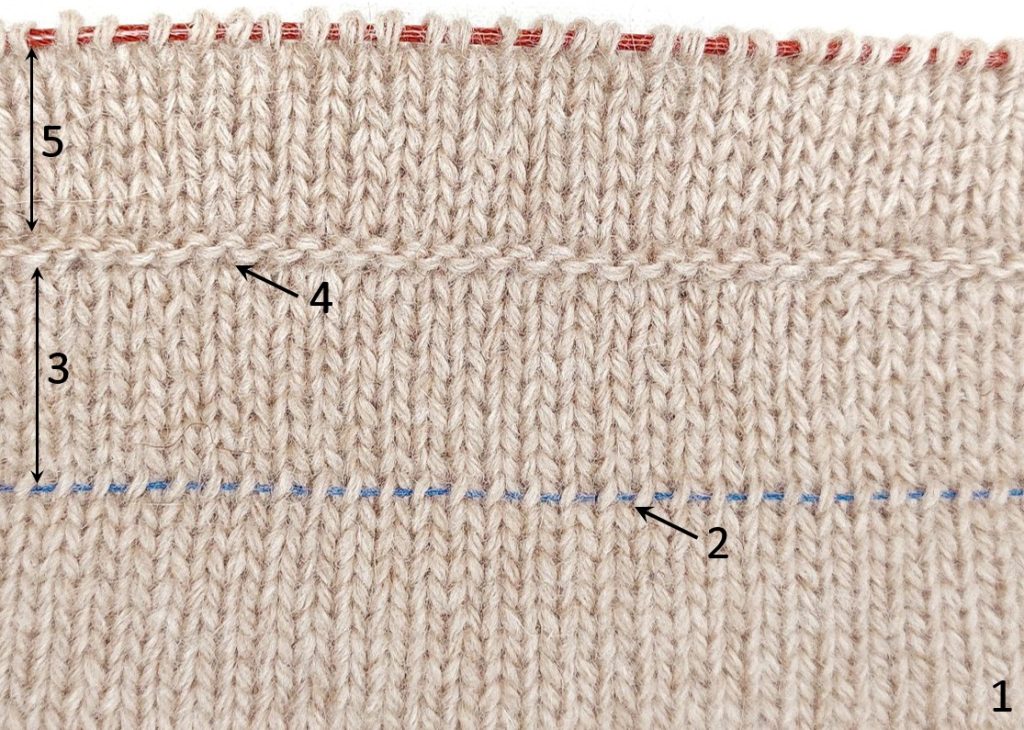
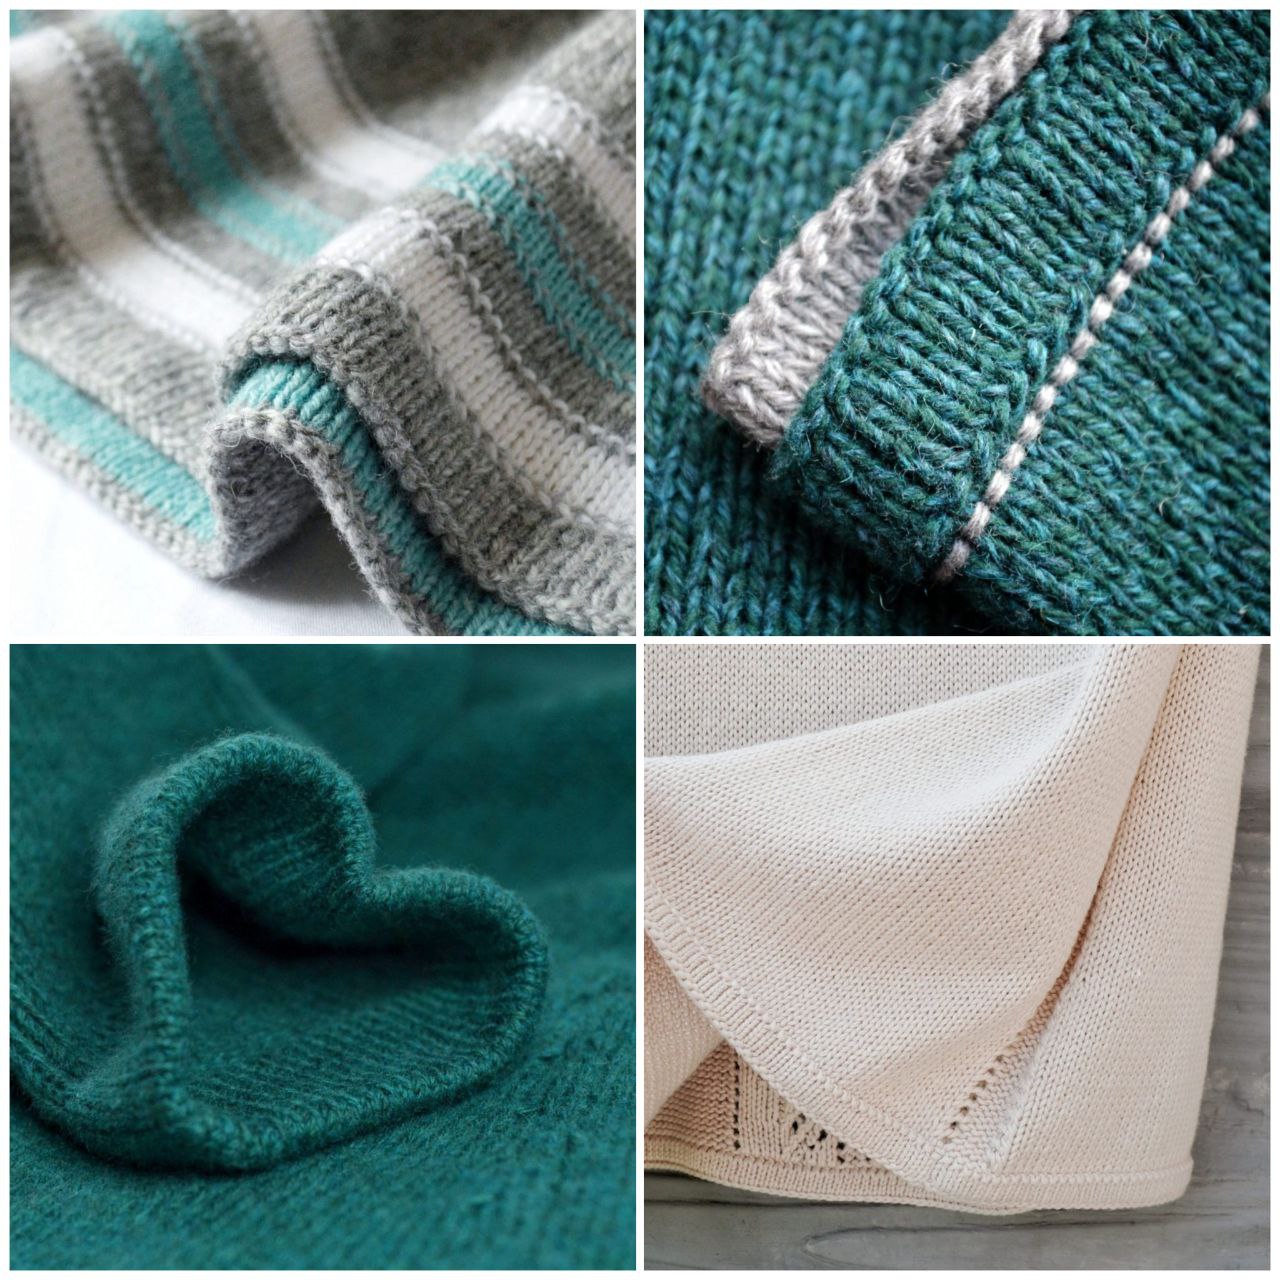
As noted above, double ribbing consists of two sections, which makes it twice as thick as the main fabric. This feature should be considered when choosing it as a design element.
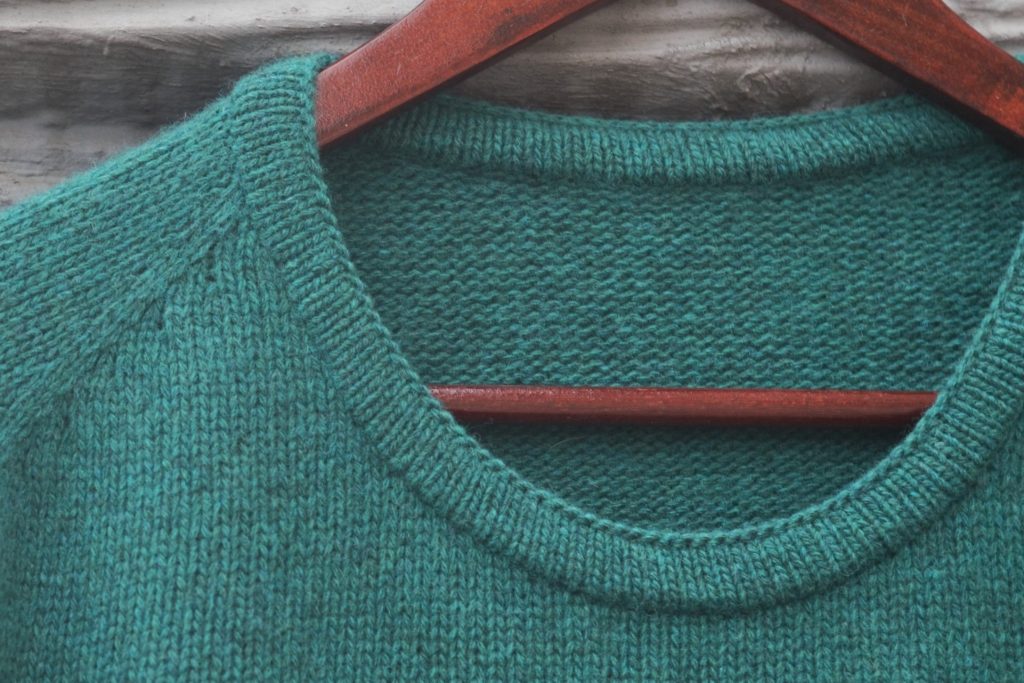
Double ribbing also has a hollow space between its two sections, hence its alternate name, hollow ribbing. This property allows its use as a waistband, a casing for a drawstring, or a hidden closure.
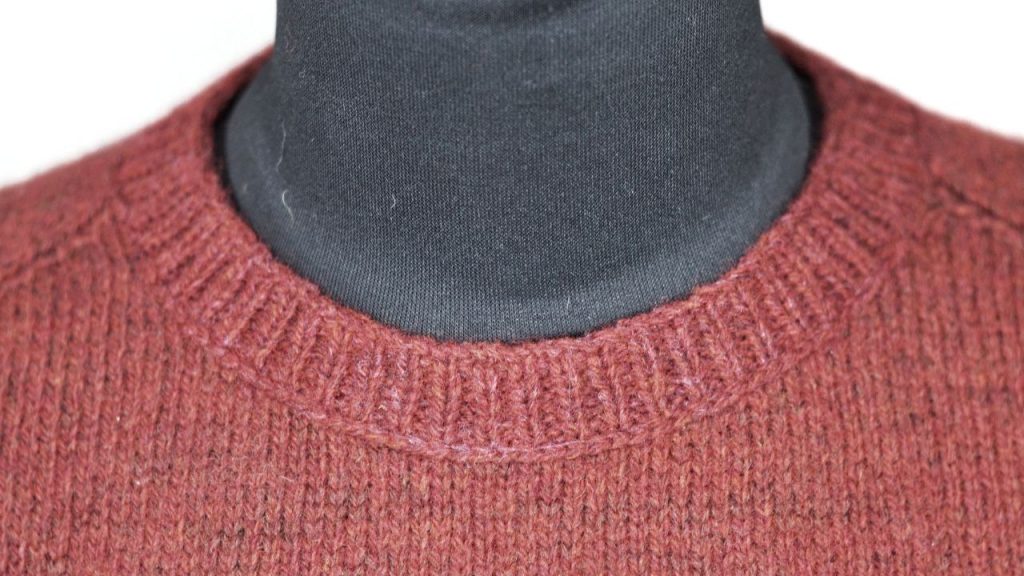
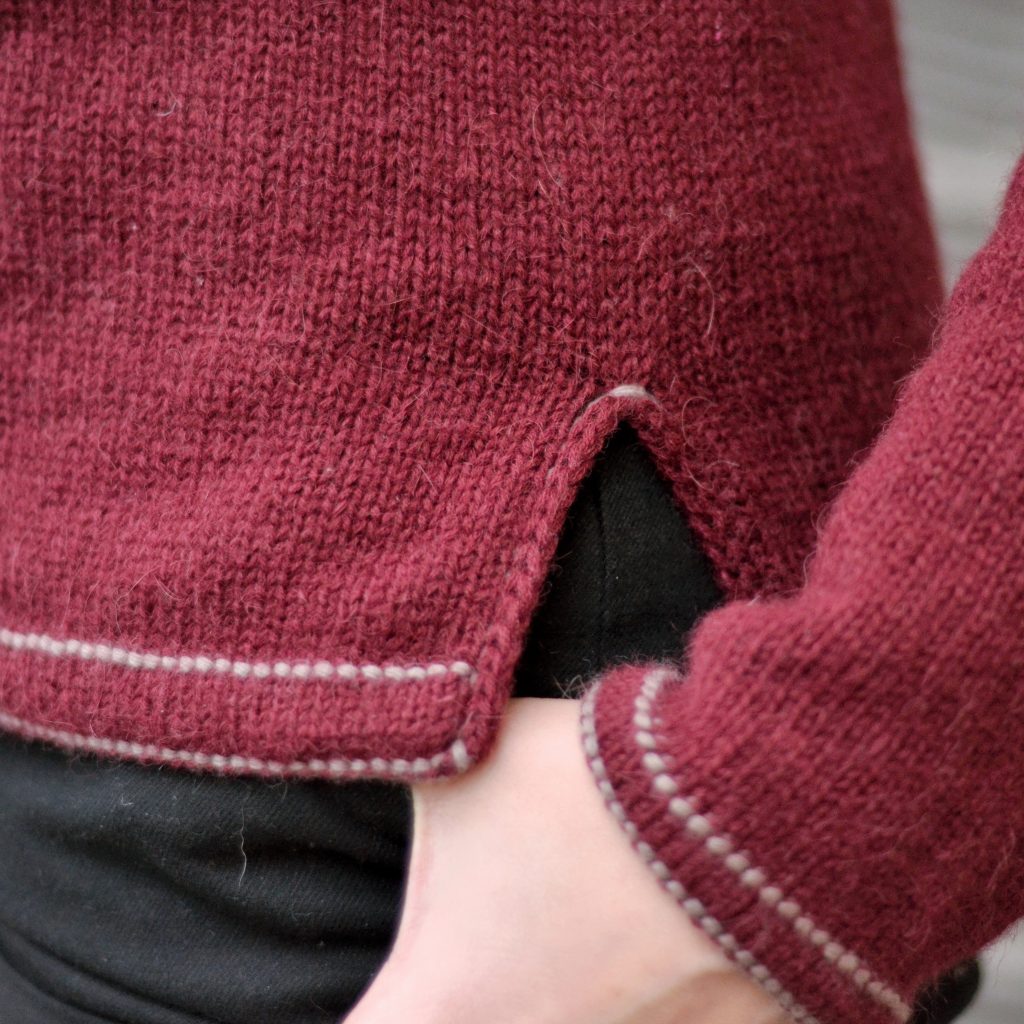
The lack of elasticity in double ribbing is compensated by its stability. For this reason, it is often used for knitting collars and imitate whipstitching the collar to the neckline.


Some theory
Double ribbing consists of two sections whose stitches are held on the needles simultaneously but are knitted alternately. In one row, you knit the stitches of one section, and in the next row, the stitches of the other. For convenience, let us call these sections the “front” and “back,” though both appear as stockinette fabric.
(right side of the garment)
(wrong side of the garment)
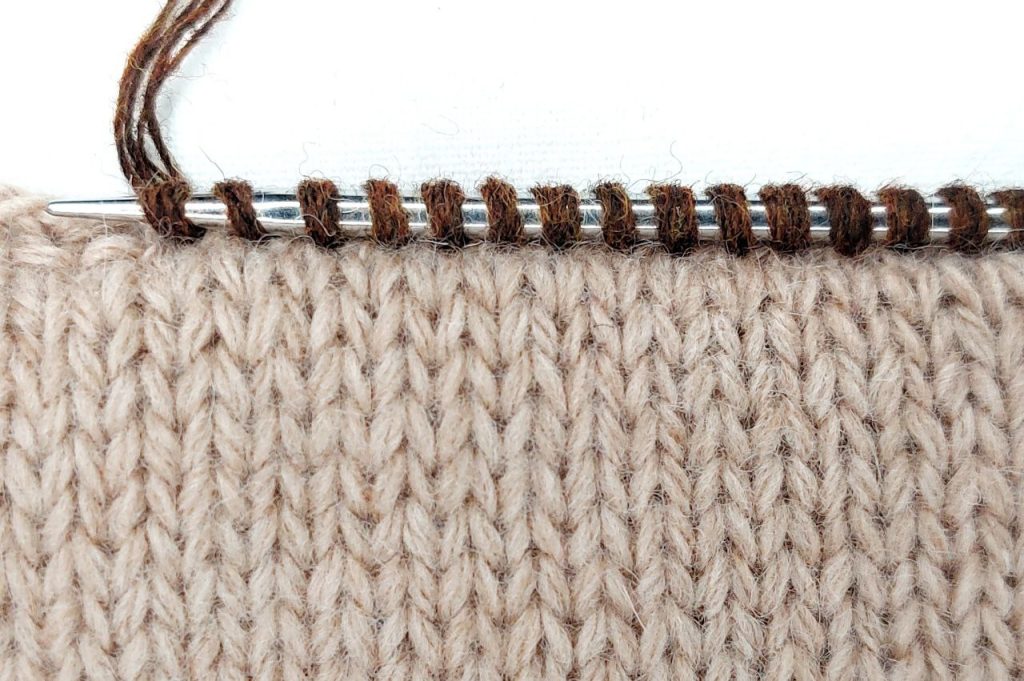
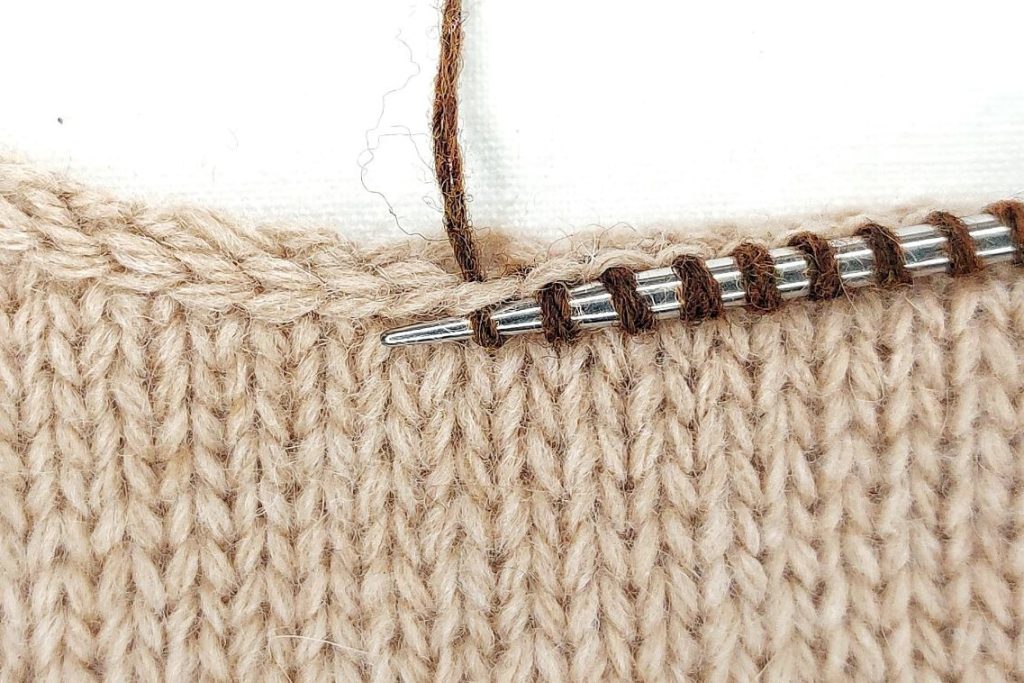
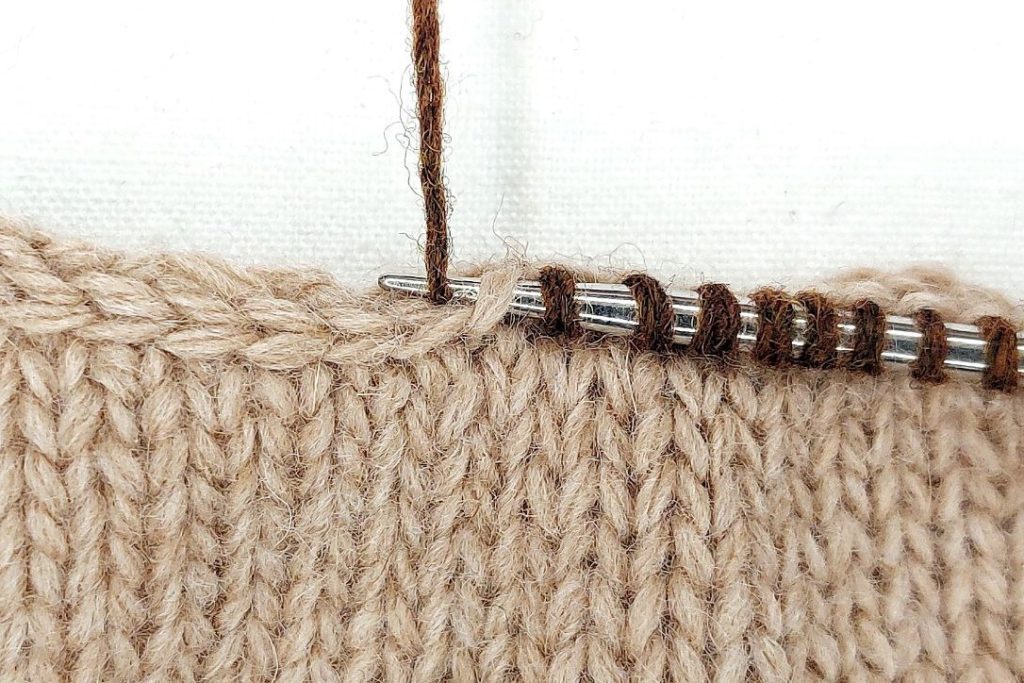
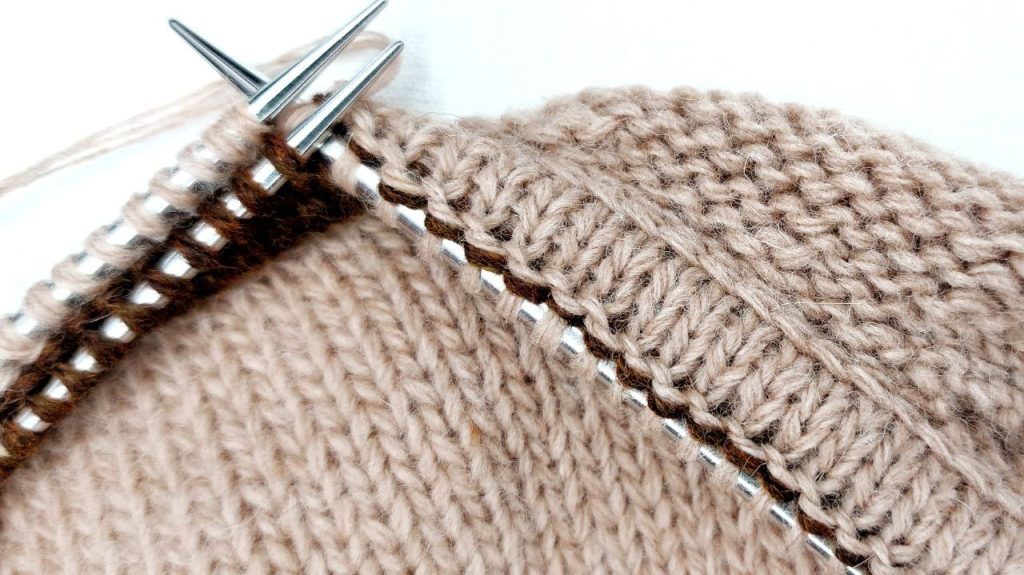
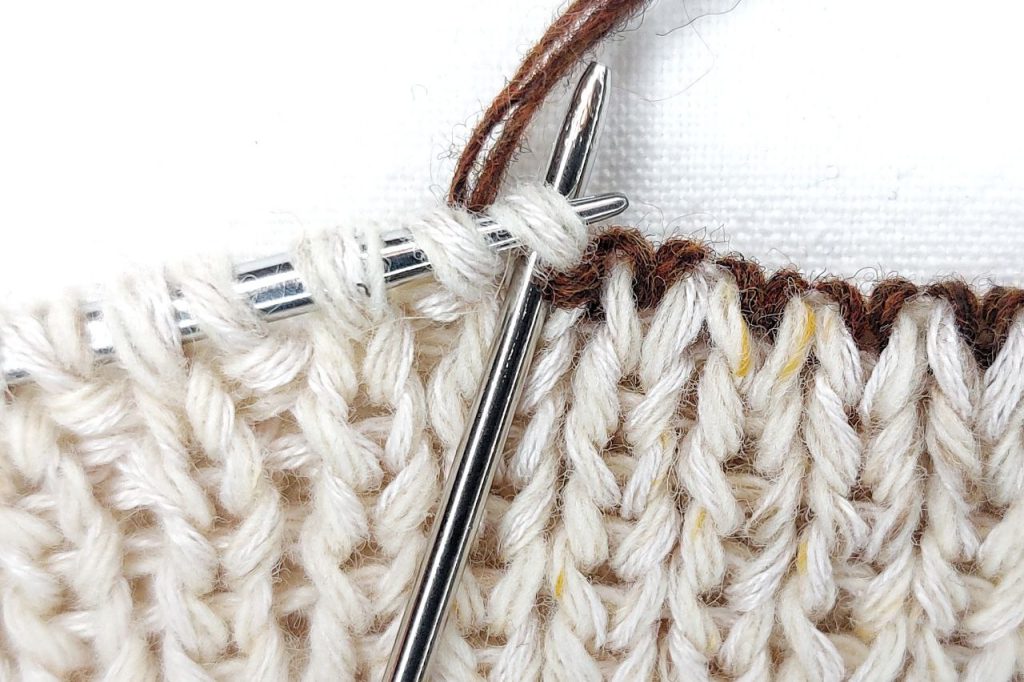
At the beginning of the work, the stitches of the main fabric (or the cast-on edge, if you start knitting the garment with a double ribbing) must be doubled. Then, you knit the ribbing to the desired width. At the end, join the two sections and bind off the stitches (or proceed to knitting the main fabric).
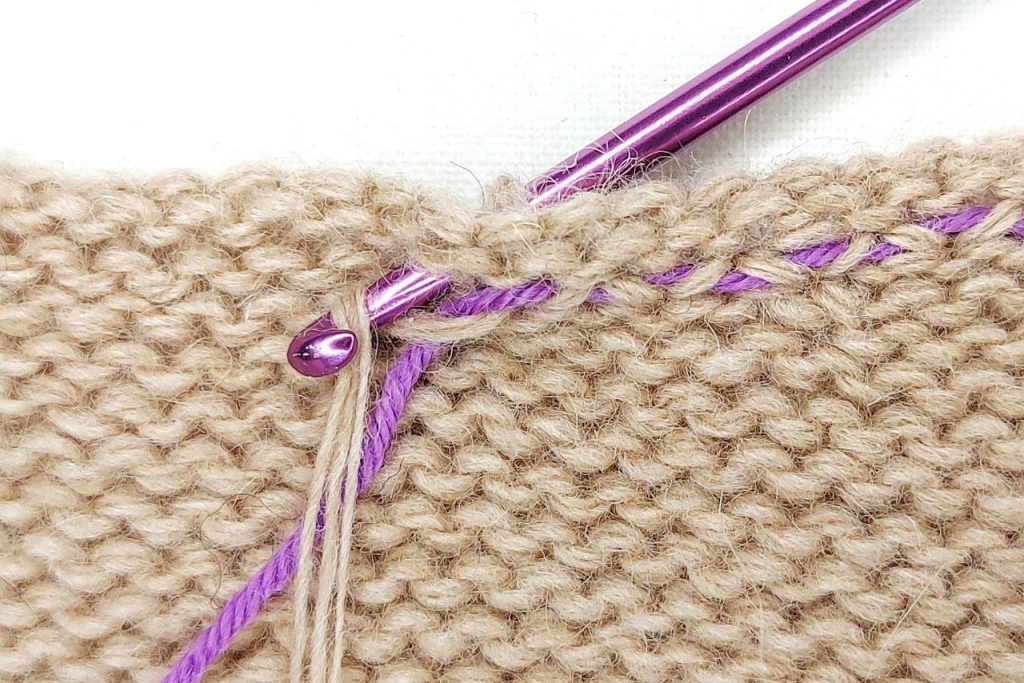
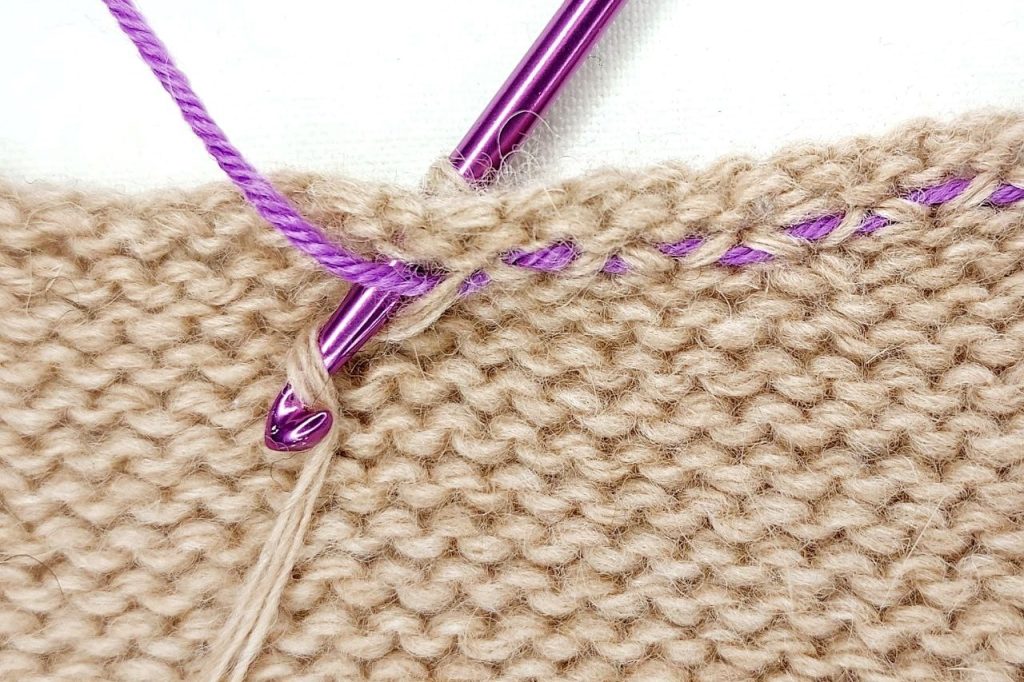
You can double the stitches in several ways: by making yarn overs, picking up stitches from the previous row, or casting on the required number of stitches using an Italian cast-on method (if the project starts with double ribbing). This article explains in detail how to double stitches using twisted yarn overs.
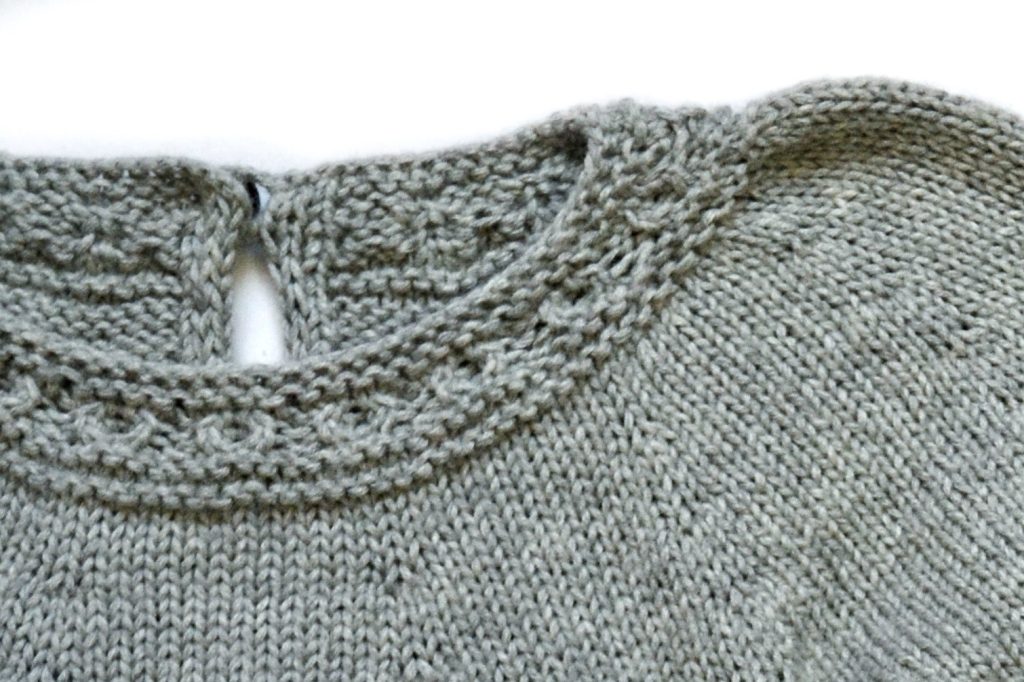
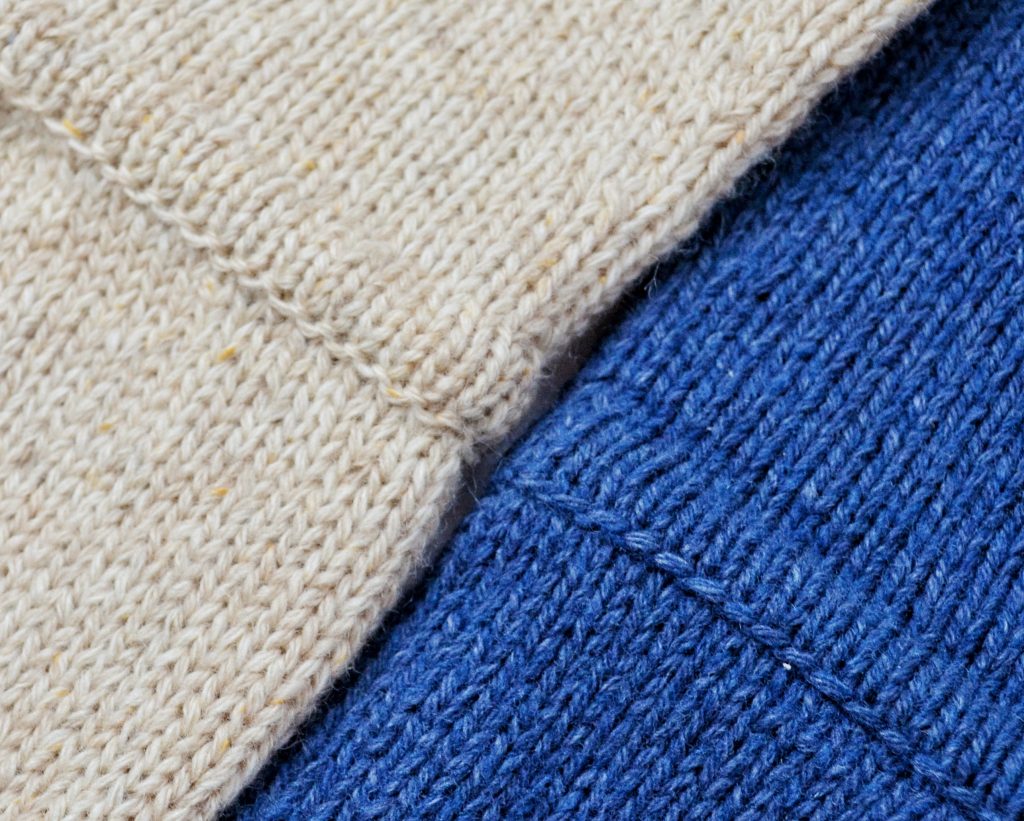
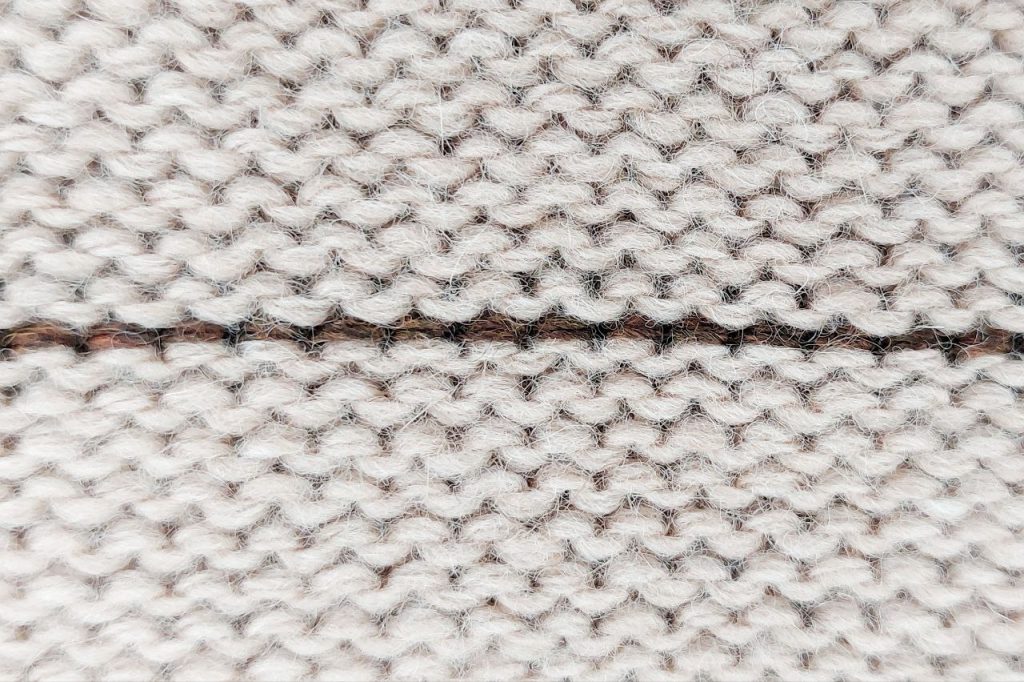
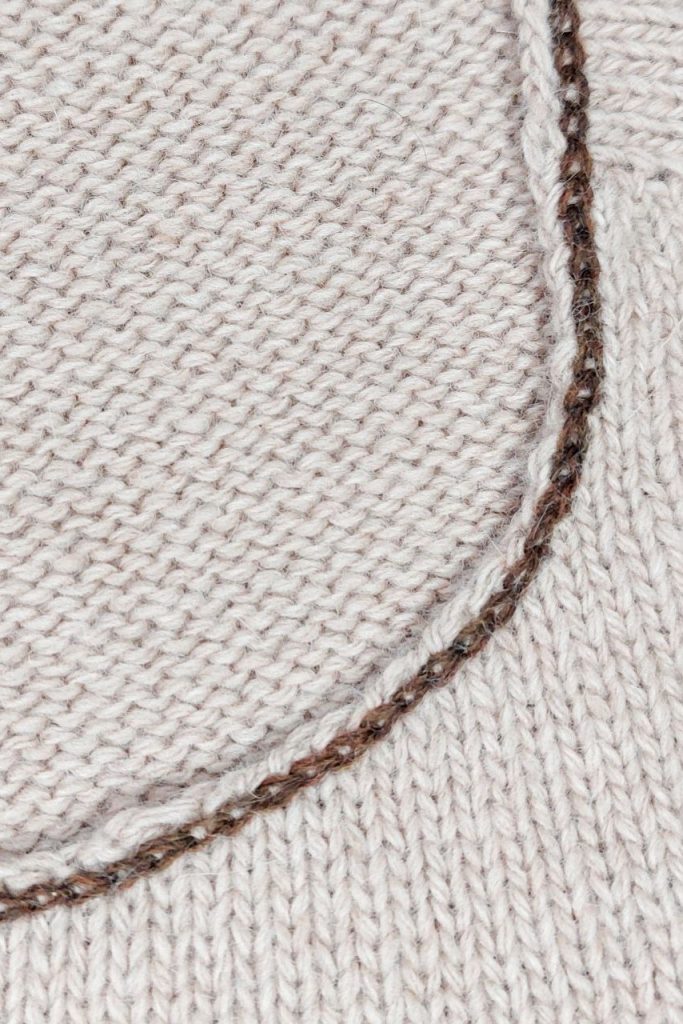
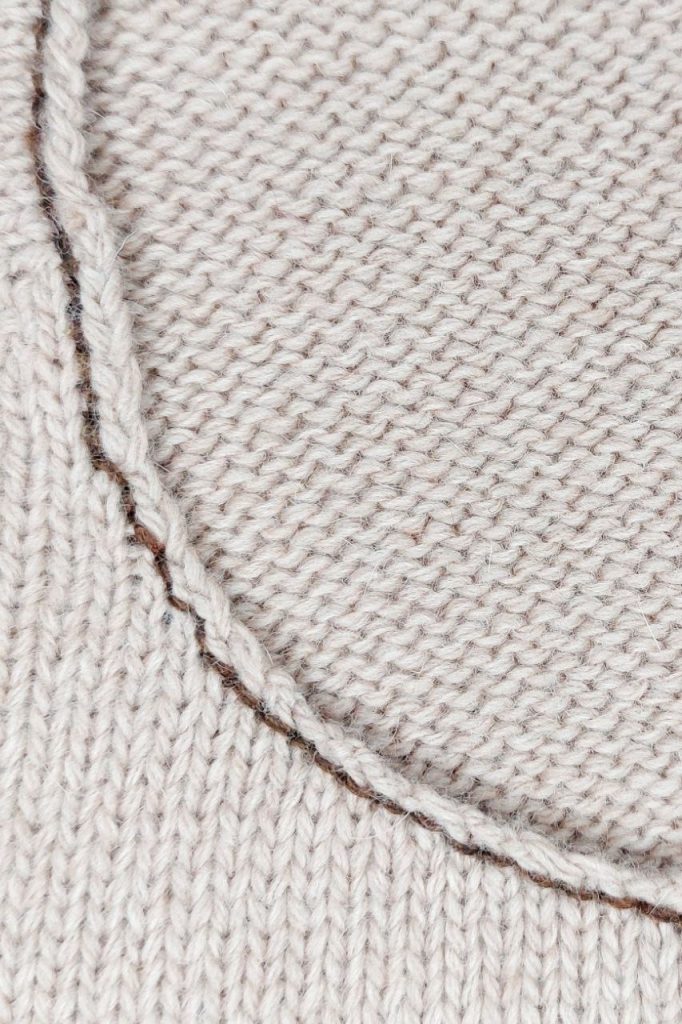
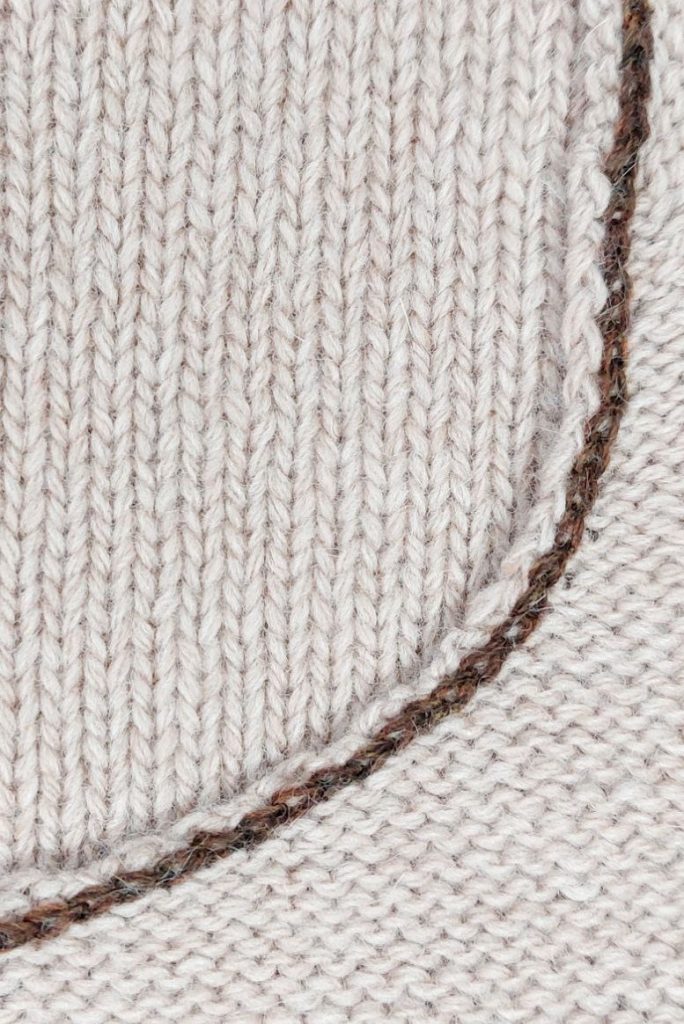
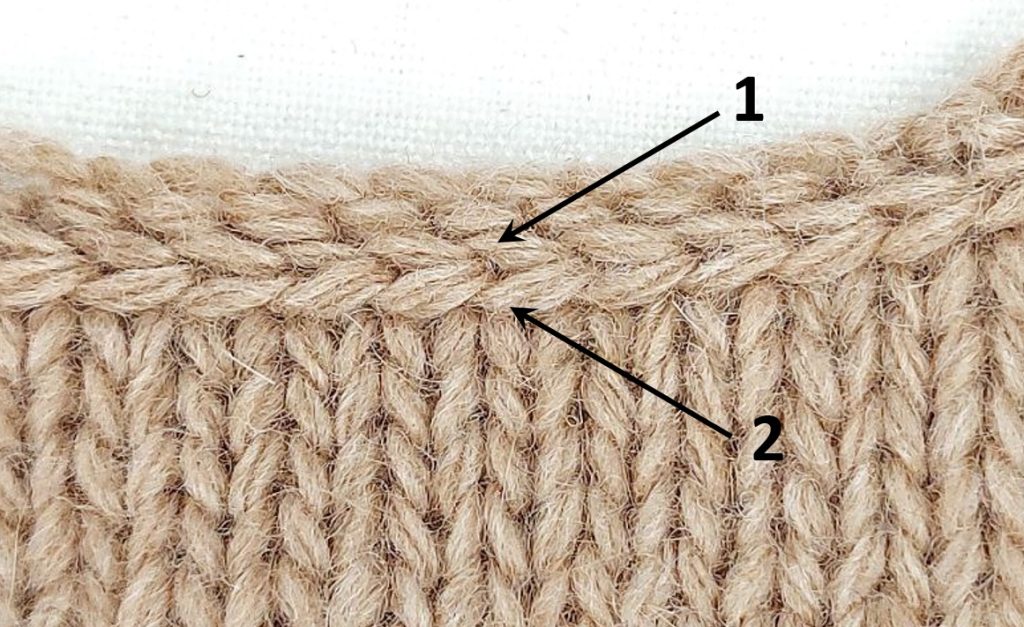
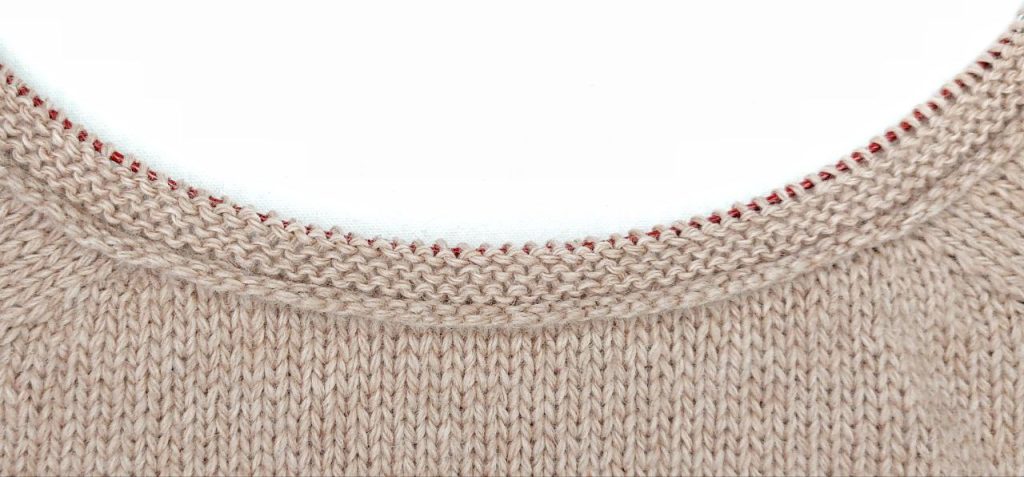
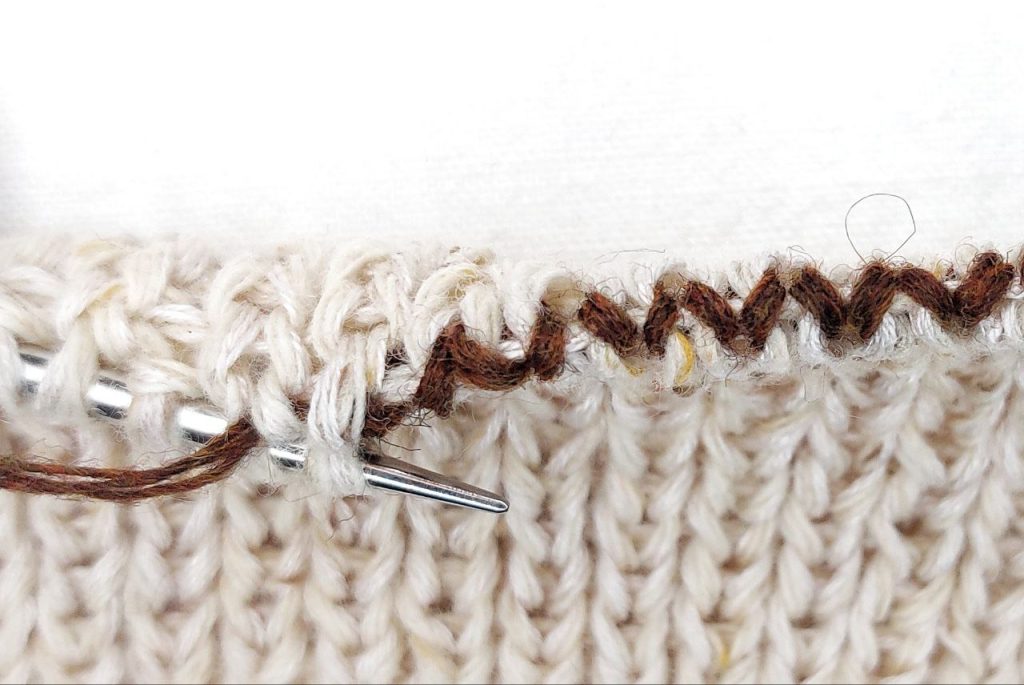
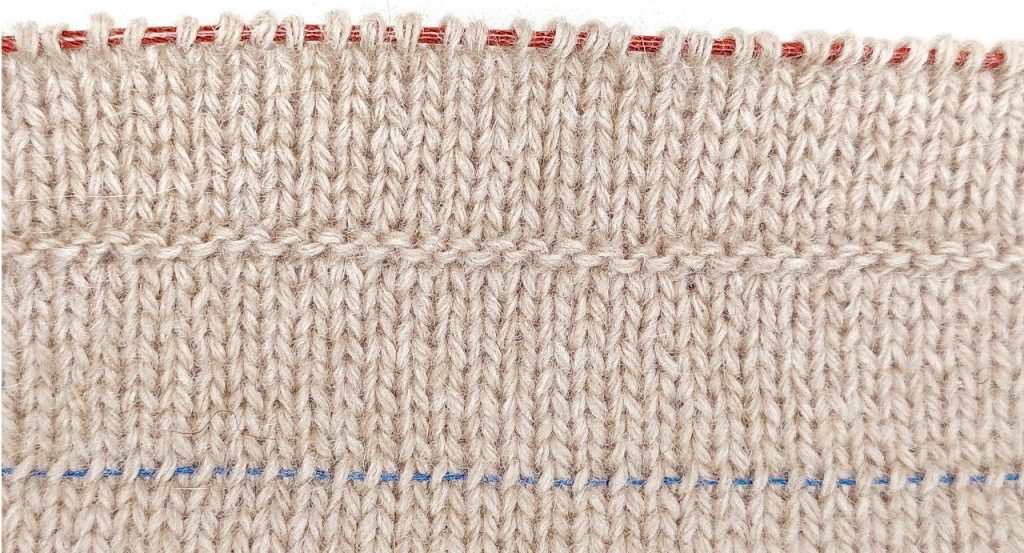
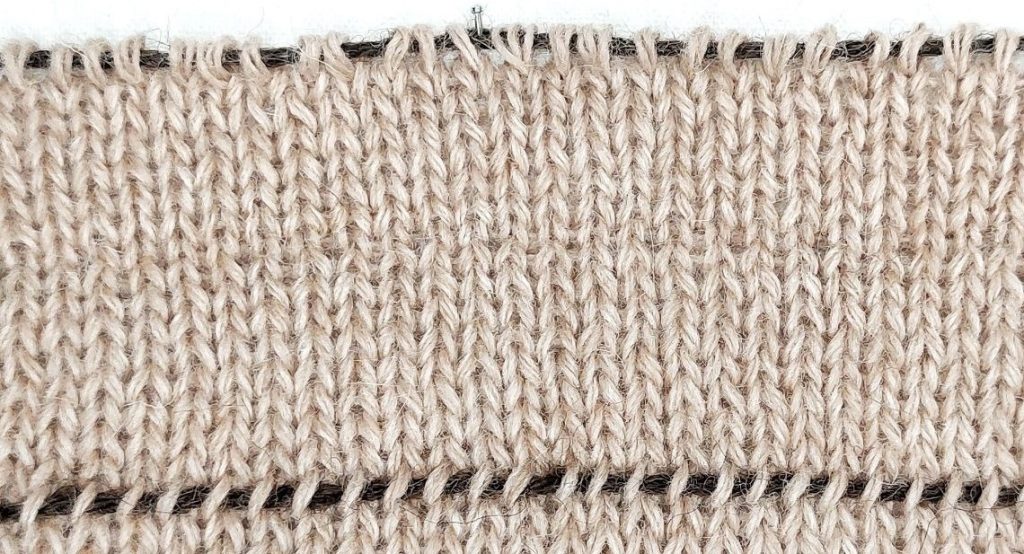
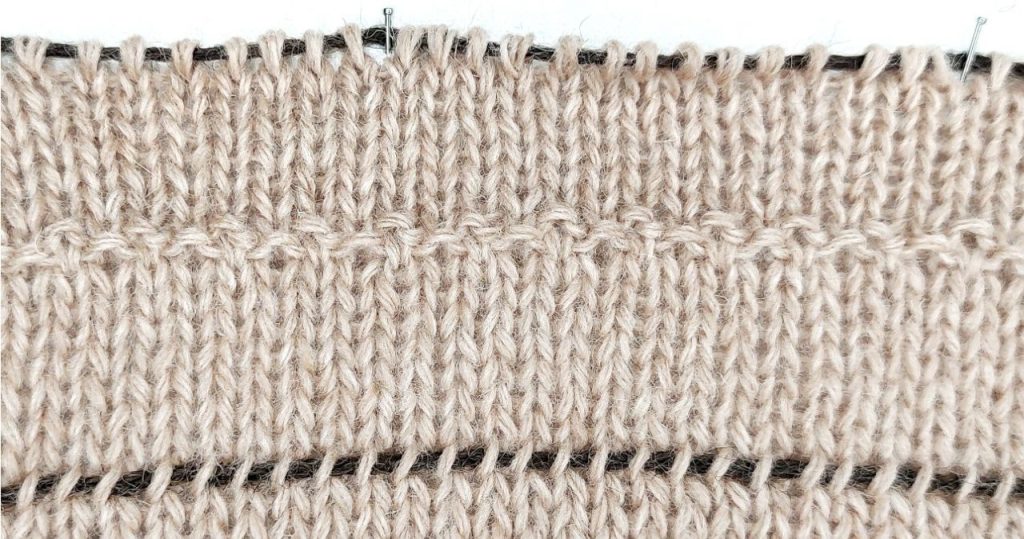
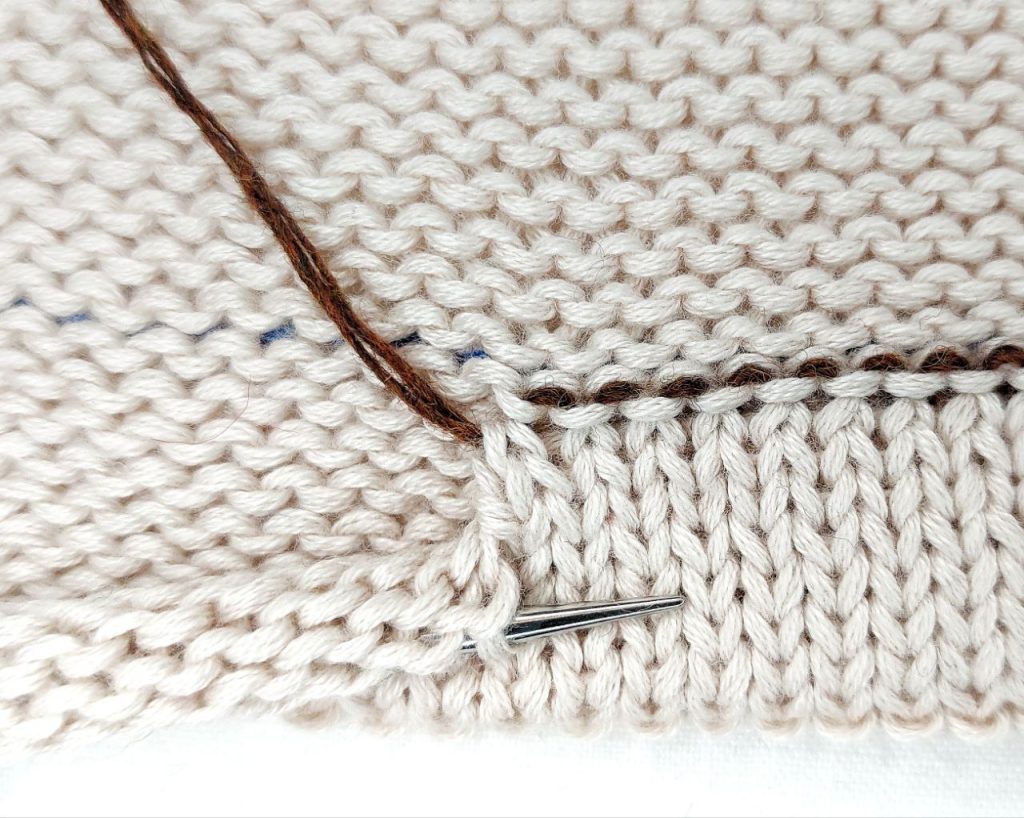
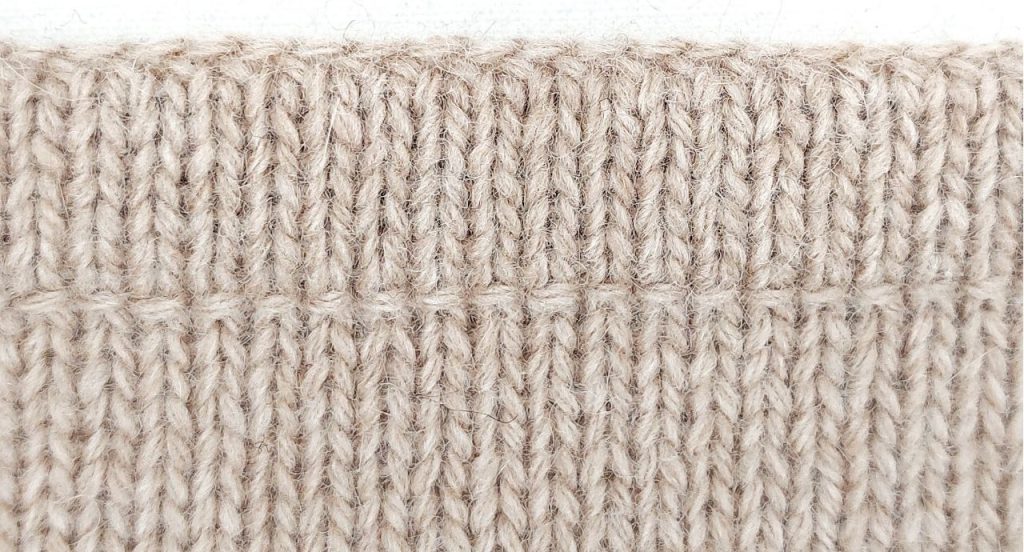
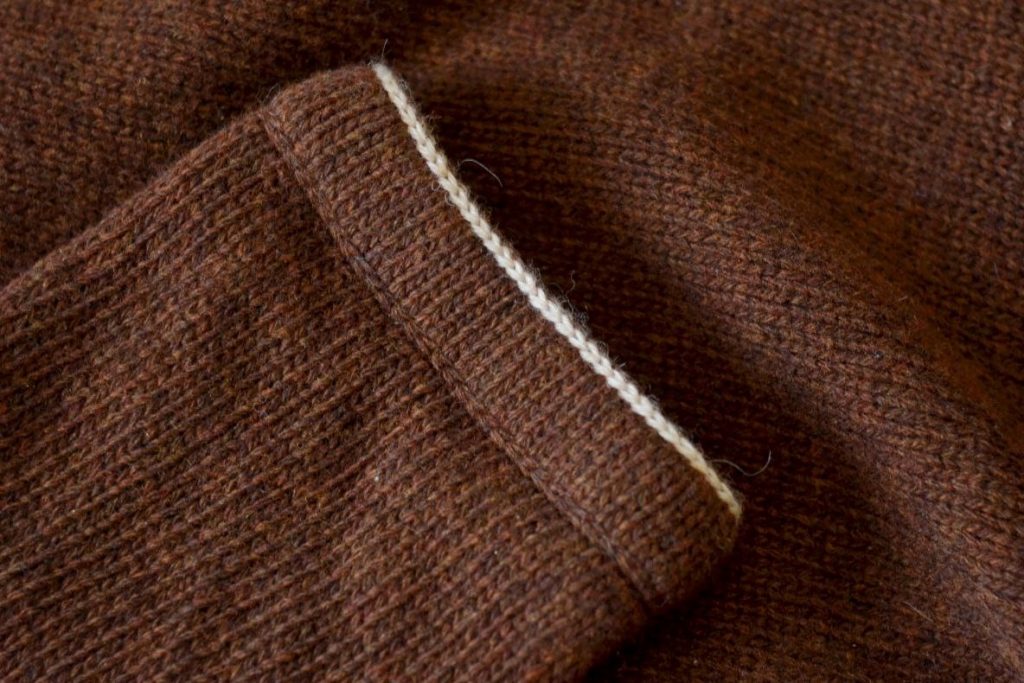
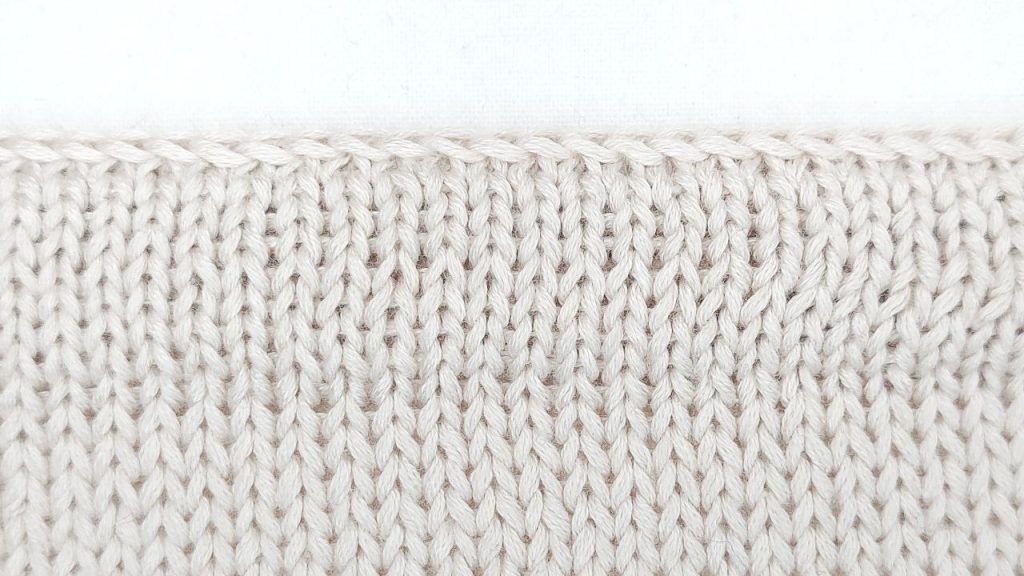
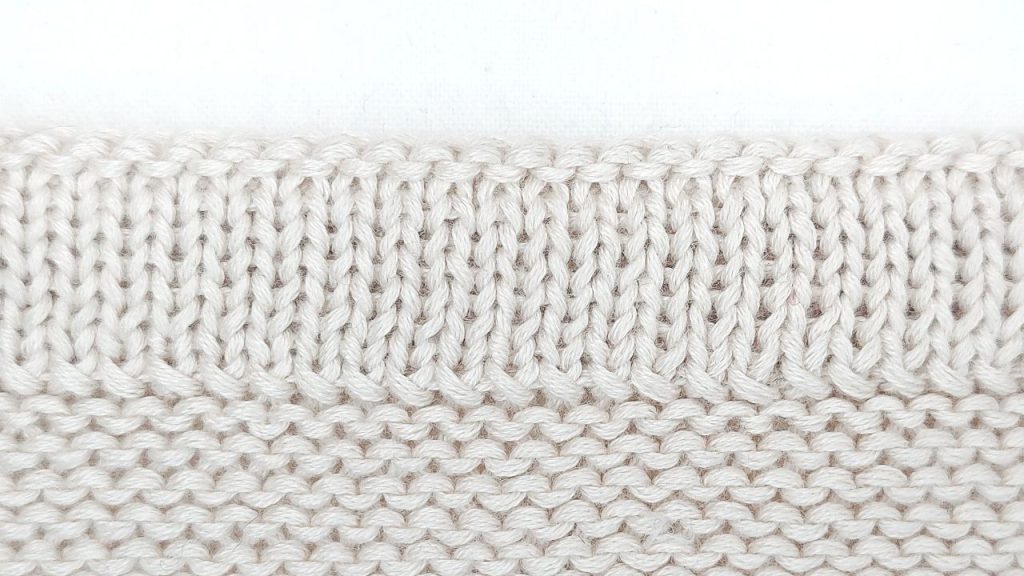
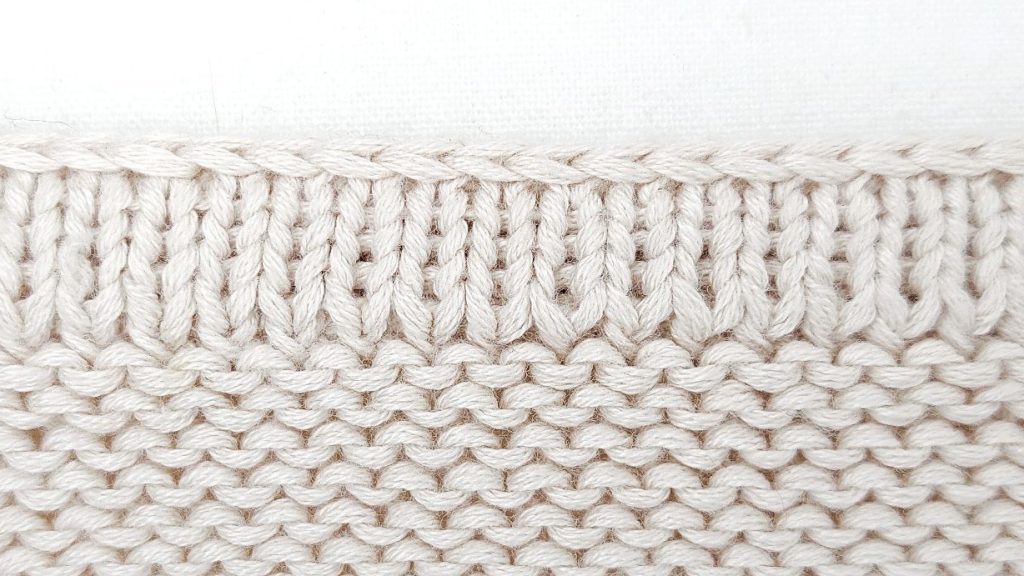
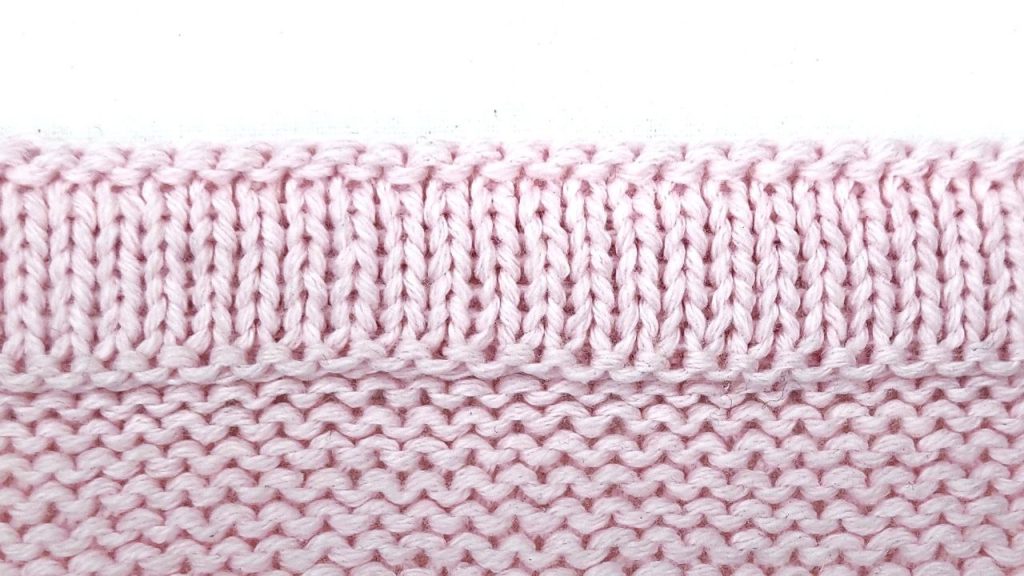
The transition from the fabric to the double ribbing can be made invisible or highlighted with a horizontal line of purl stitches.
Double ribbing can be knitted flat (in rows) or in the round. It can also be made with yarn in one or two colors.


The two sections of double ribbing can be joined invisibly or highlighted. If double ribbing is used to finish the project, the joining of the two sections can coincide with binding off the stitches, or two sections can be joined first and then bound off using needles, a crochet hook, or a tapestry needle.


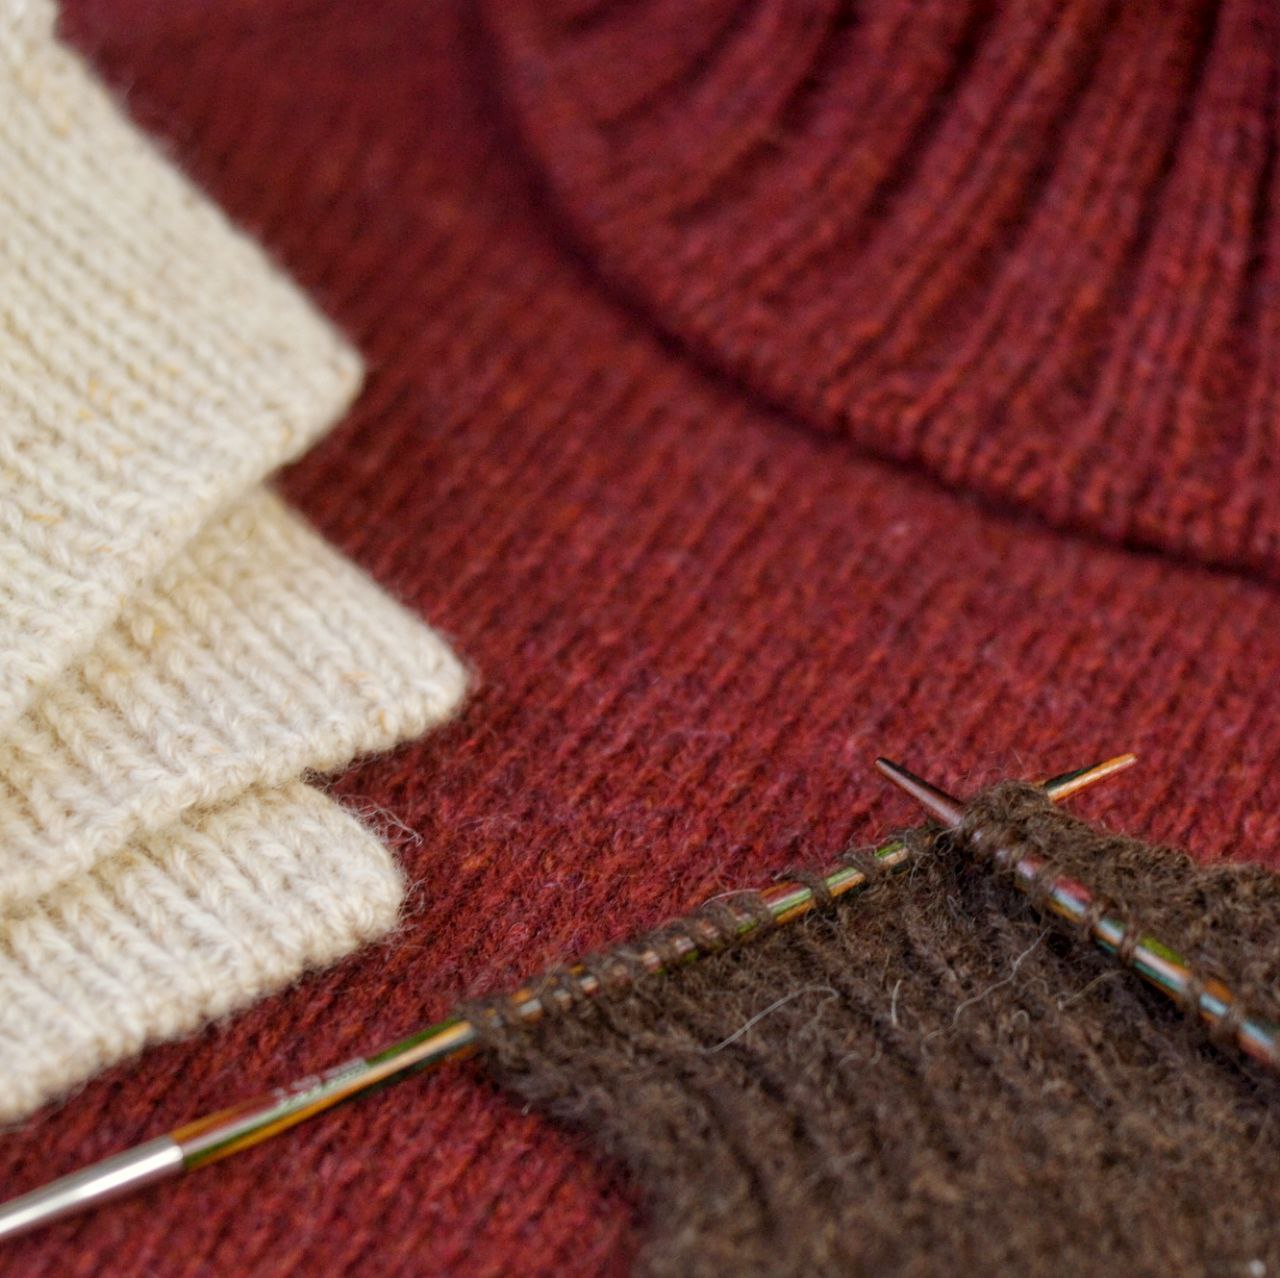
For knitting double ribbing, use needles smaller than the main ones (0.5–1.5 mm thinner).
You can remove one ply from the work if the yarn consists of 5–6 plies.
If double ribbing widens the edge, knit one row with smaller needles or evenly decrease a few stitches before starting it.
Getting to Practice
Double ribbing can be knitted flat (in rows) or in the round.
For flat knitting:
– RS (right side of the garment) – knit the front section’s stitches of the ribbing,
– WS (wrong side of the garment) – knit the back section’s stitches of the ribbing.
When knitting flat, the edge stitch is a conditional term. It may consist of one, two, or three stitches. Also, the edges may be separated from the ribbing with one purl stitch.
For circular knitting, you always work on the right side of the garment. In odd-numbered rows, knit the front section’s stitches; in even-numbered rows, purl the back section’s stitches.
Knitting/purling stitches from one section, slip the stitches of the other section. To slip a stitch: transfer it from the left needle to the right without knitting. Insert the right needle as if to purl (the stitch’s position on the needle remains unchanged). The working yarn always stays “inside” the double ribbing, regardless of the knitting direction.
Double Ribbing Worked Flat
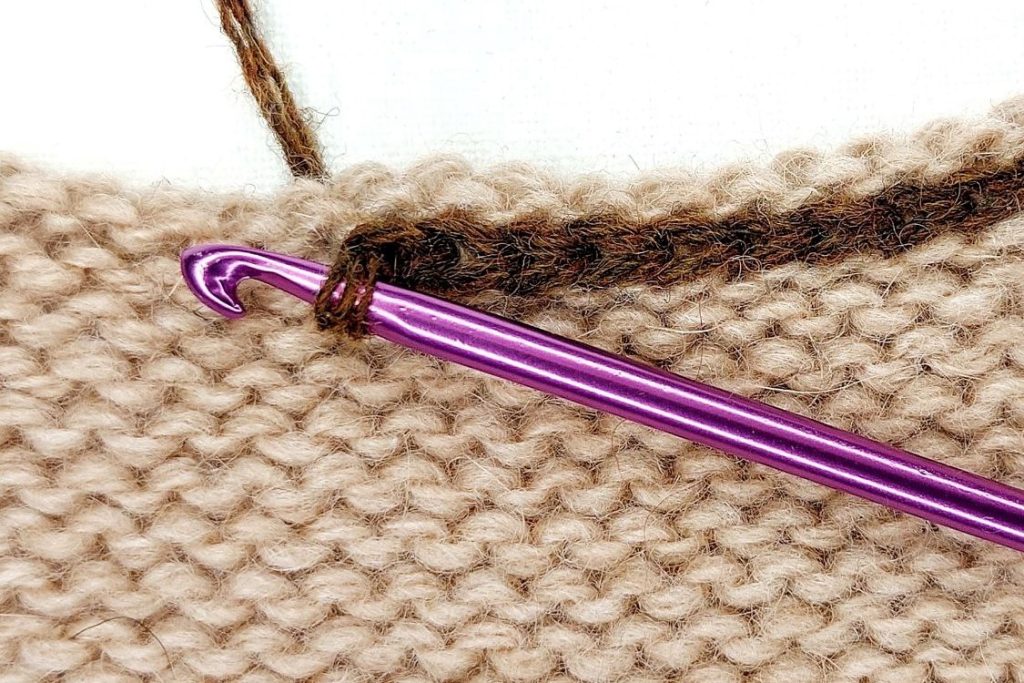
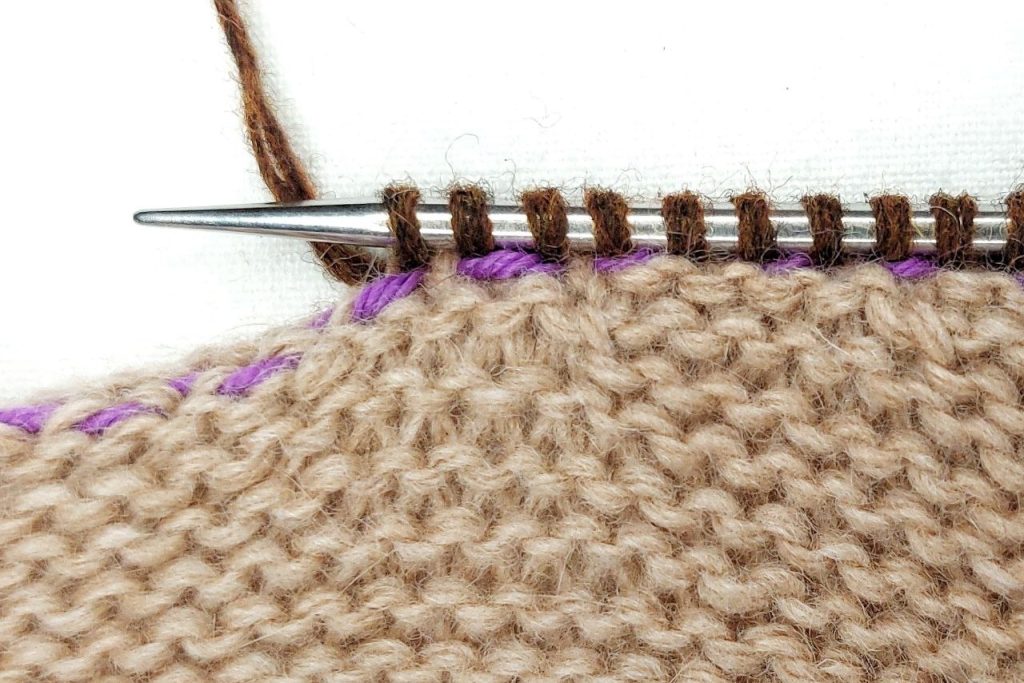
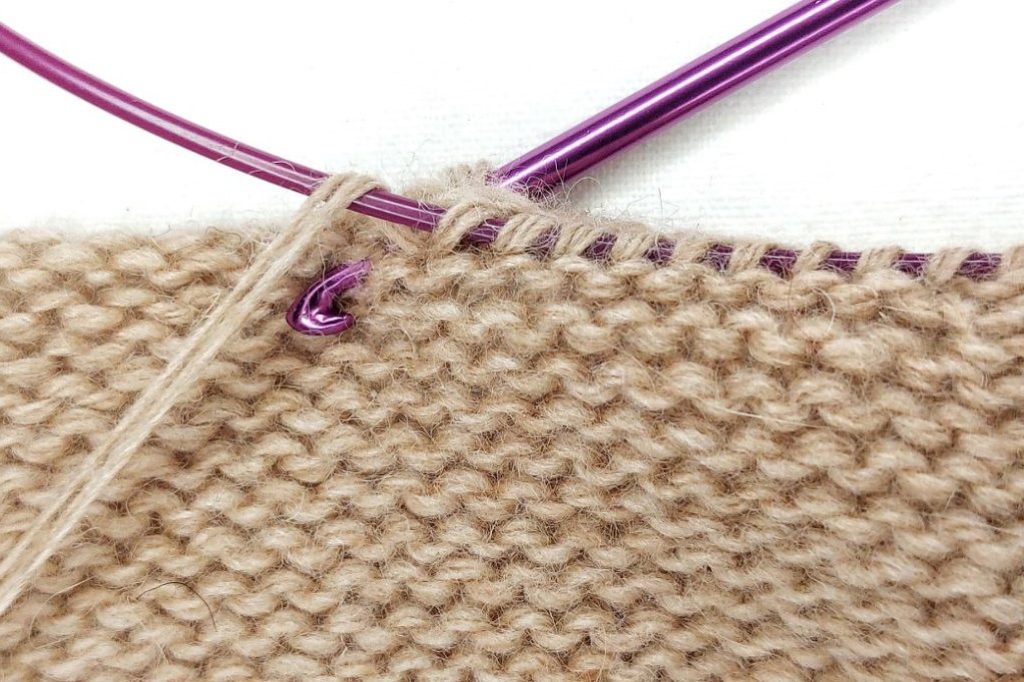
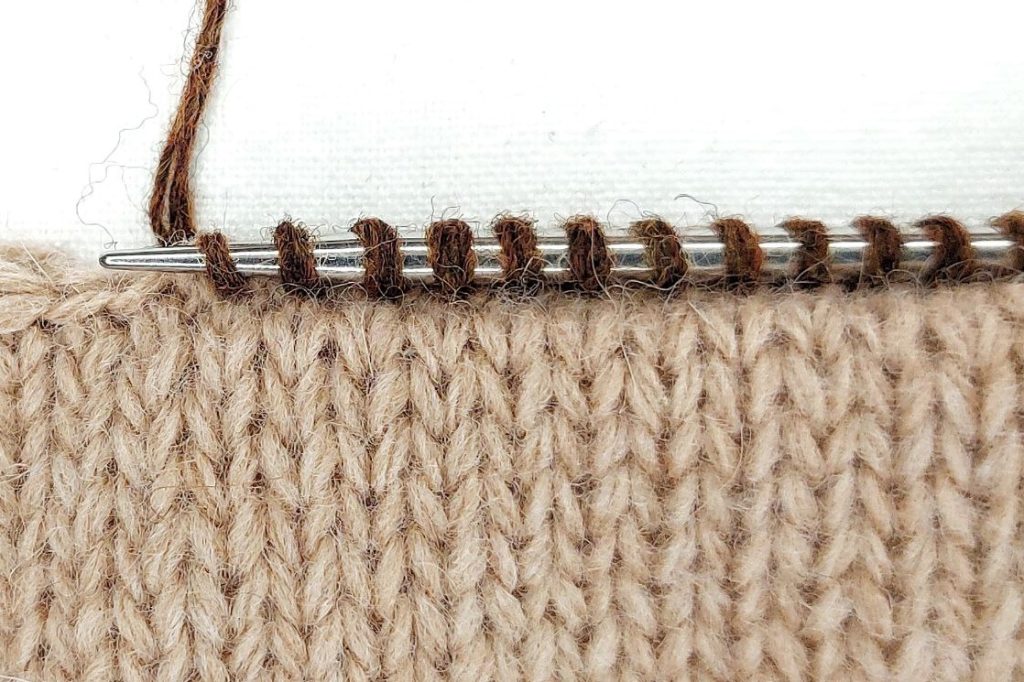
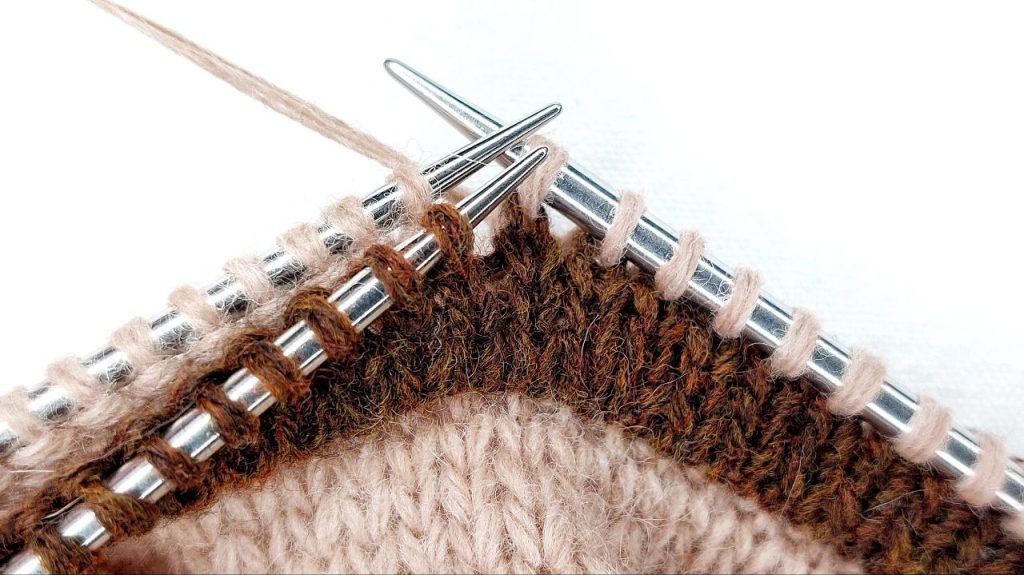
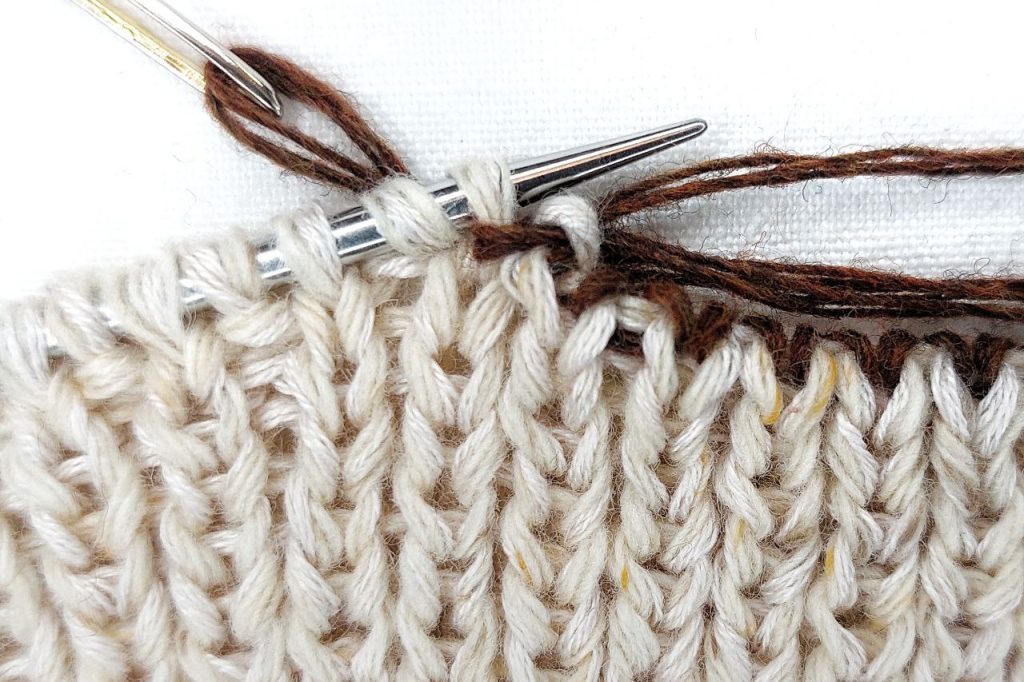
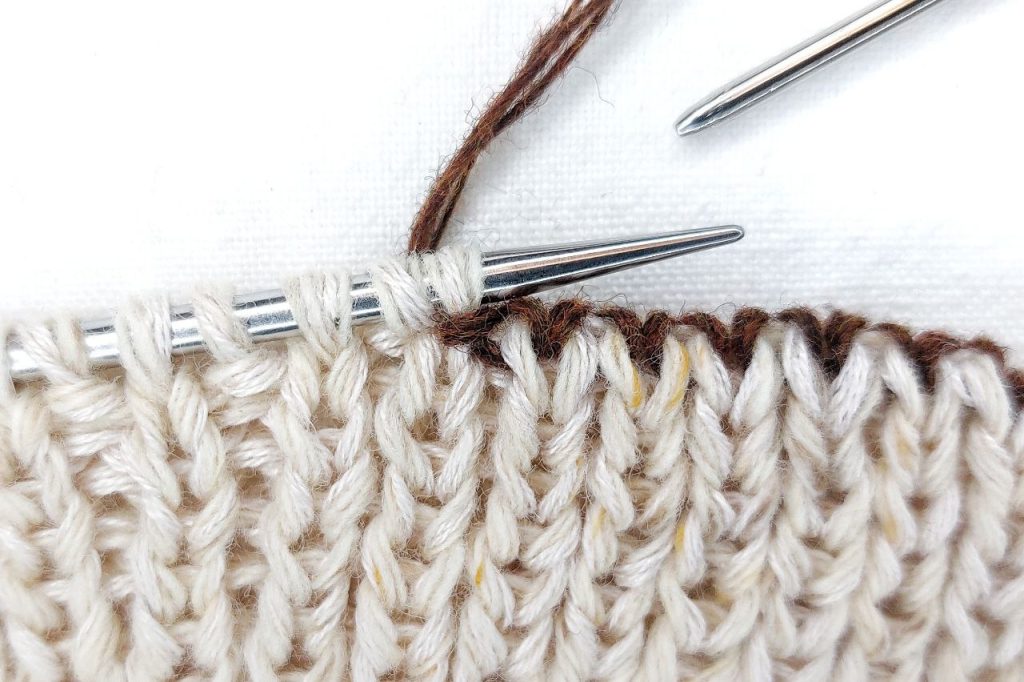
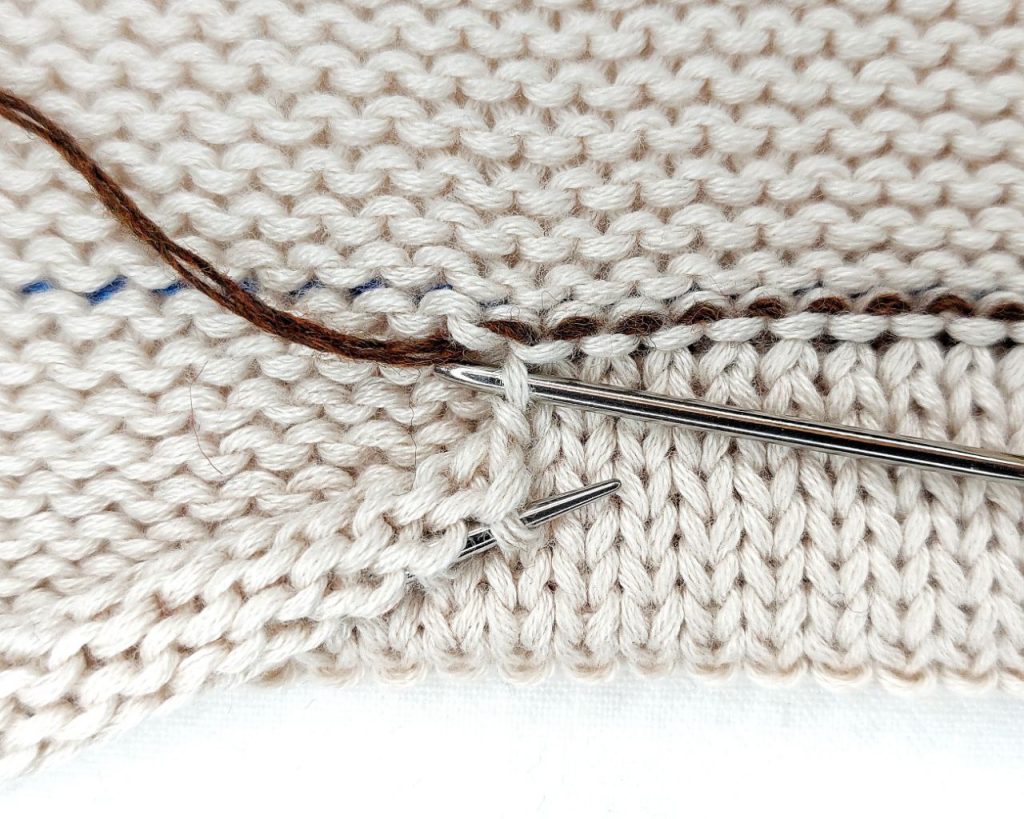
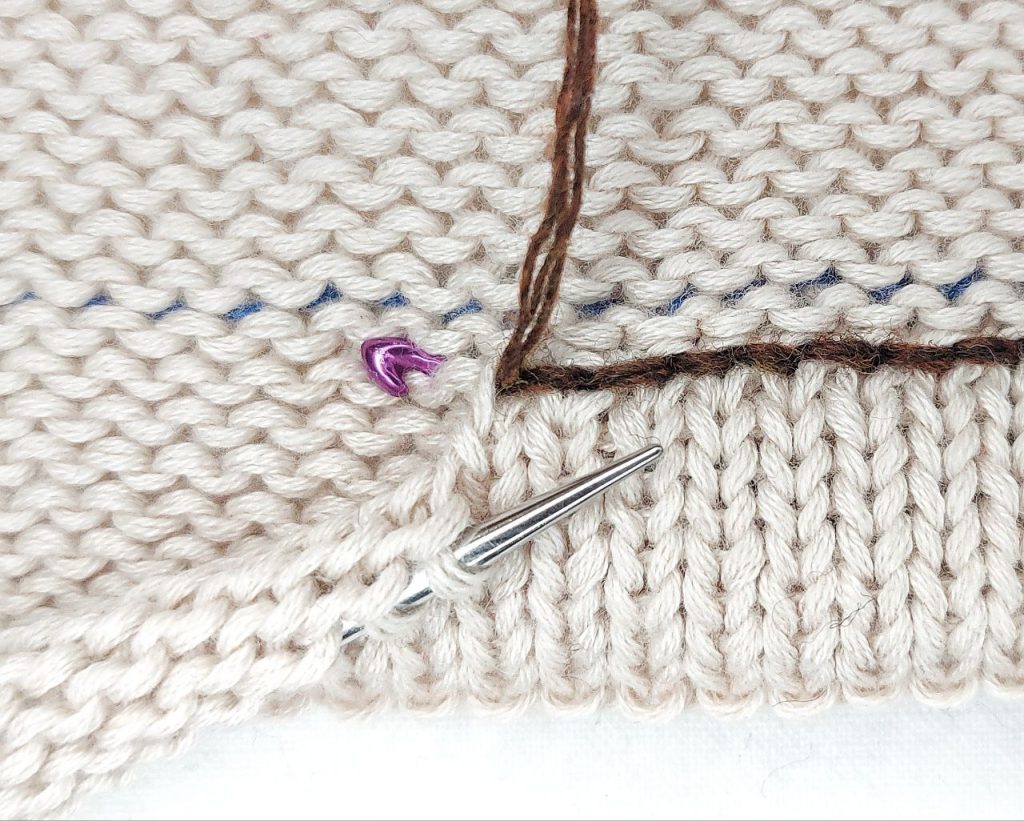
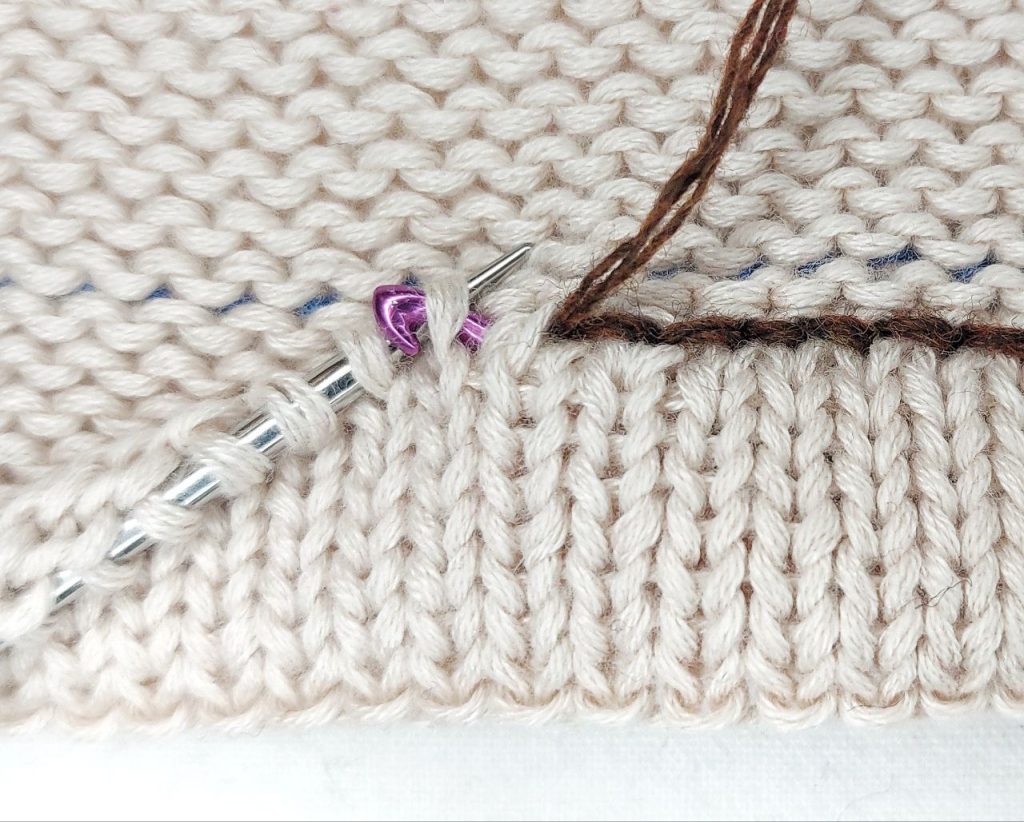
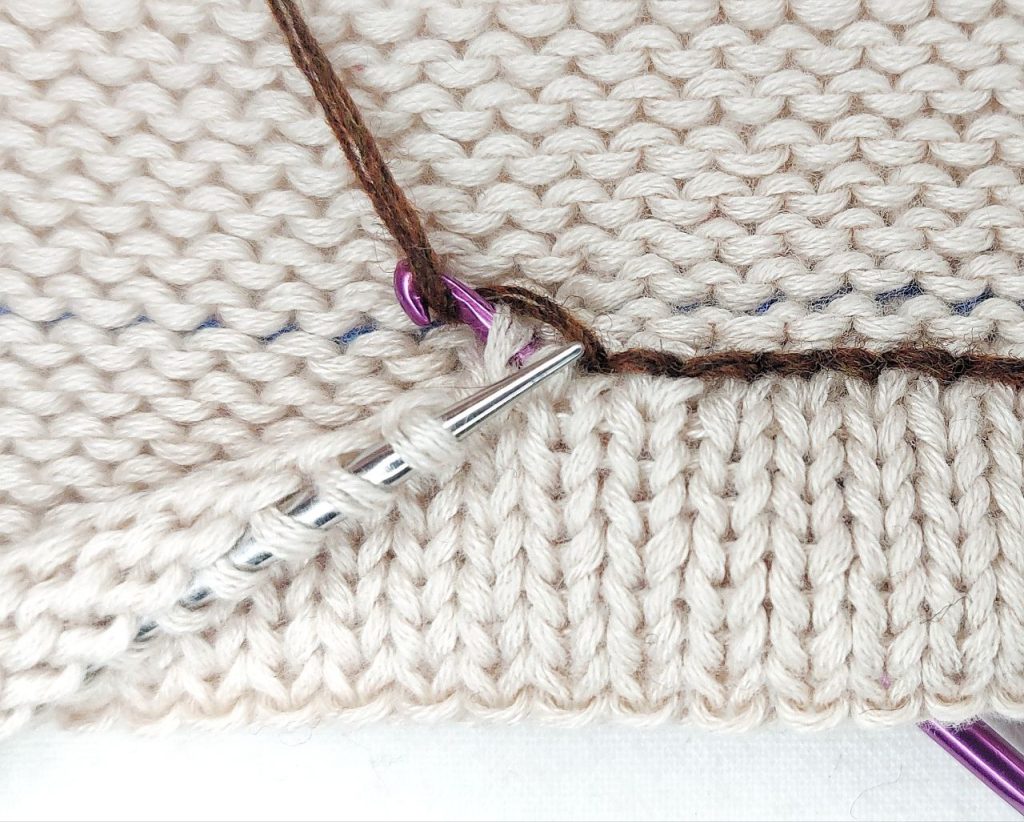
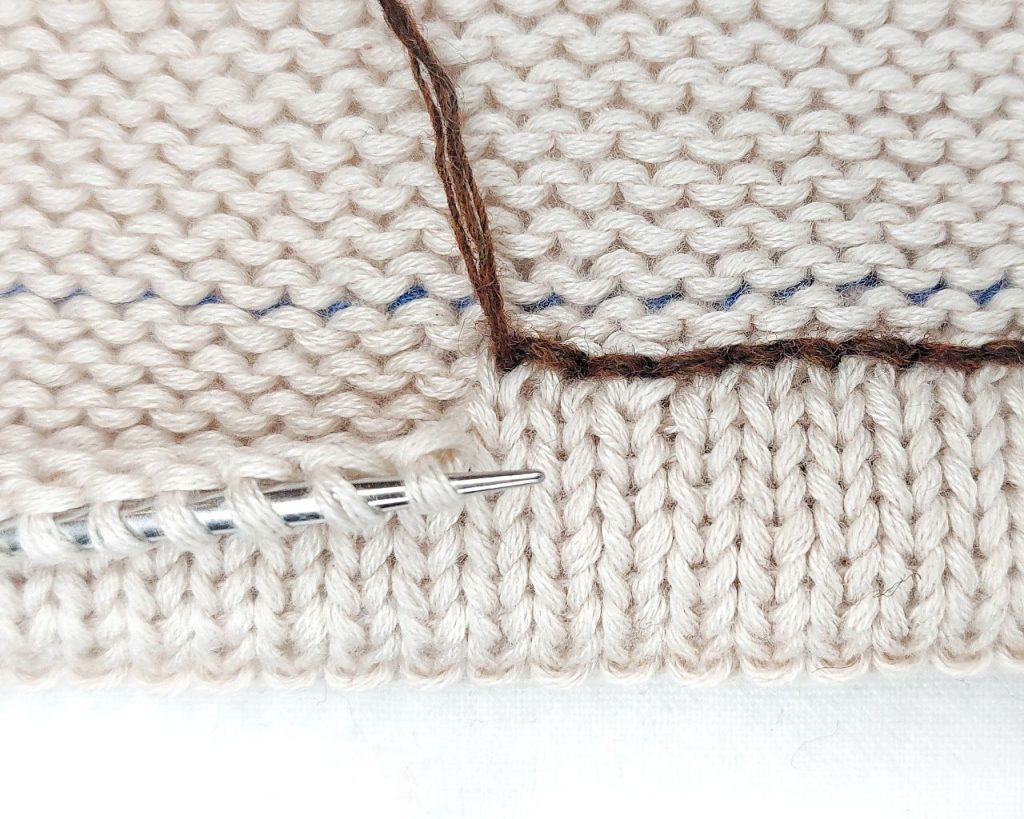
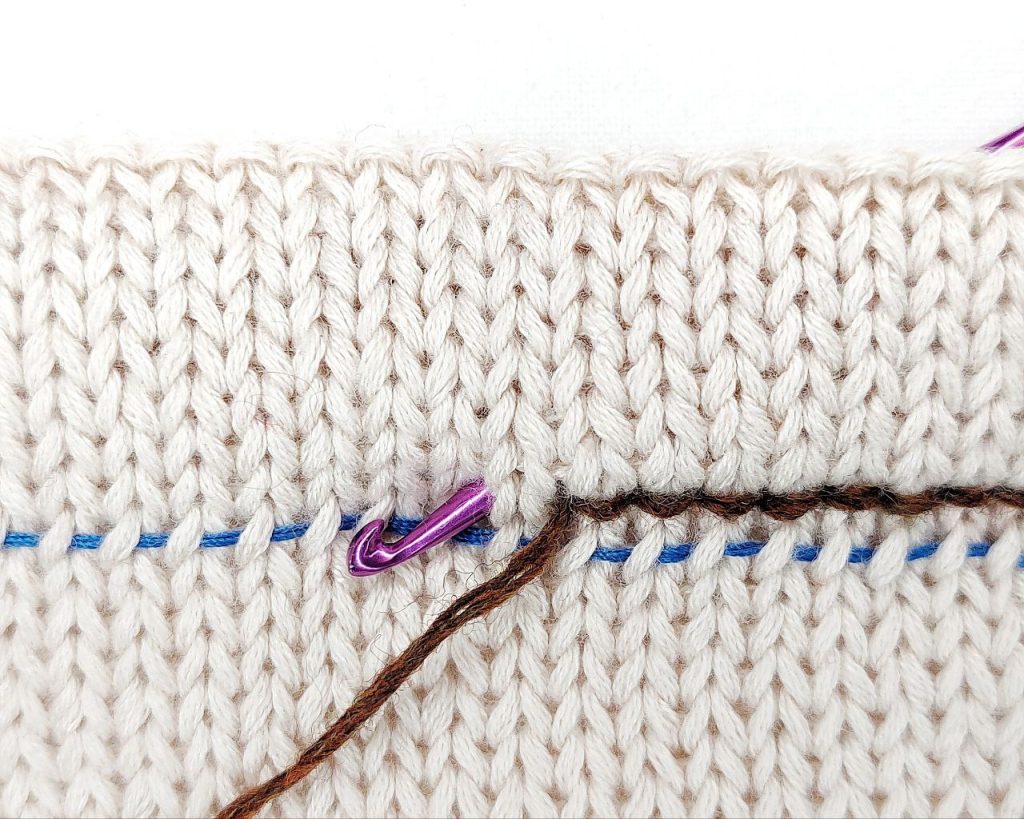
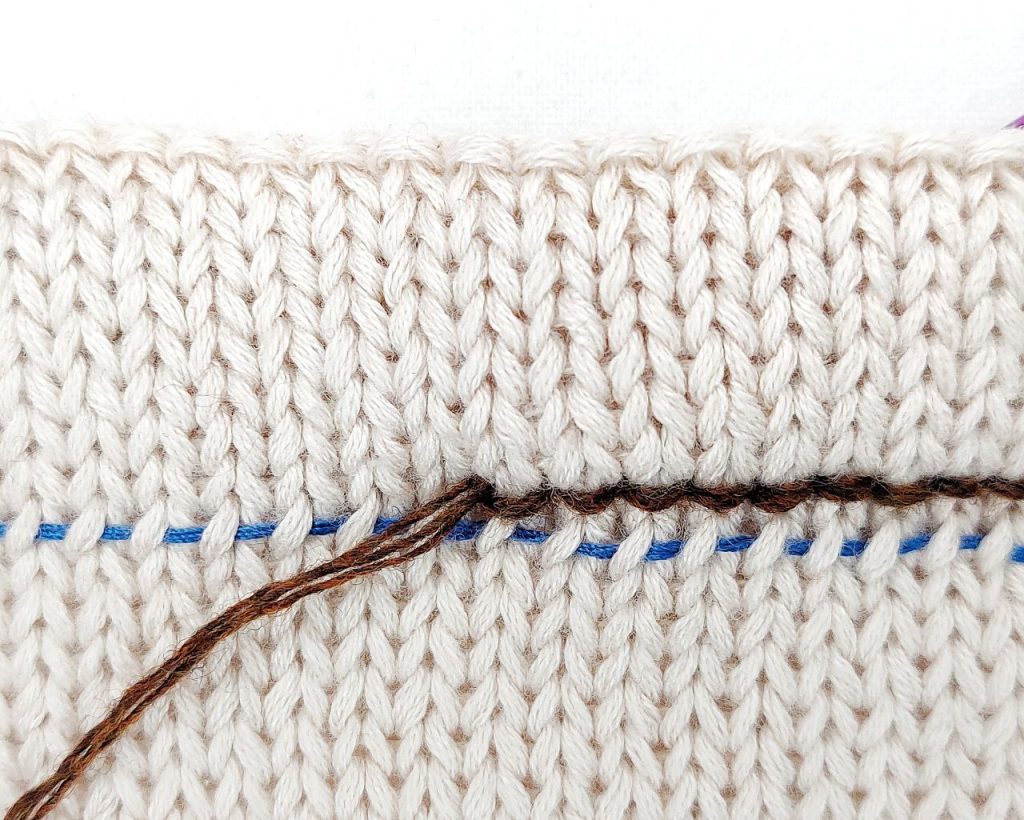
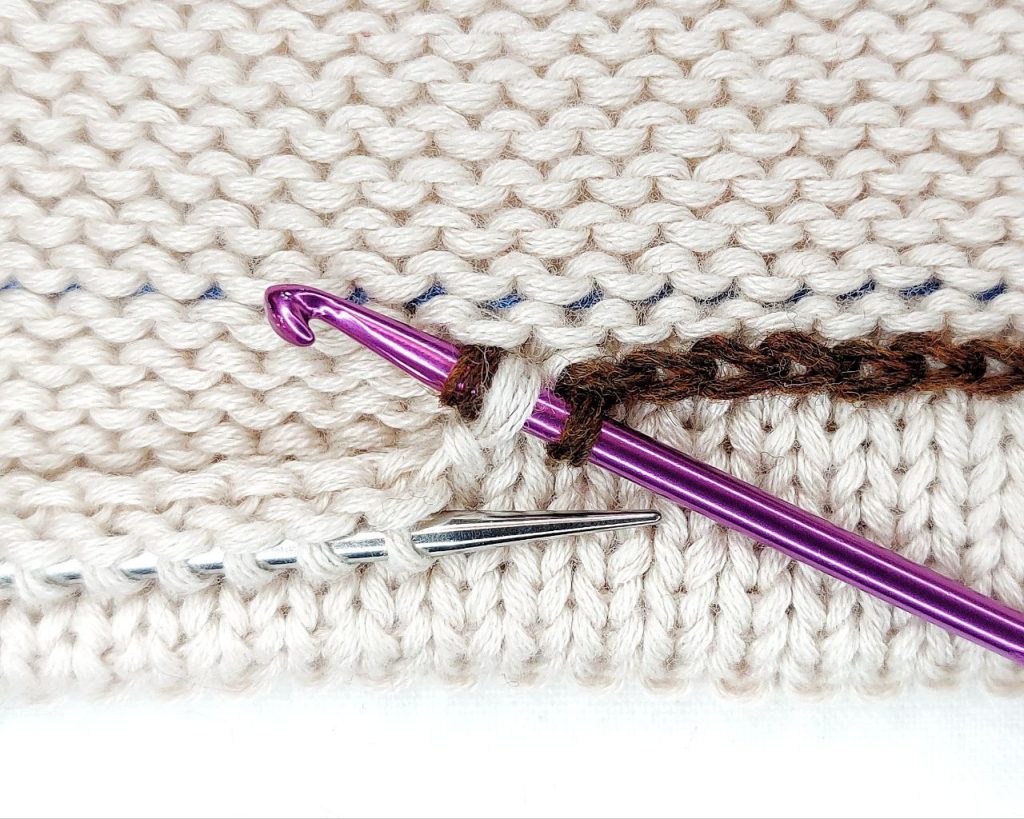
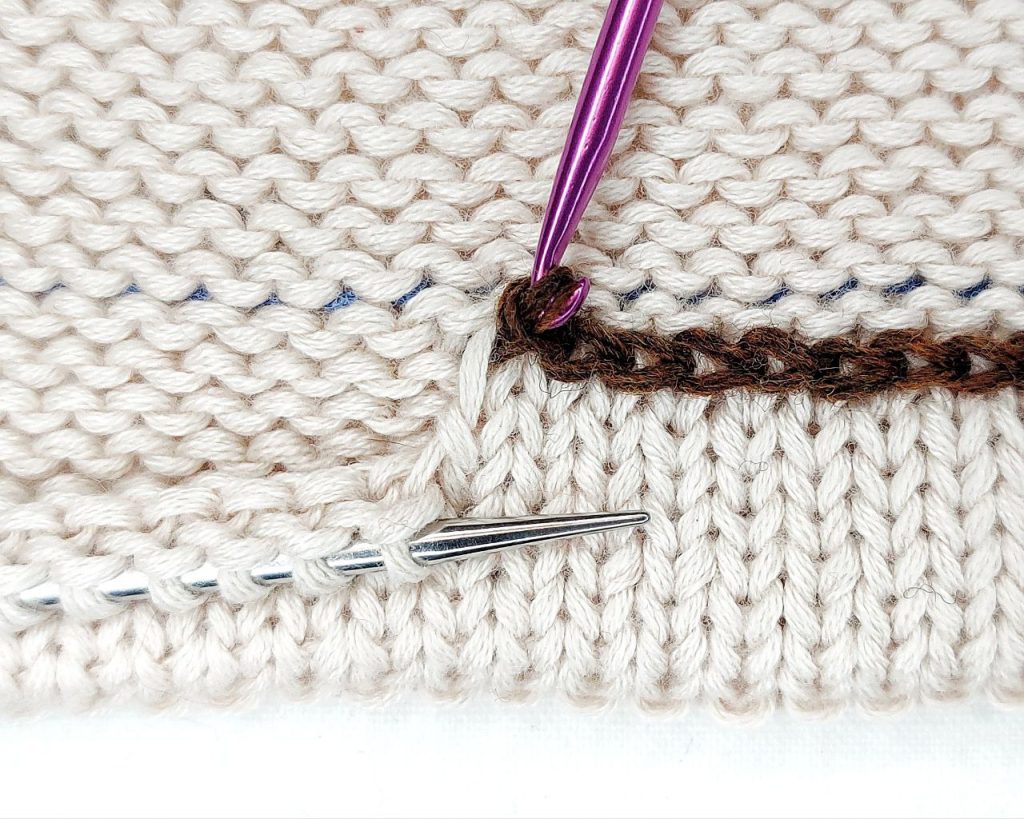
Stitch Doubling Row (RS): selvage stitch, *YO, knit 1. Repeat from * to the end, the last stitch is selvage.
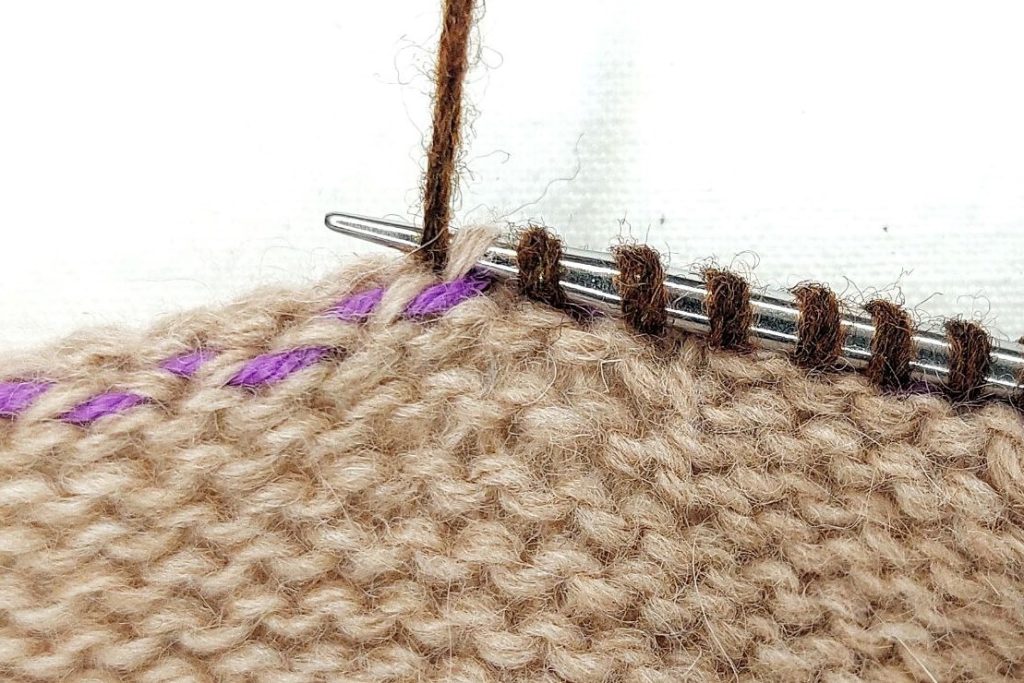
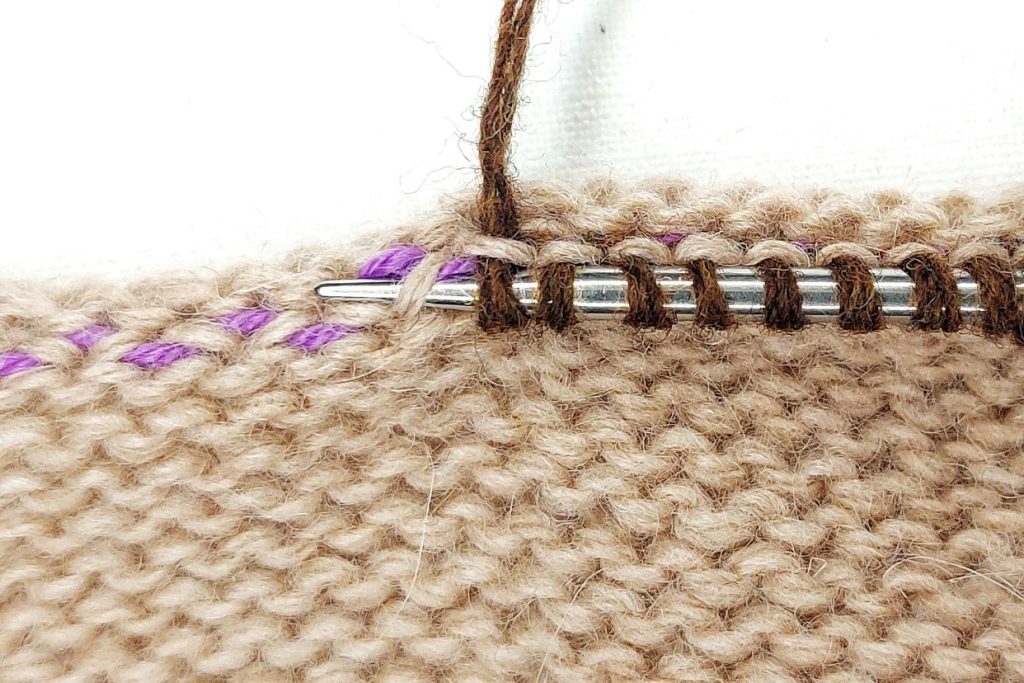
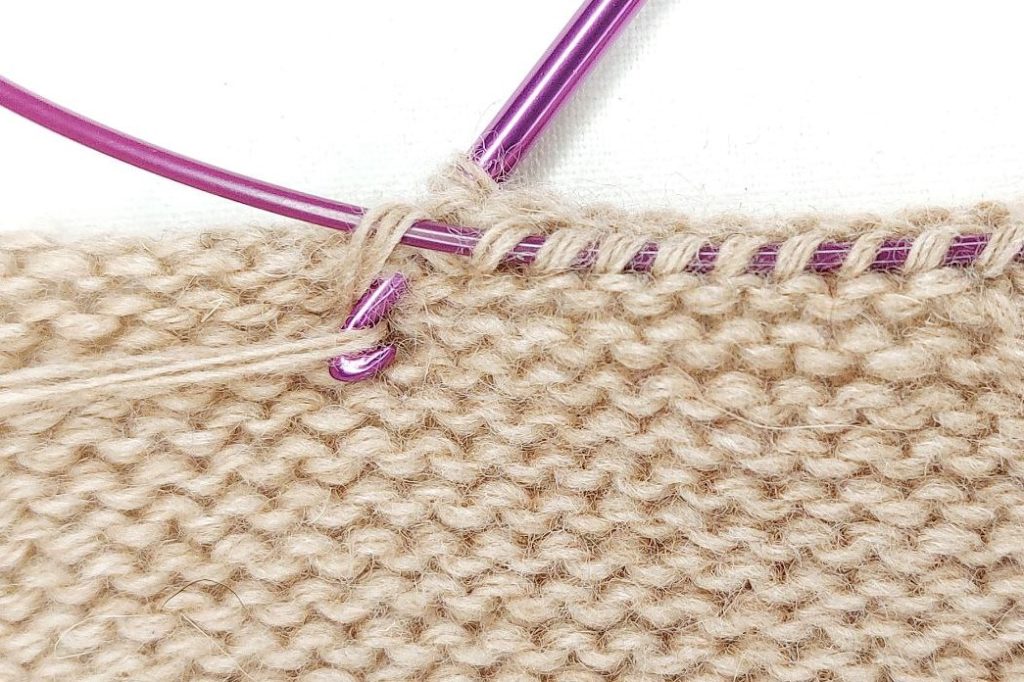
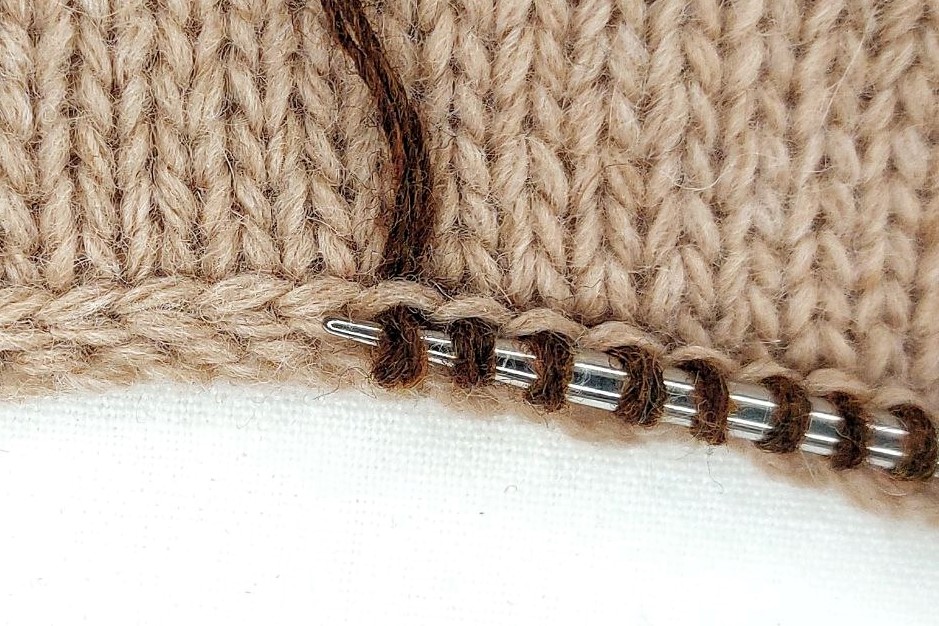
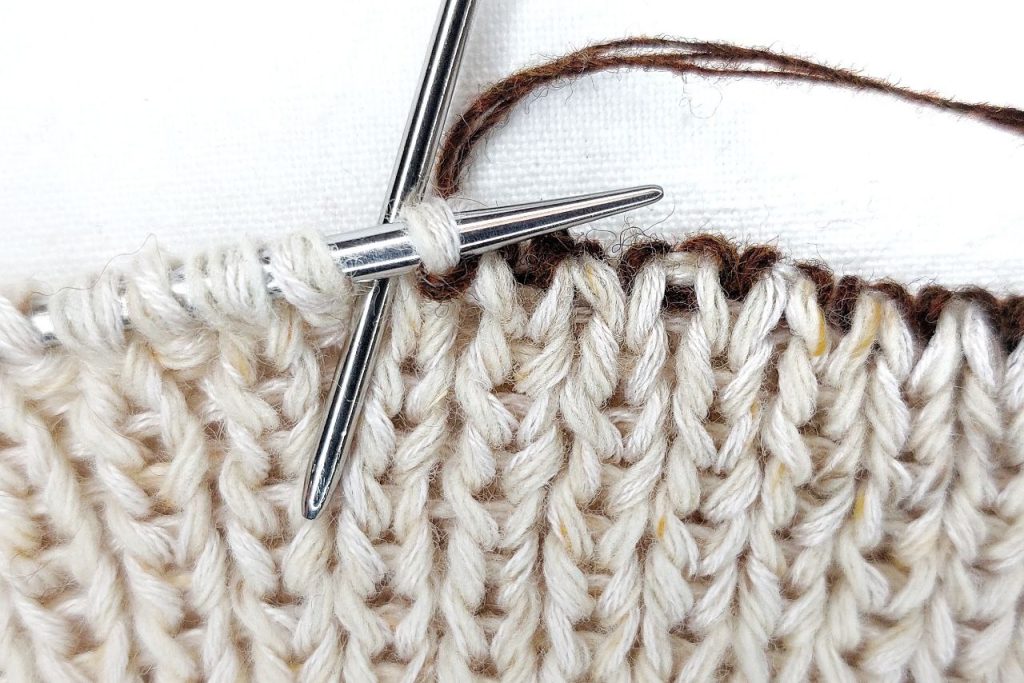
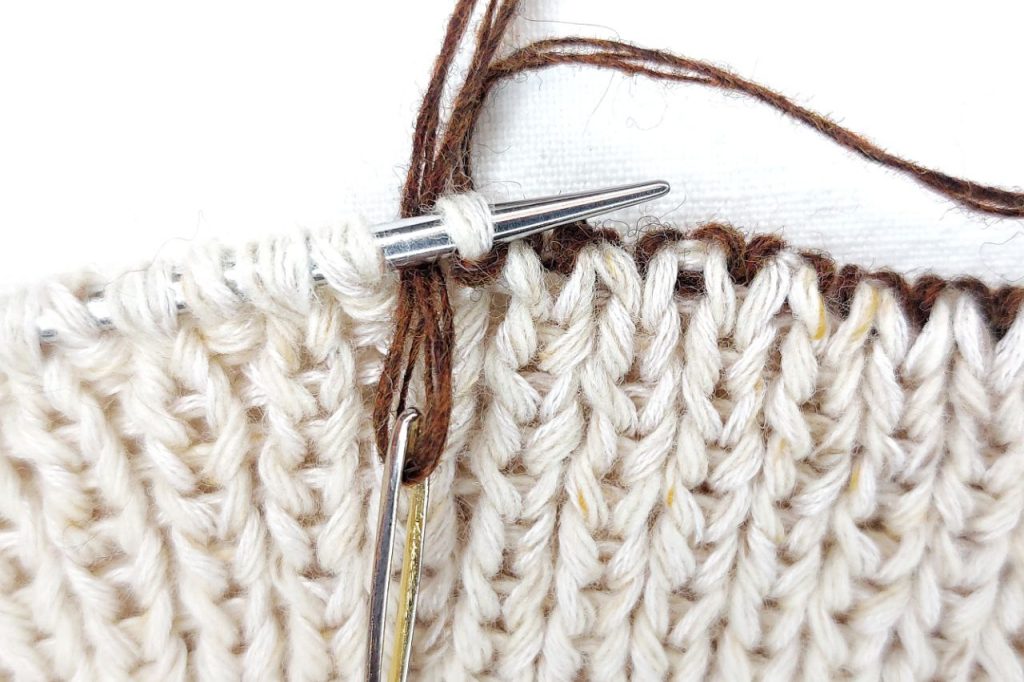
Back Sections Shaping Row (WS): selvage stitch, *slip 1 with yarn in front, knit 1 twisted. Repeat from * to the end, the last stitch is selvage.
Main Double Ribbing Pattern (2 stitches, 2 rows).
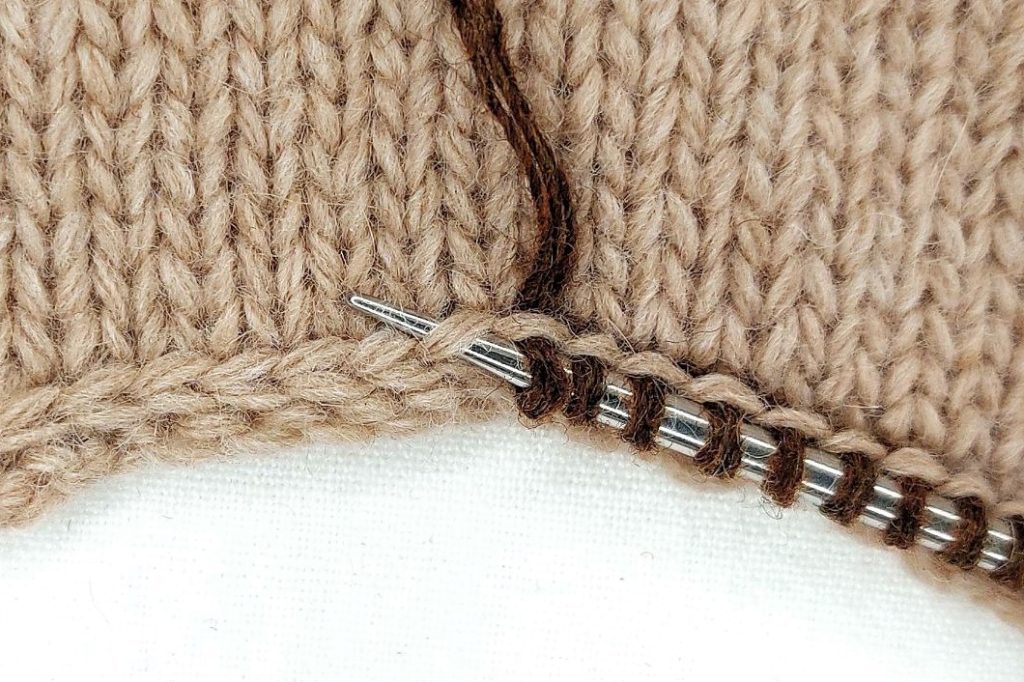
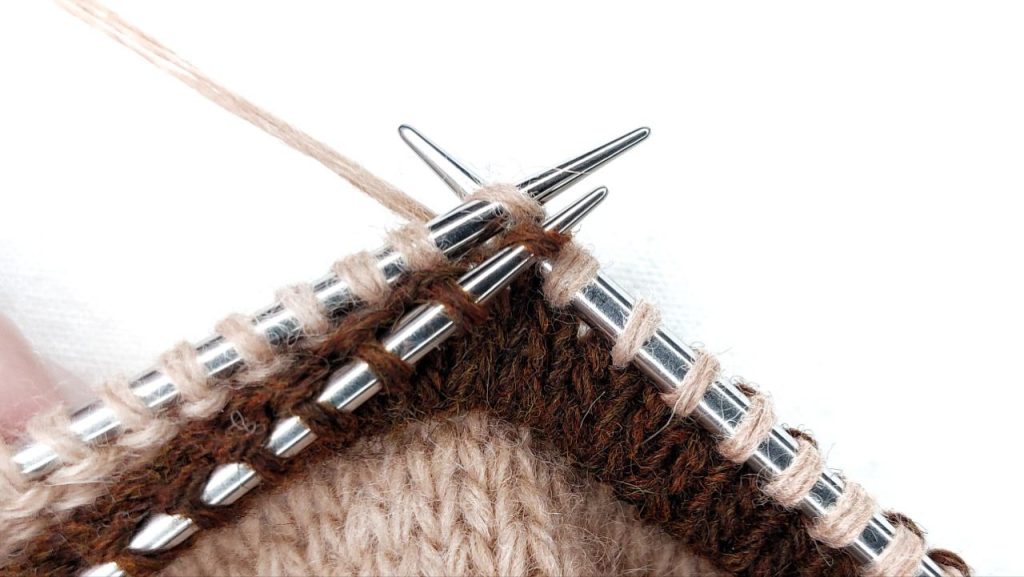
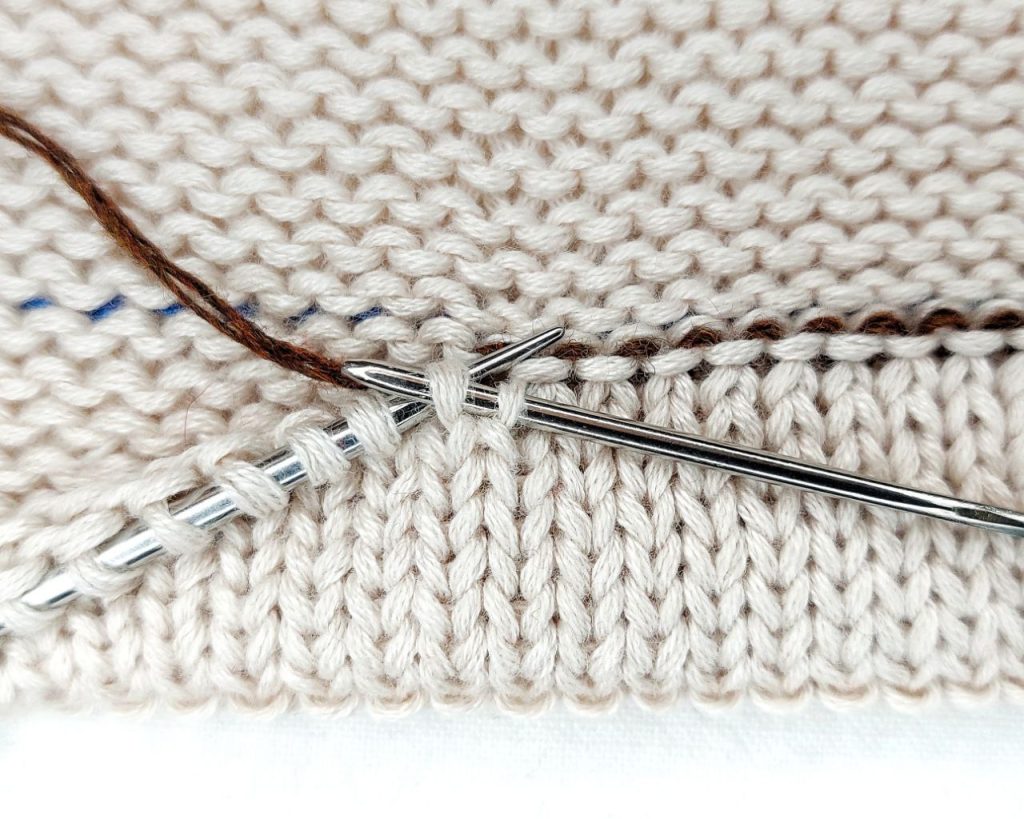
Row 1 (RS): selvage stitch, *slip 1 with yarn in front, knit 1. Repeat from * to the end, the last stitch is selvage.
Row 2 (WS): work like Row 1.
Repeat the Main Double Ribbing Pattern until the ribbing reaches the desired width.
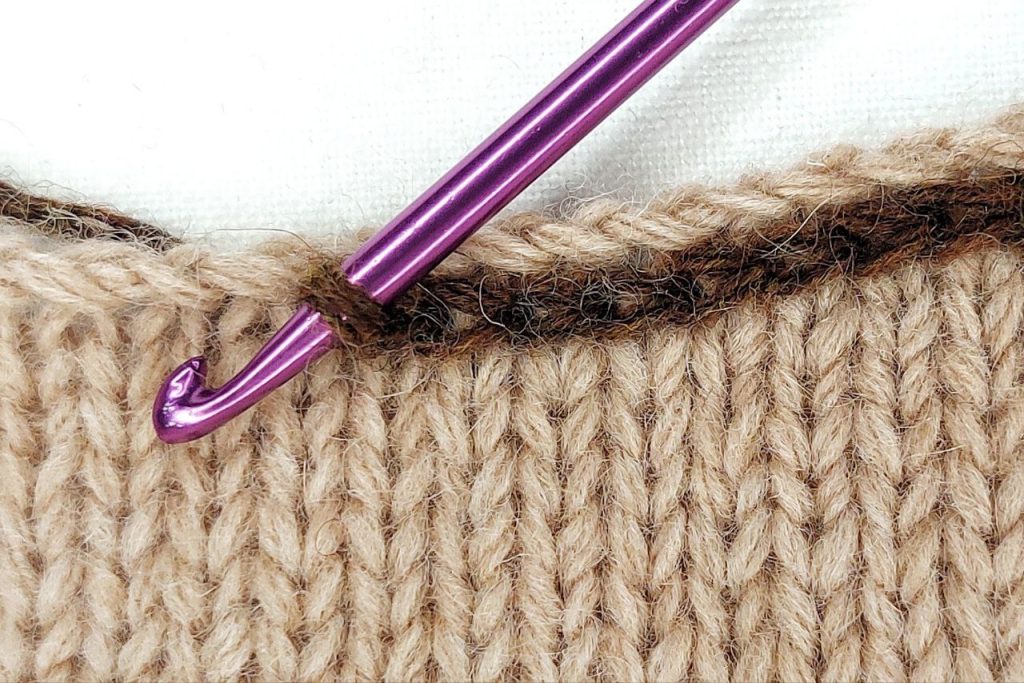
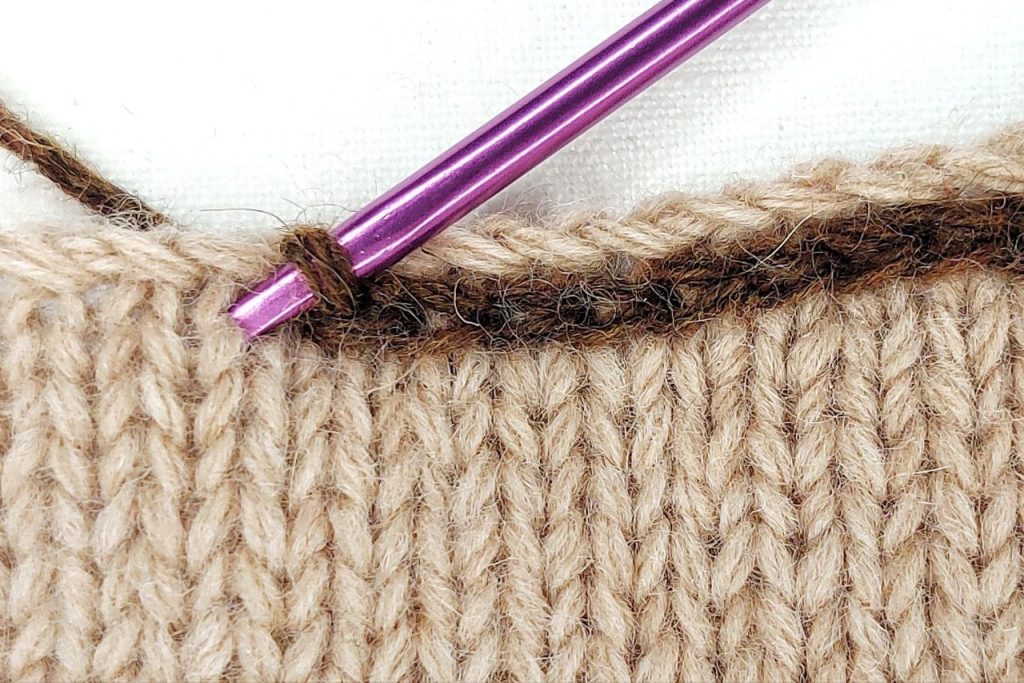
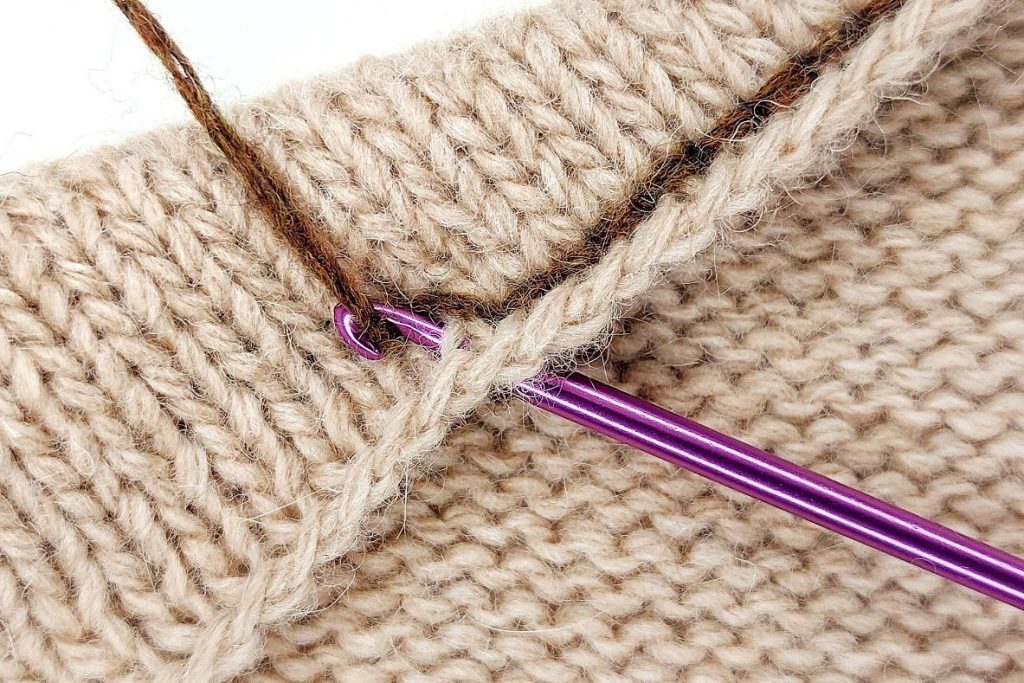
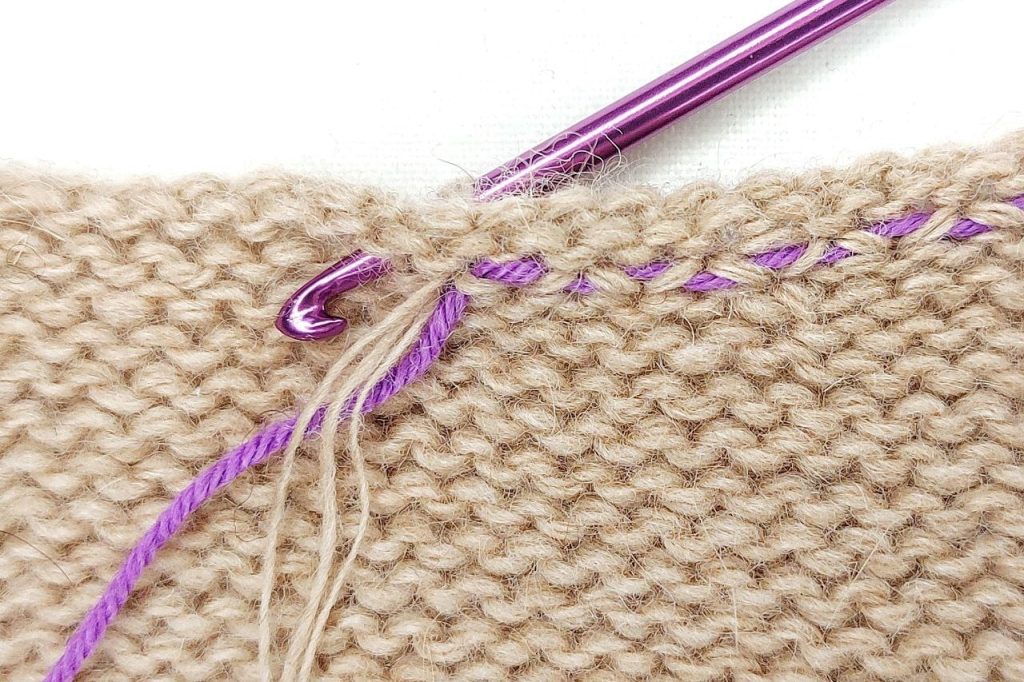
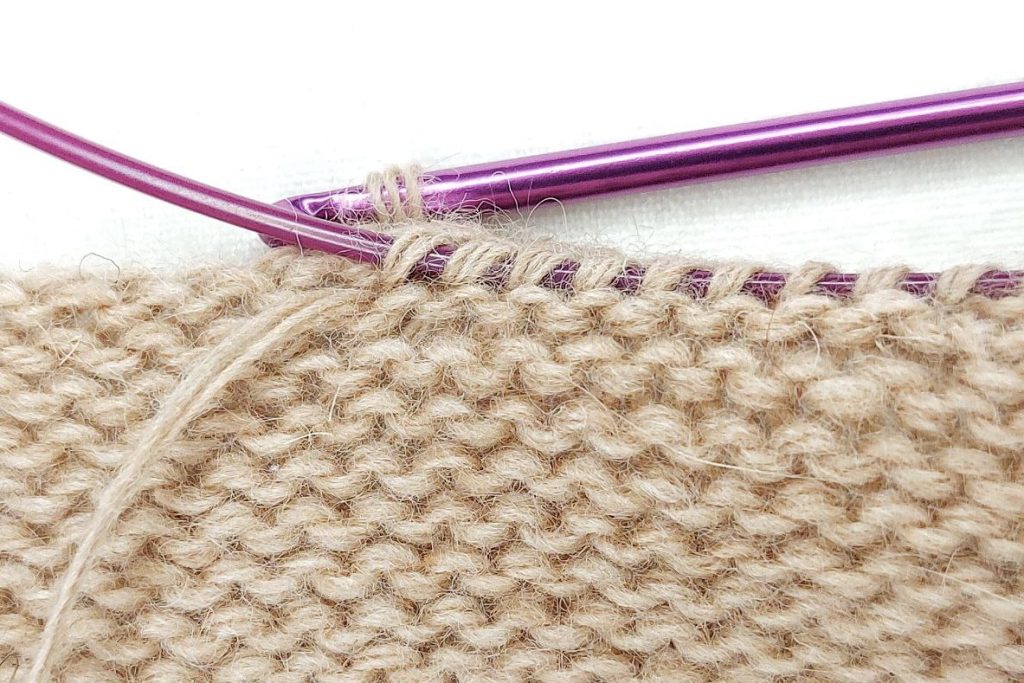
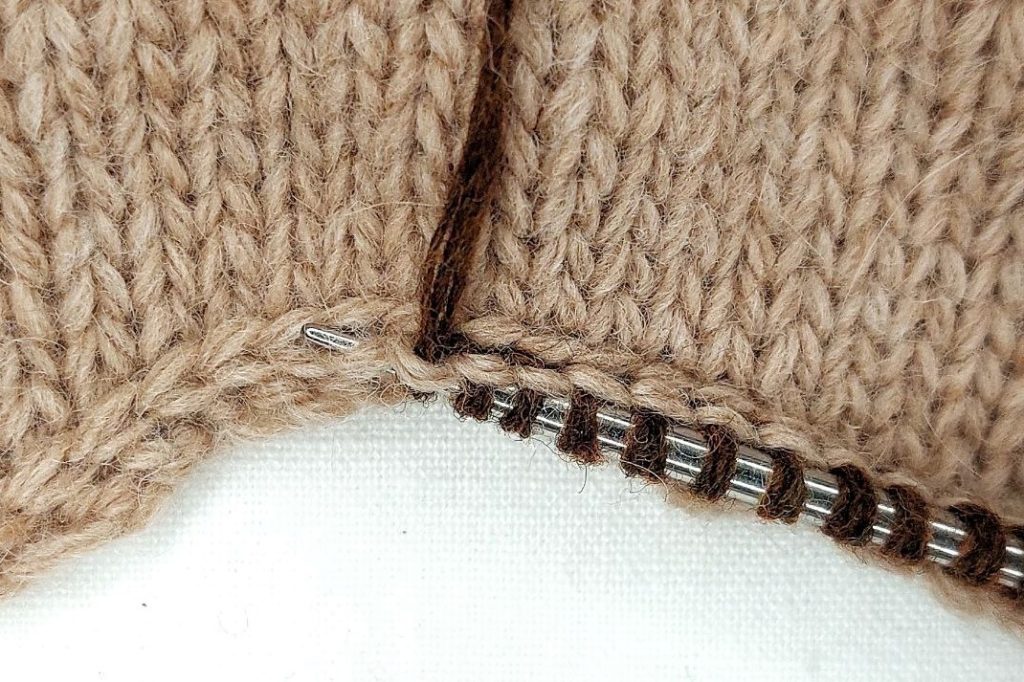
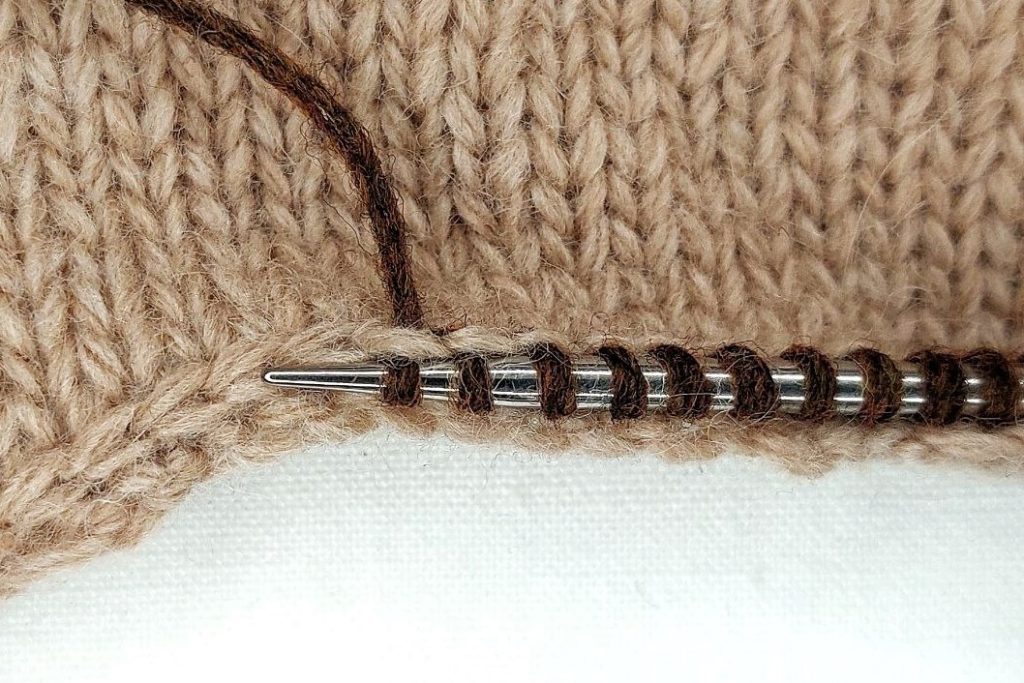
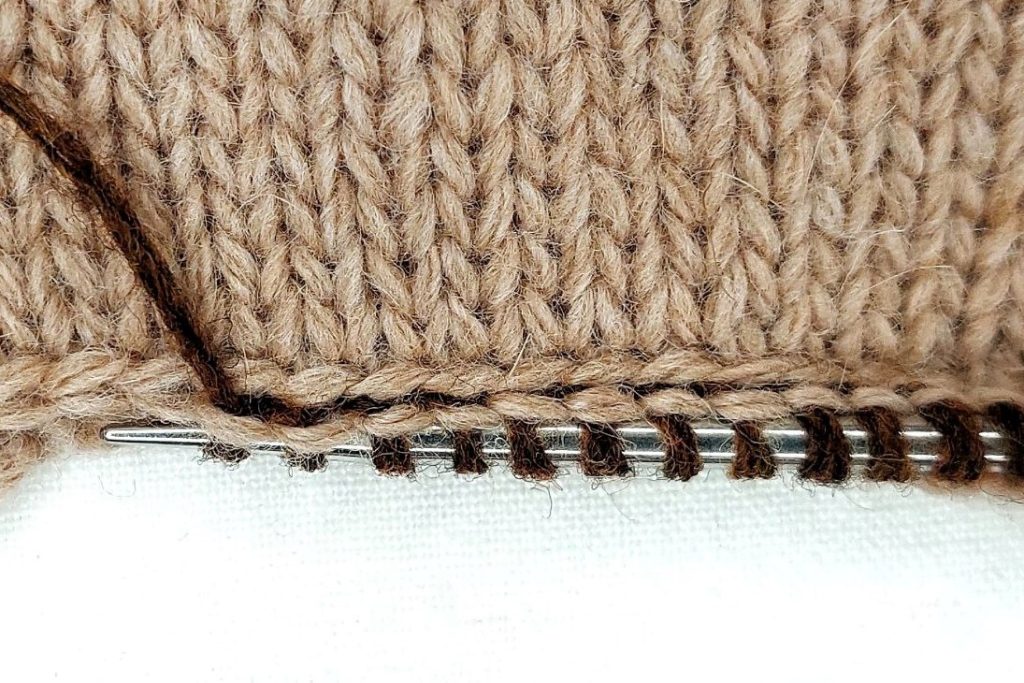
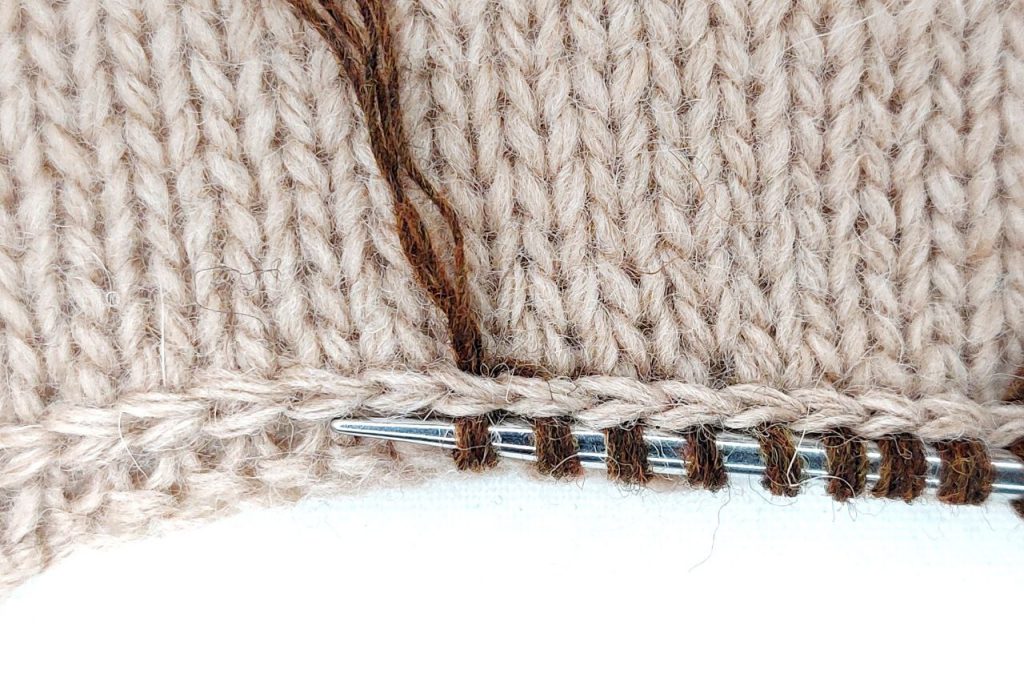
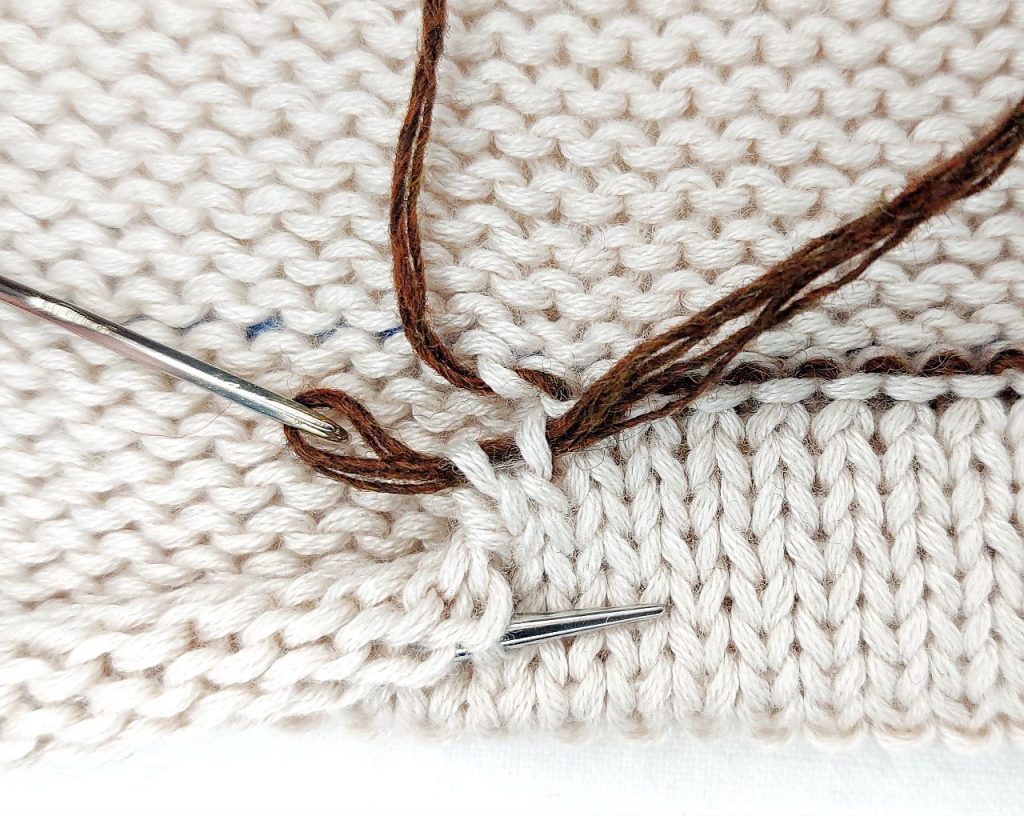
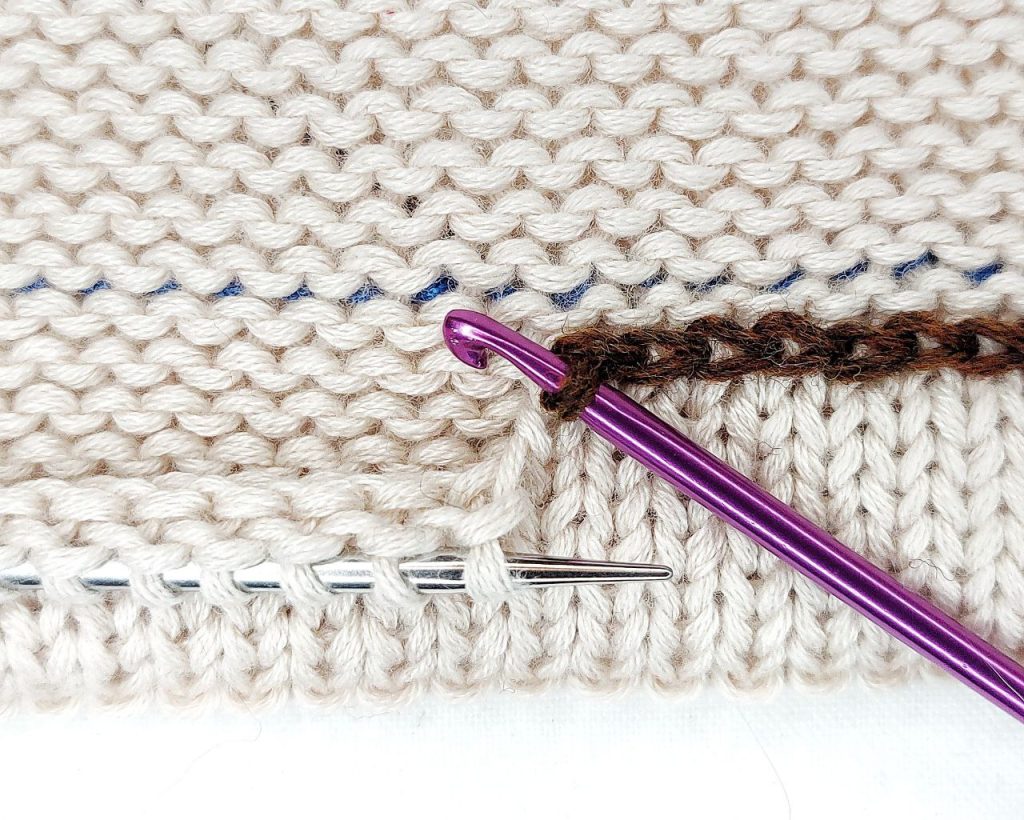
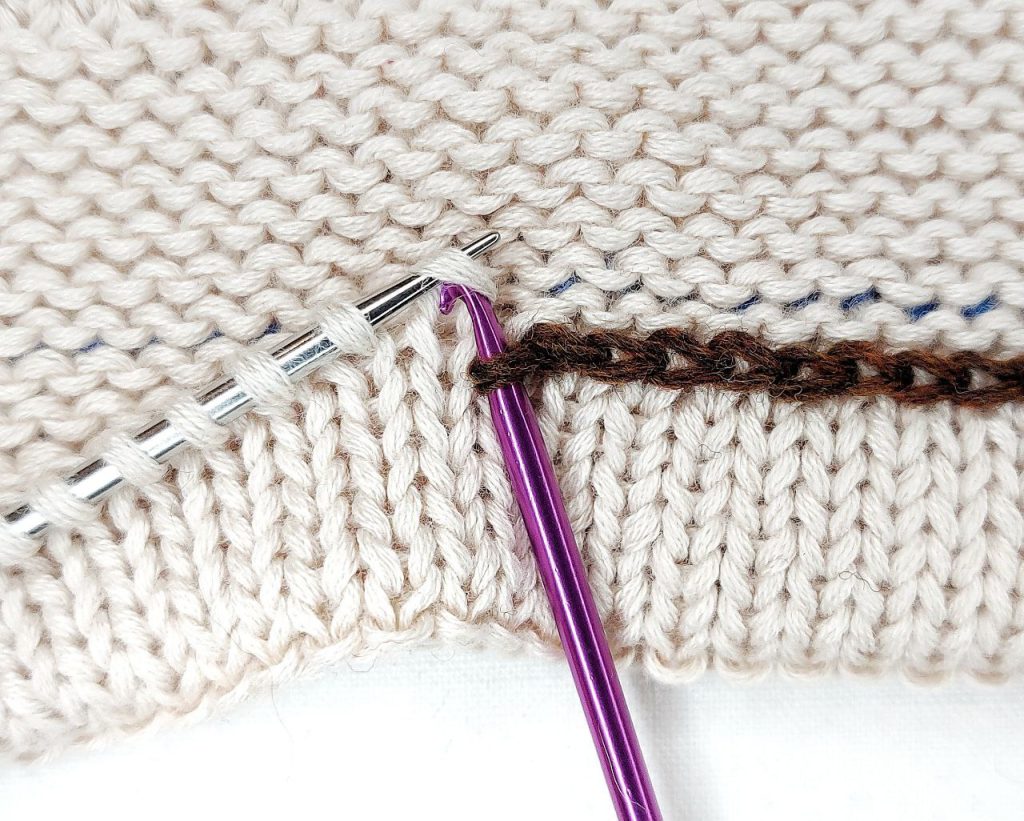
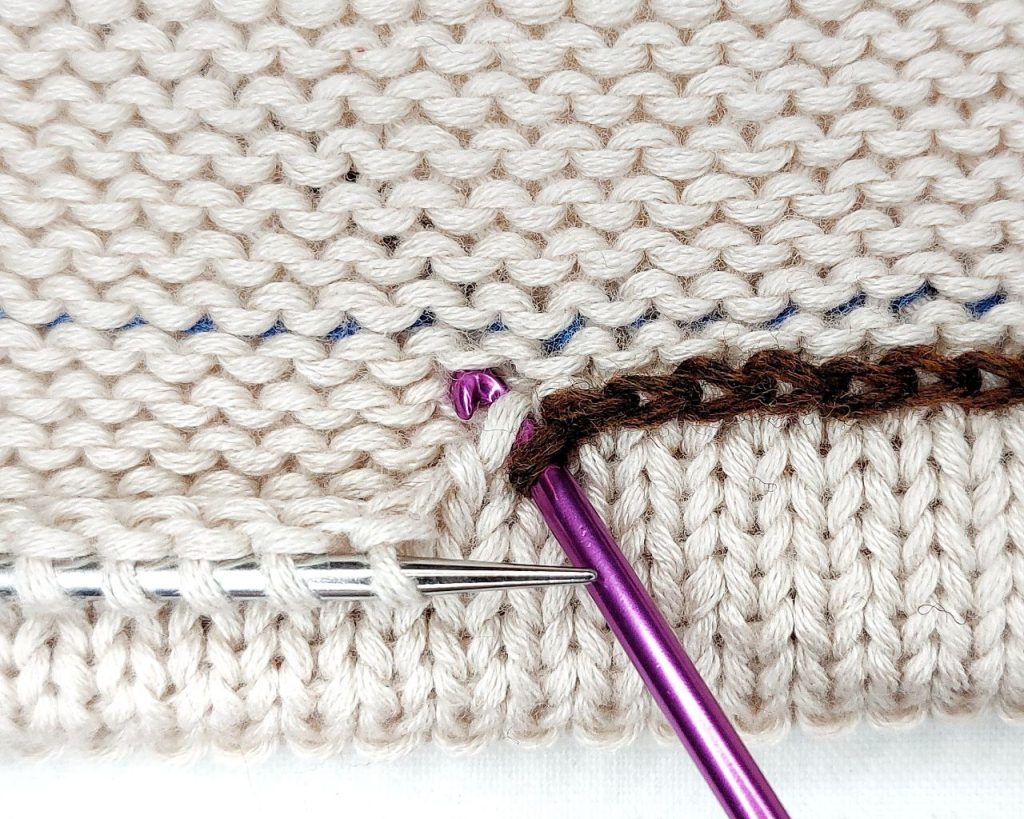
Joining Two Sections of Double Ribbing.
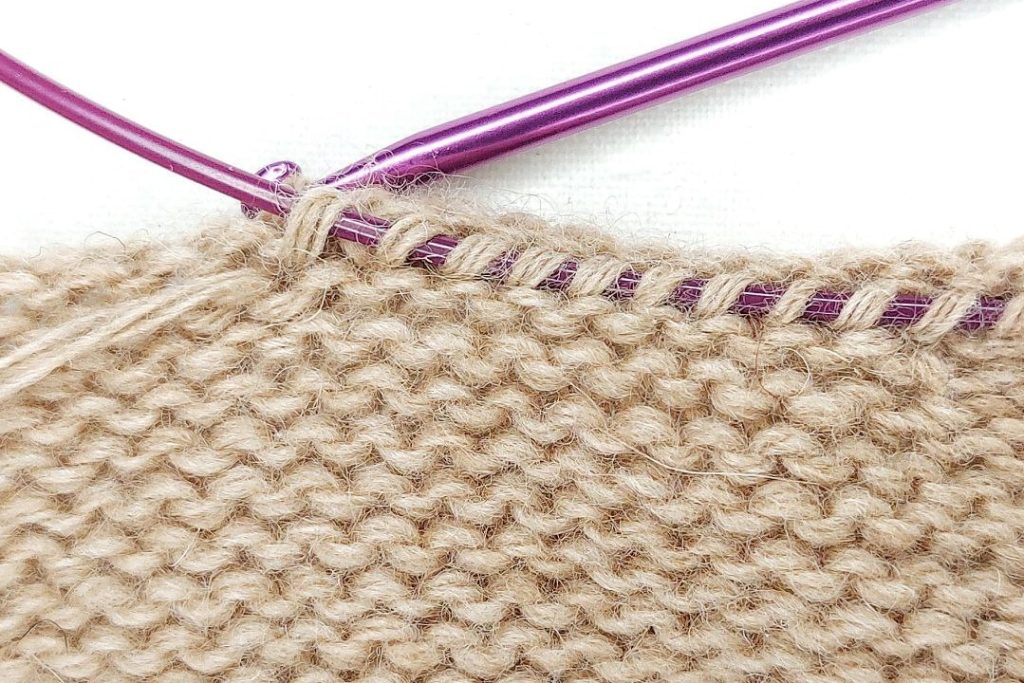
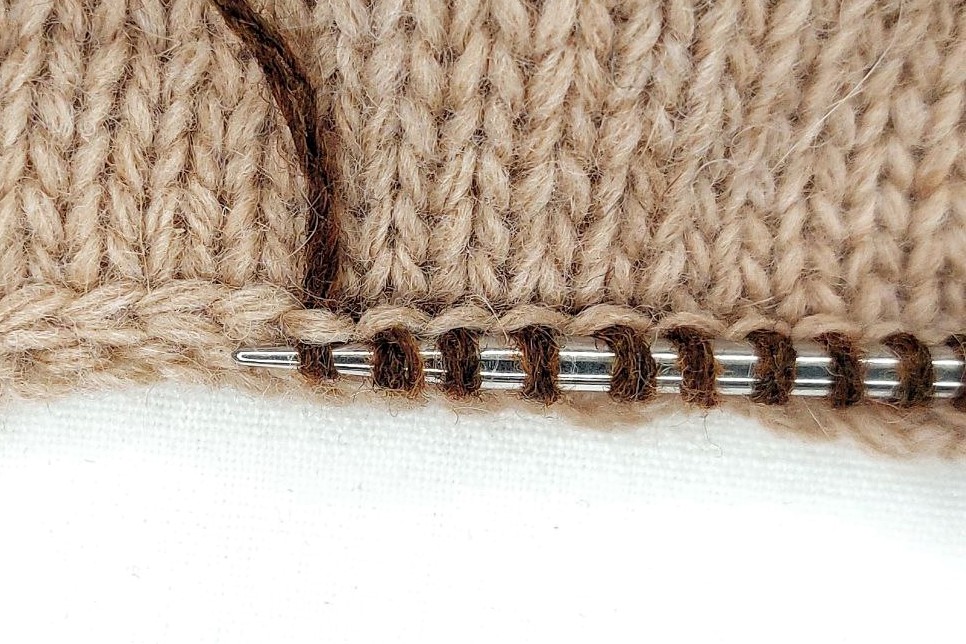
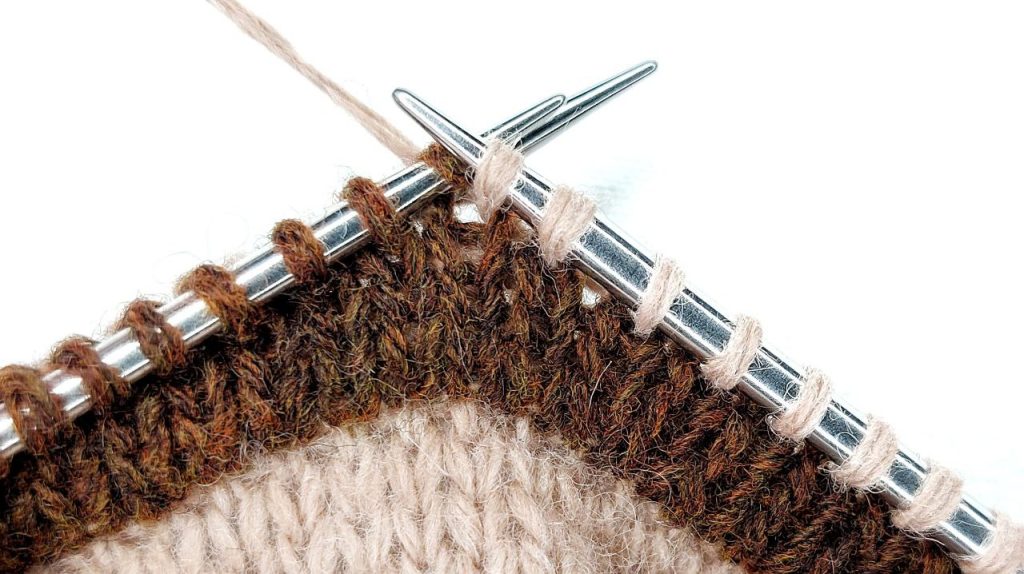
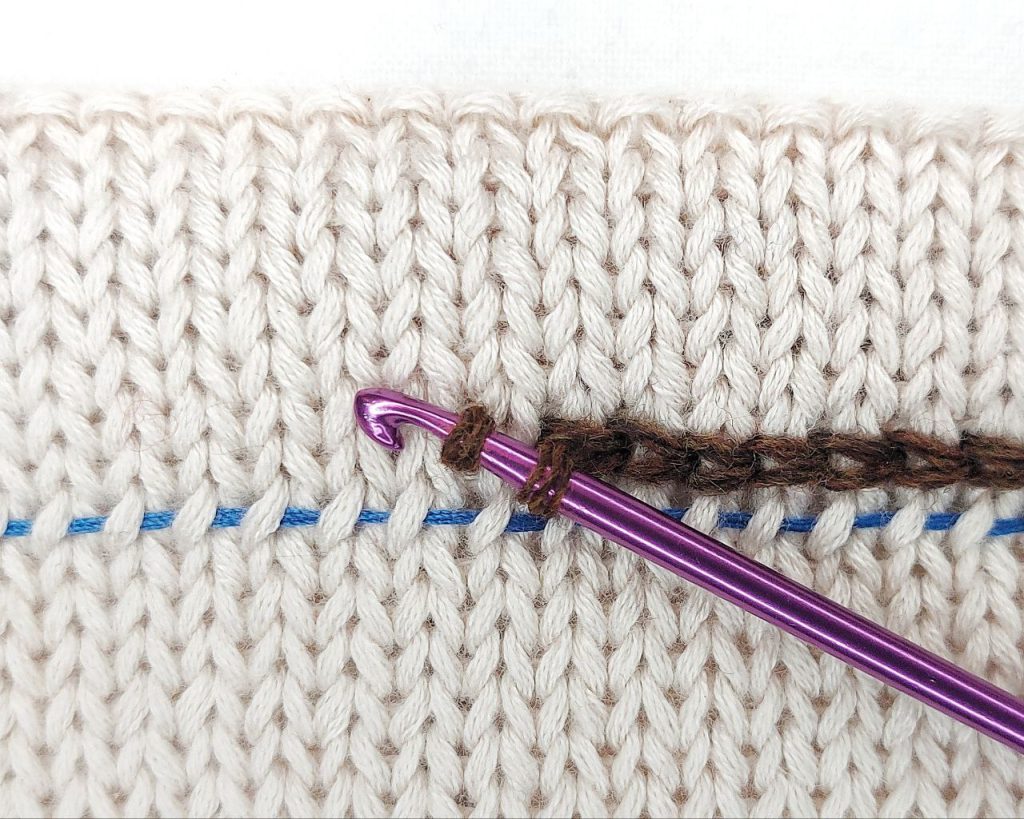
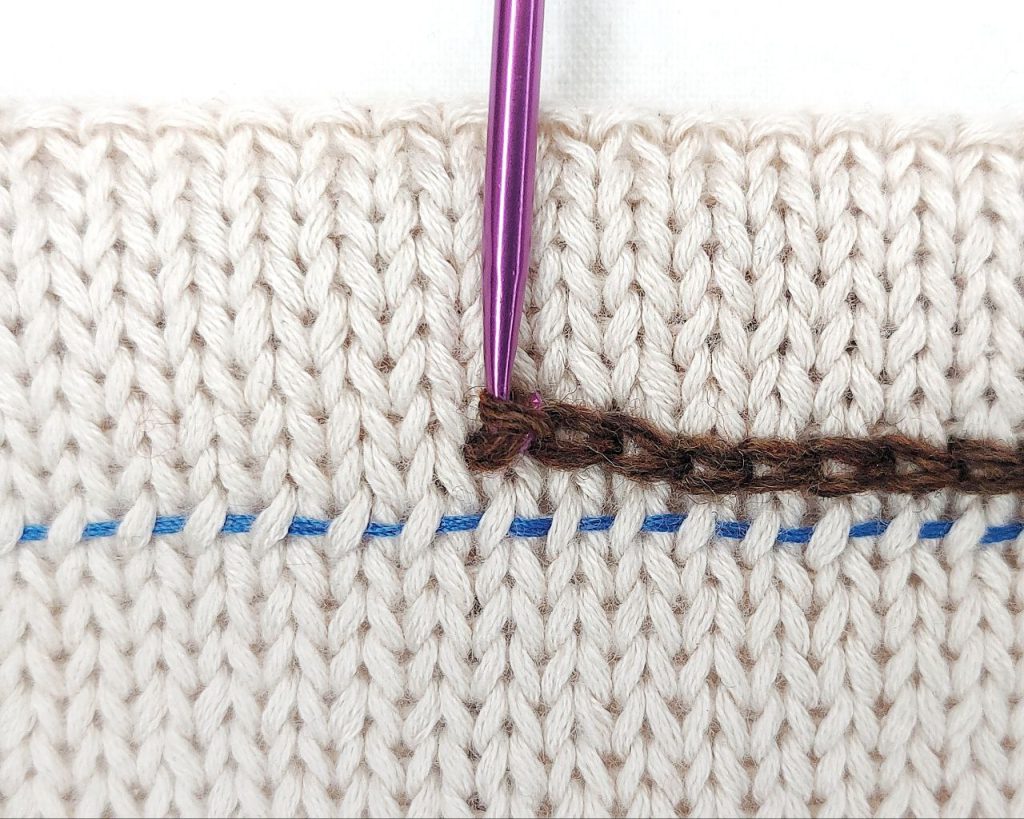
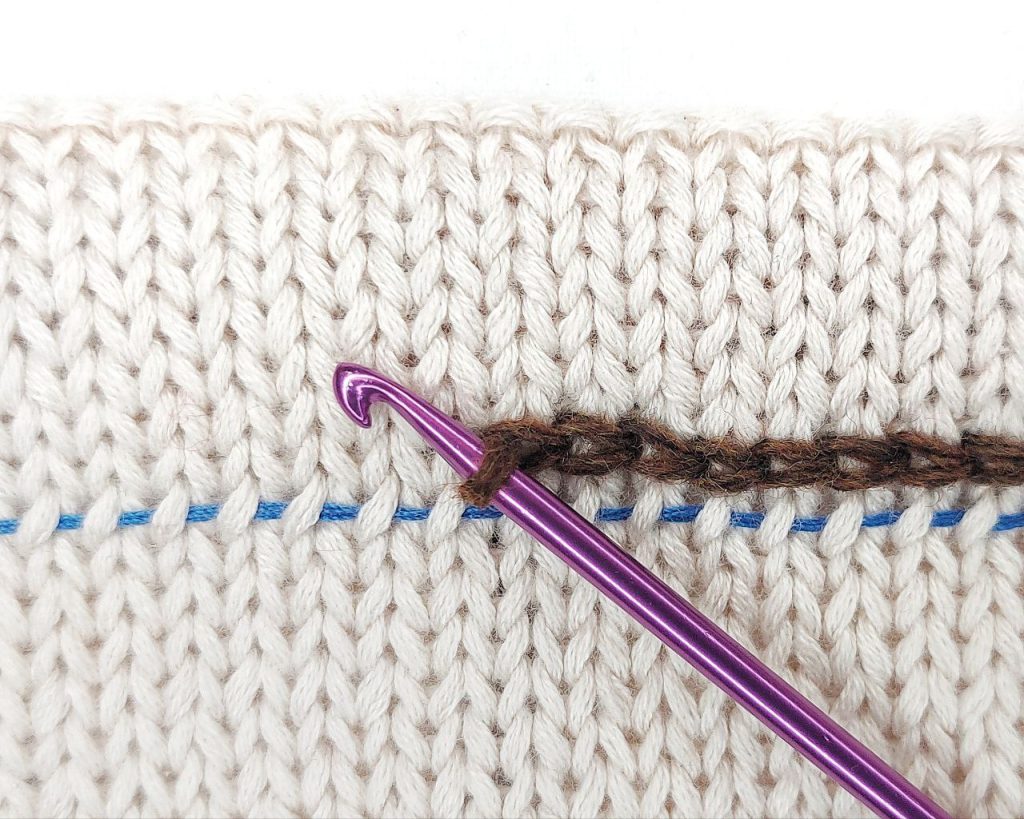
Joining Row (RS): selvage stitch, *knit 2 together. Repeat from * to the end, the last stitch is selvage.
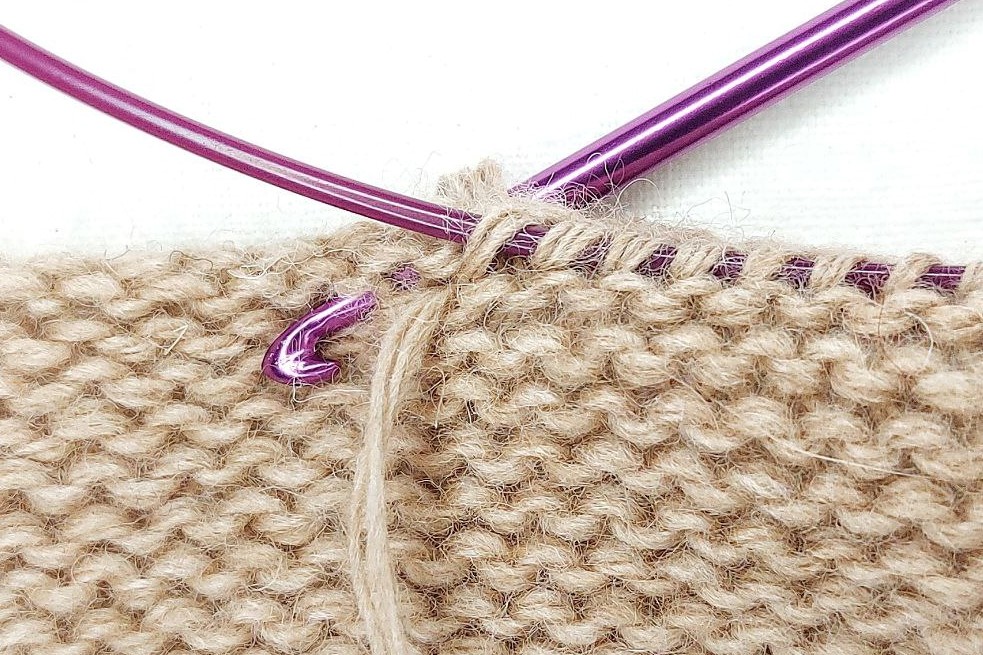
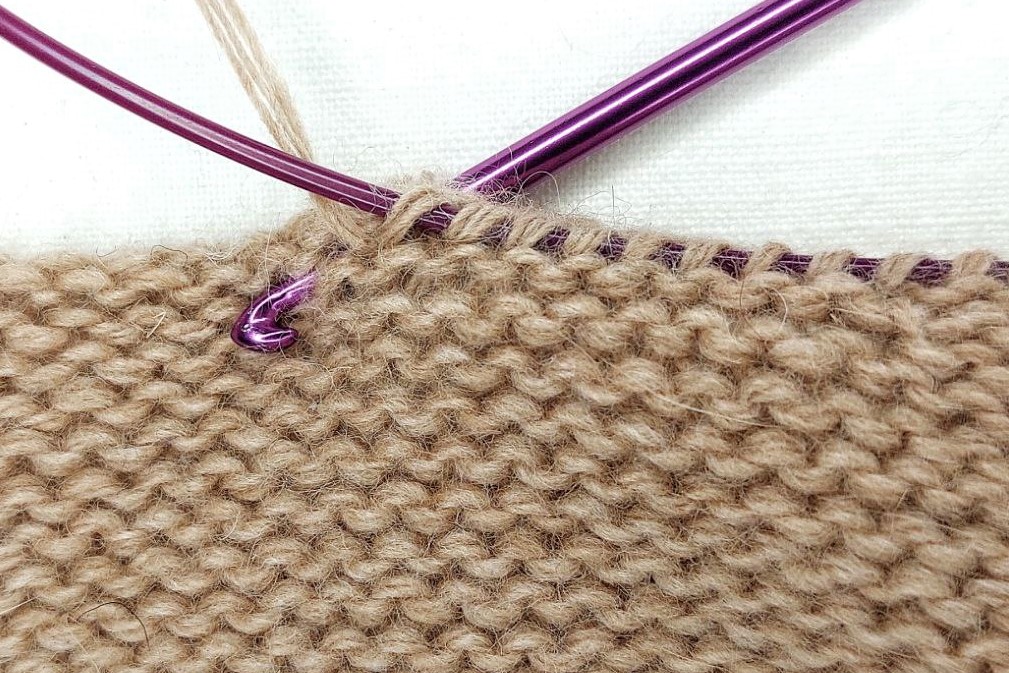
If the double ribbing finishes the project, you can bind off the stitches while joining the sections.
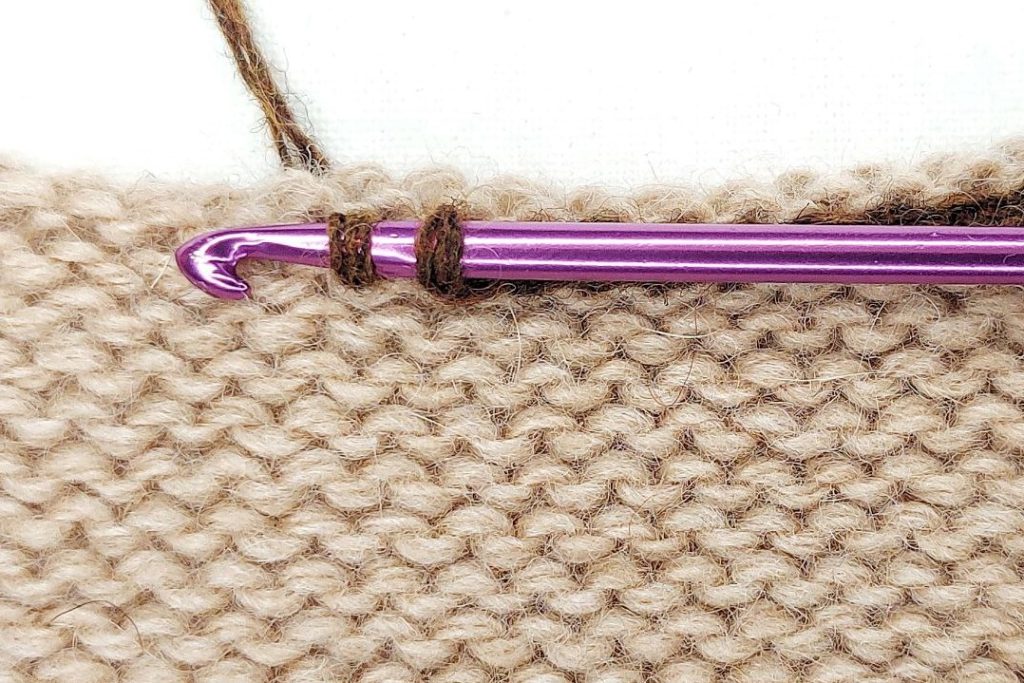
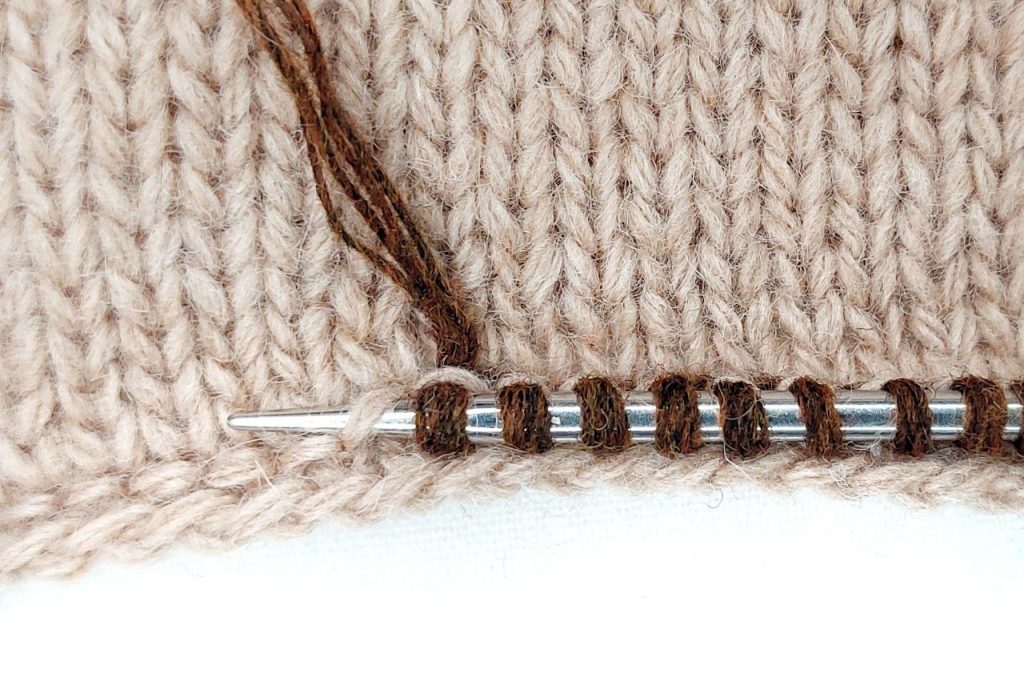
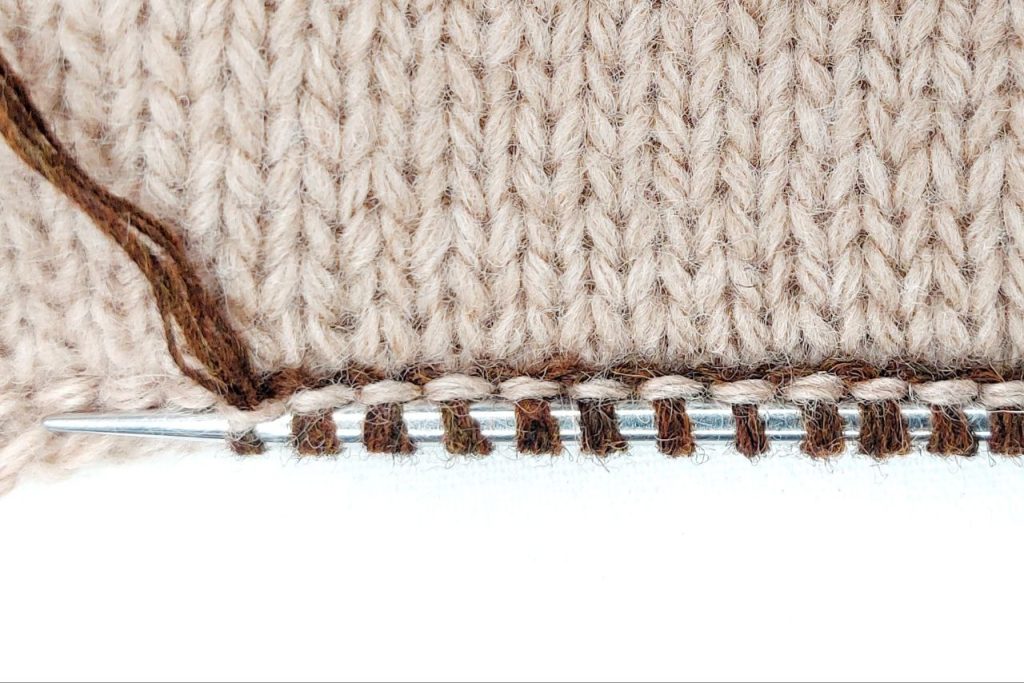
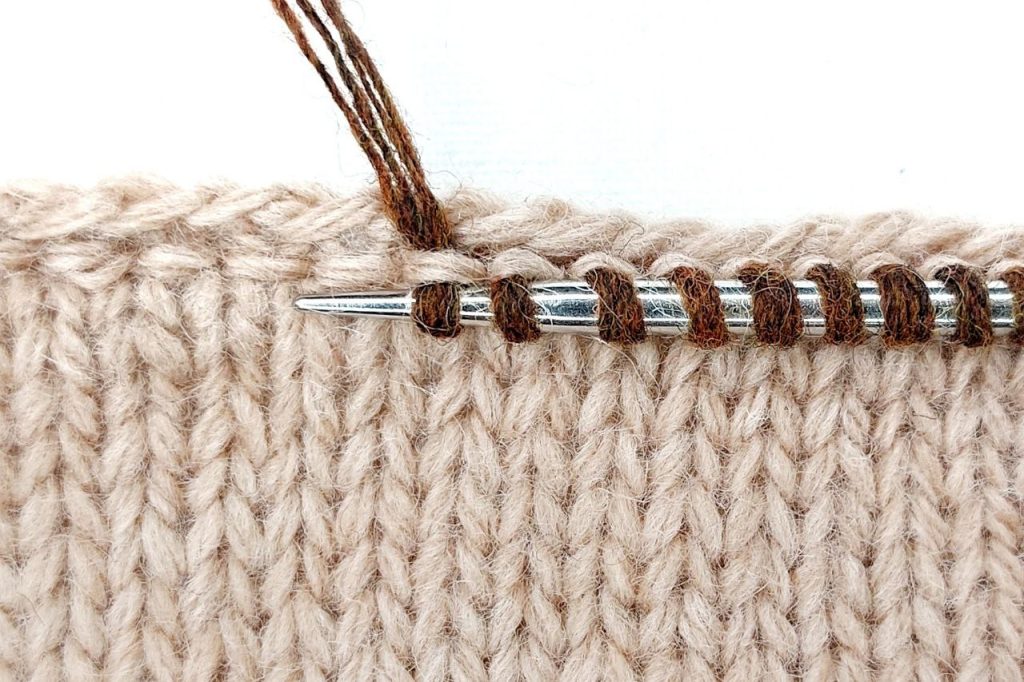
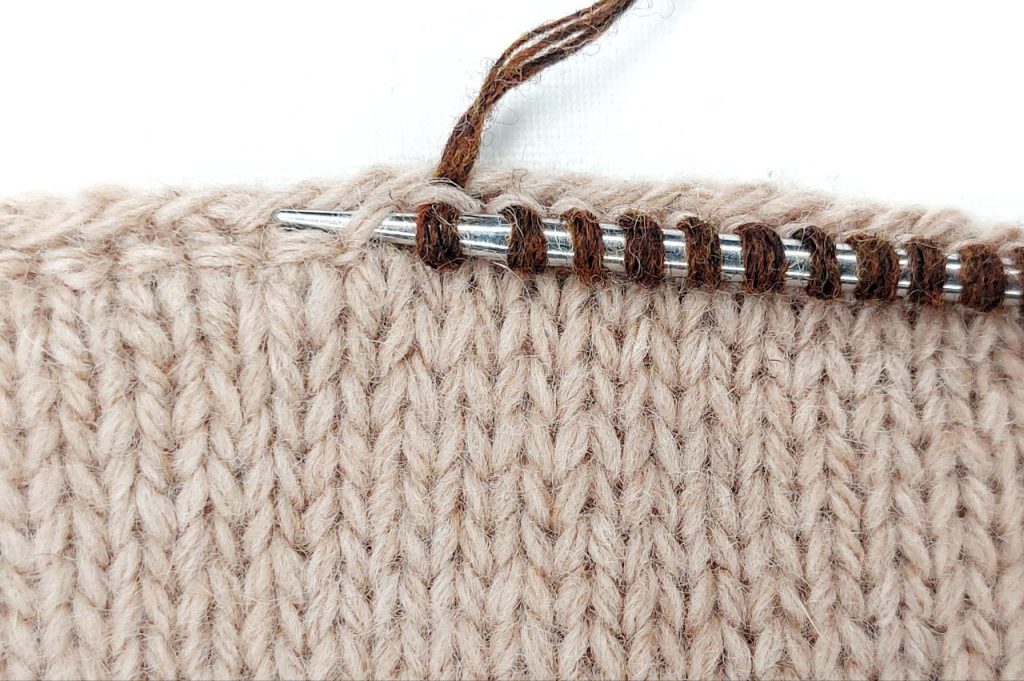
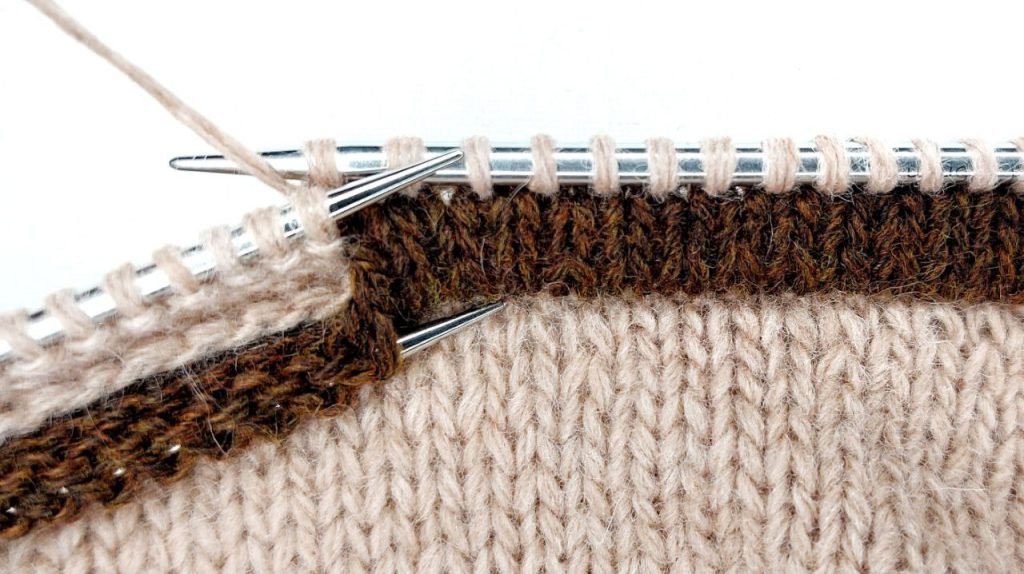
Joining and Binding Off Row (RS): selvage stitch, *knit 2 together, pass the first stitch over the second on the right needle, and drop it off. Repeat from * to the end, and finish the selvage stitch the same way. Cut the yarn, and pull it through the last stitch.
Double Ribbing in the Round
Stitch Doubling Round: *YO, knit 1. Repeat from * to the end of the round.
Back Sections Shaping Round: *purl 1 twisted, slip 1 with yarn in back. Repeat from * to the end of the round.
Main Double Ribbing Pattern (2 stitches, 2 rounds).
Round 1: *slip 1 with yarn in front, knit 1. Repeat from * to the end of the round.
Round 2: *purl 1, slip 1 with yarn in back. Repeat from * to the end of the round.
Repeat the Main Double Ribbing Pattern until the ribbing reaches the desired width.
Joining Two Sections of Double Ribbing.
Joining Round: *knit 2 together. Repeat from * to the end of the round.
If the double ribbing finishes the project, you can bind off the stitches while joining the sections.
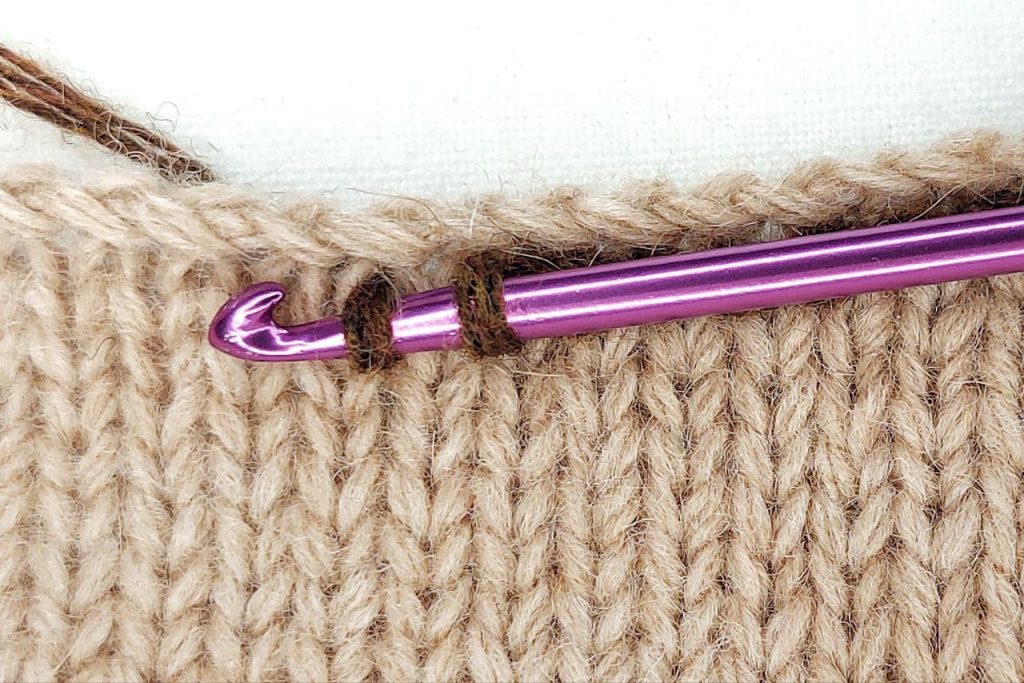
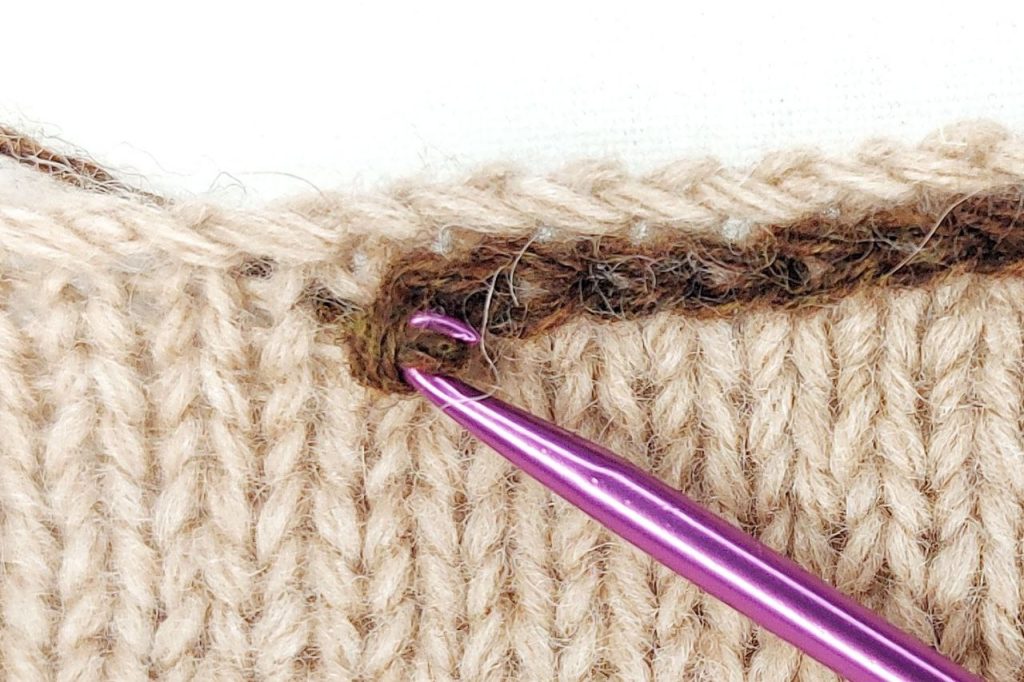
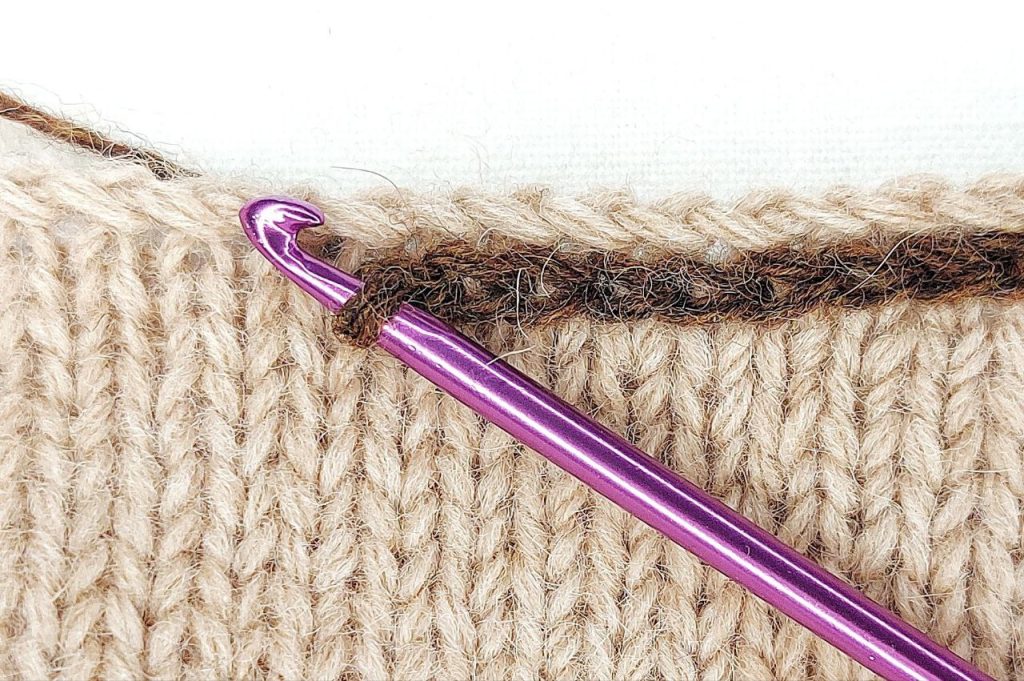
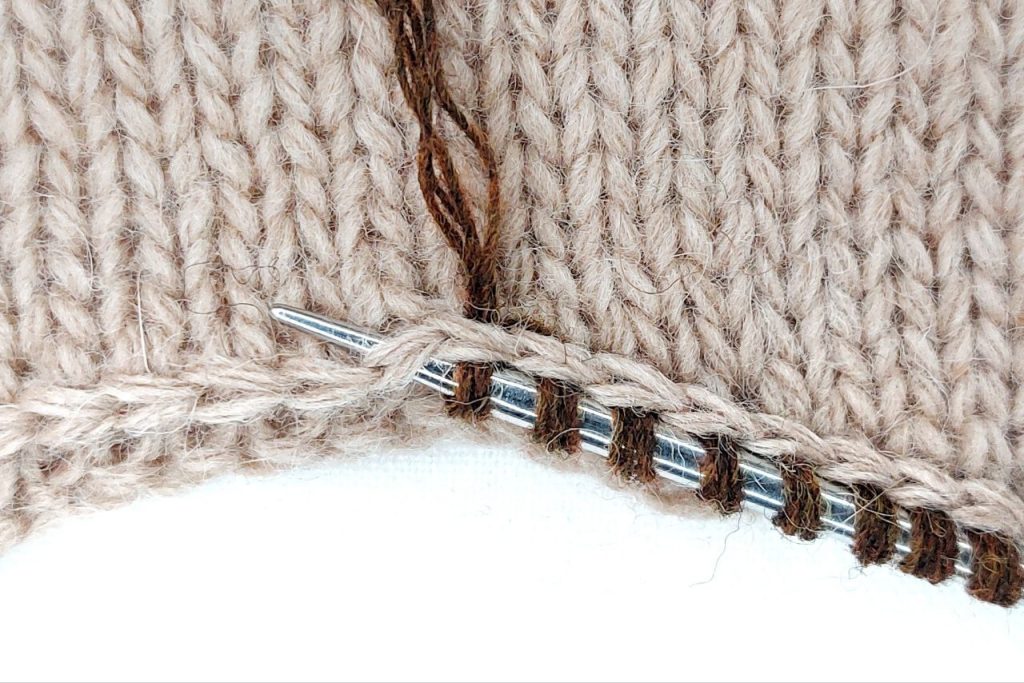
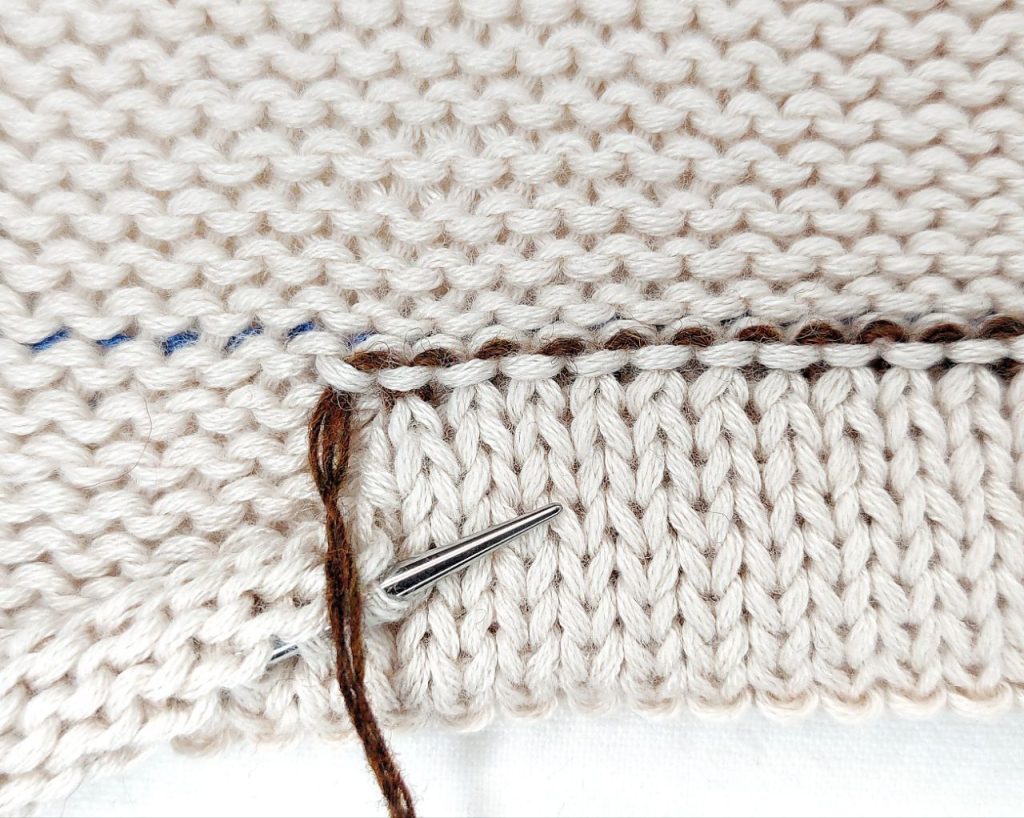
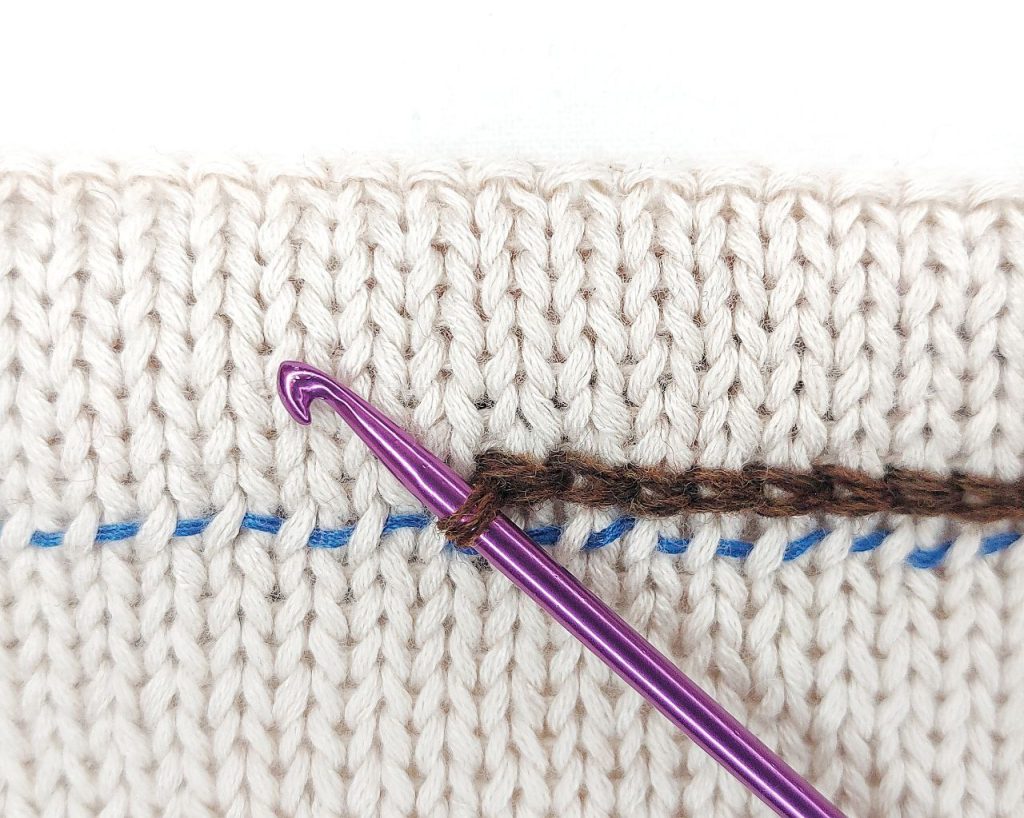
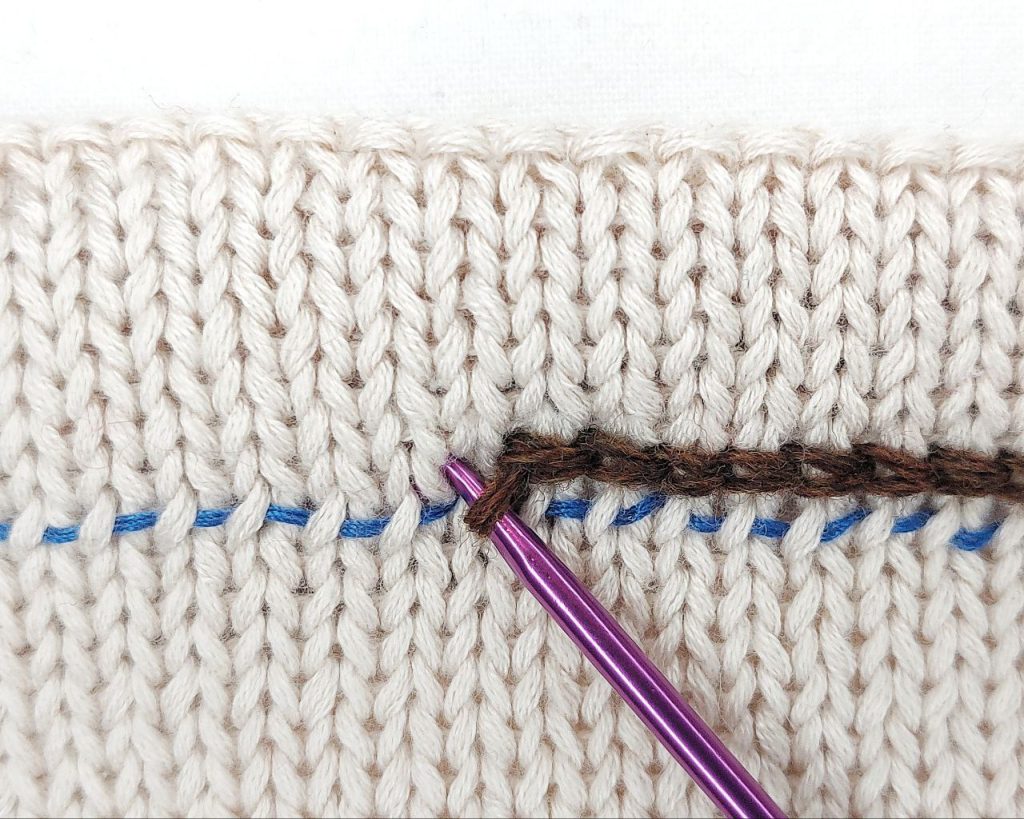
Joining and Binding Off Round: knit 2 together, *knit 2 together, pass the first stitch over the second on the right needle, and drop it off. Repeat from * to the end of the round. At last, join the binding off in the round: cut the working yarn, pull it through the last stitch, then through the two loops of the first stitch, and back through the last stitch in the opposite direction. Hide the yarn tail inside the double ribbing.
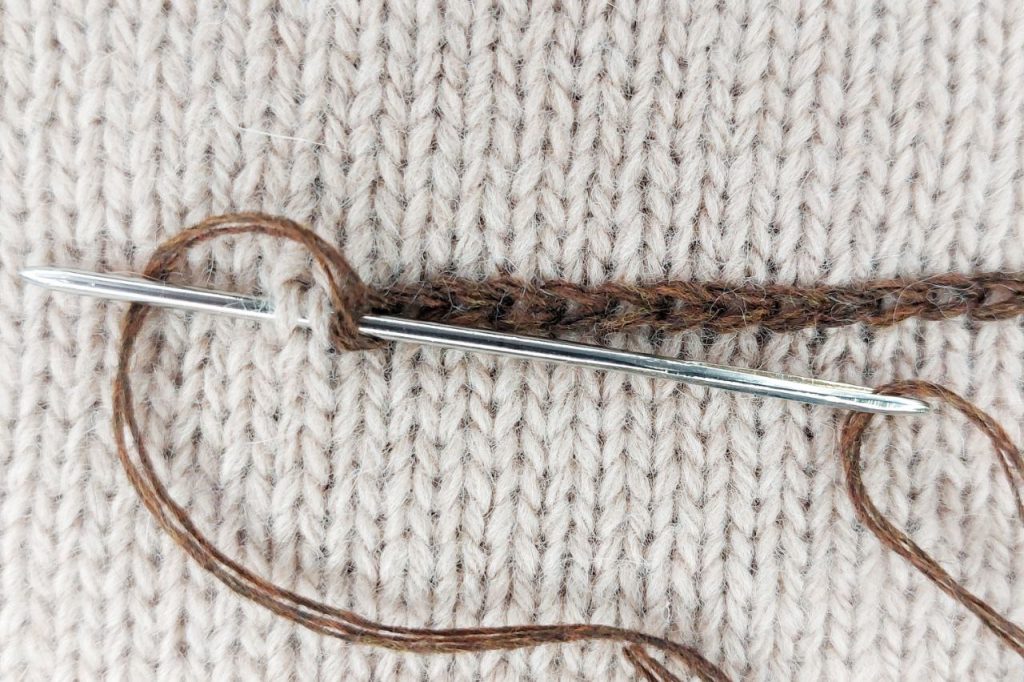
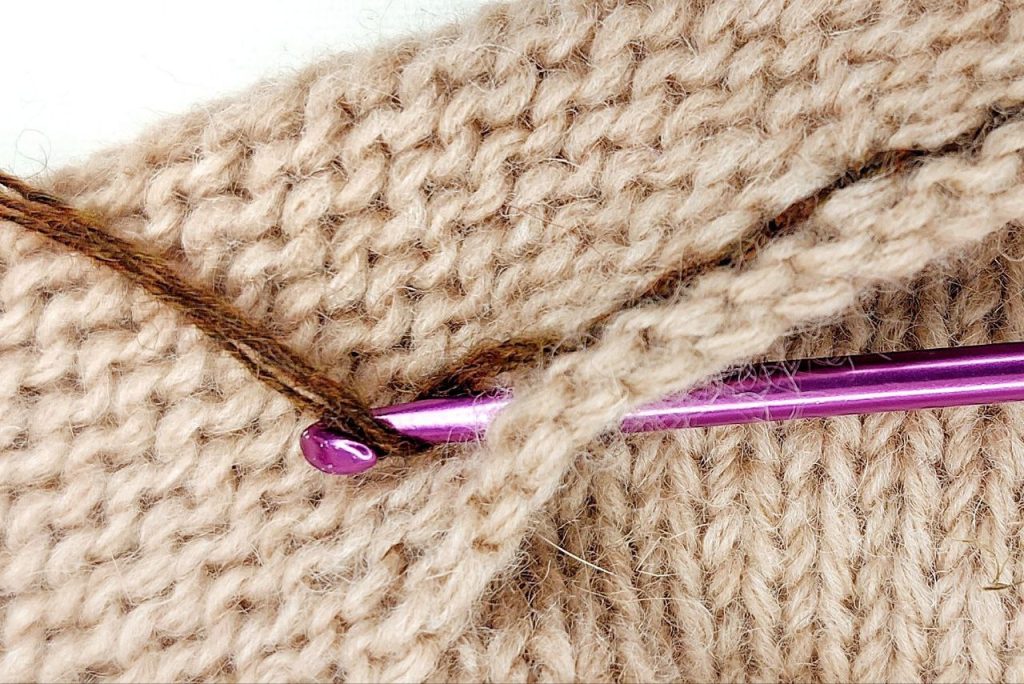
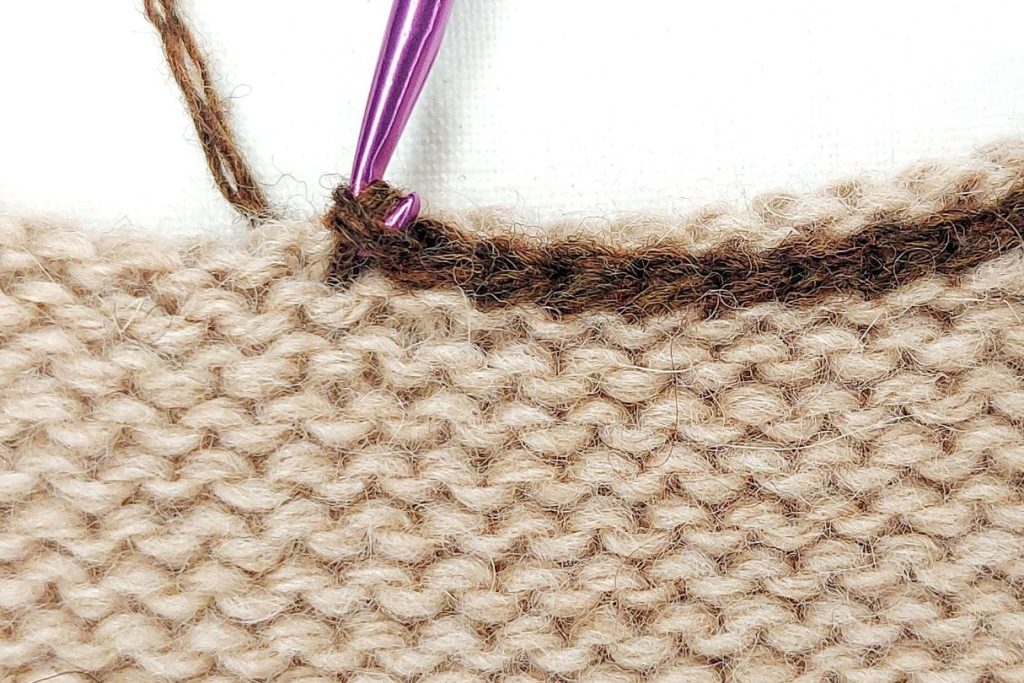
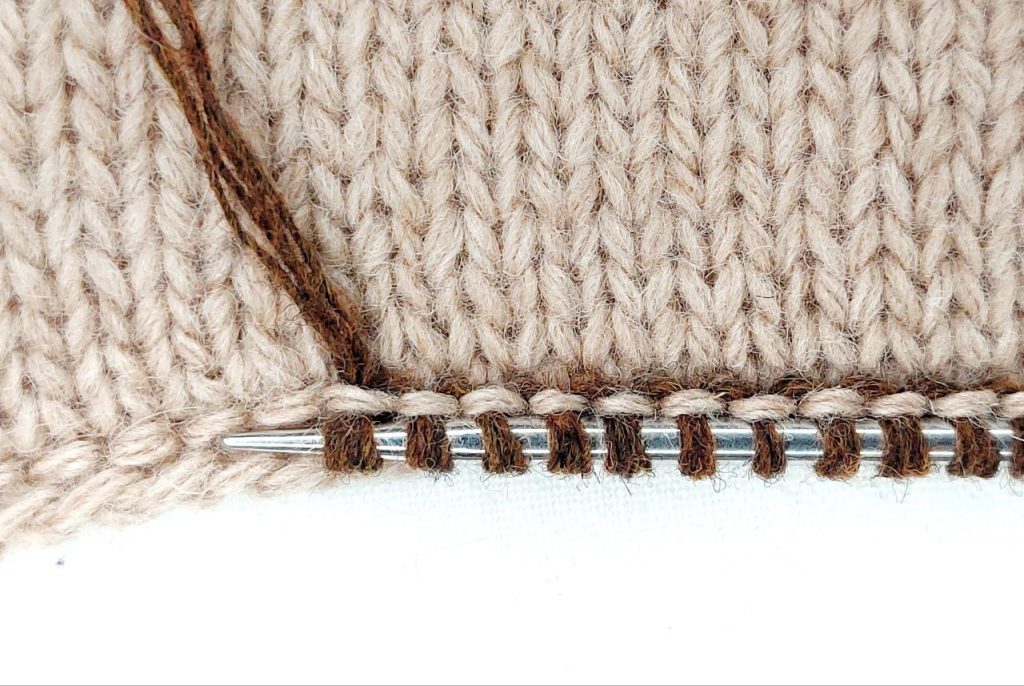
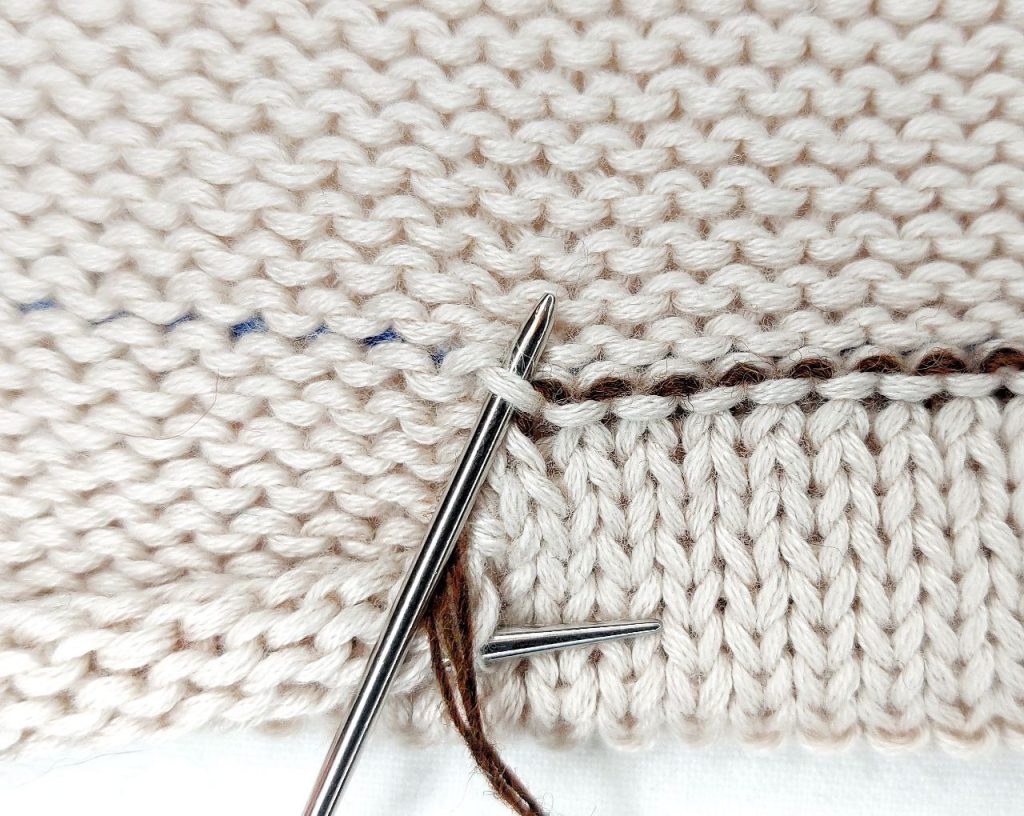
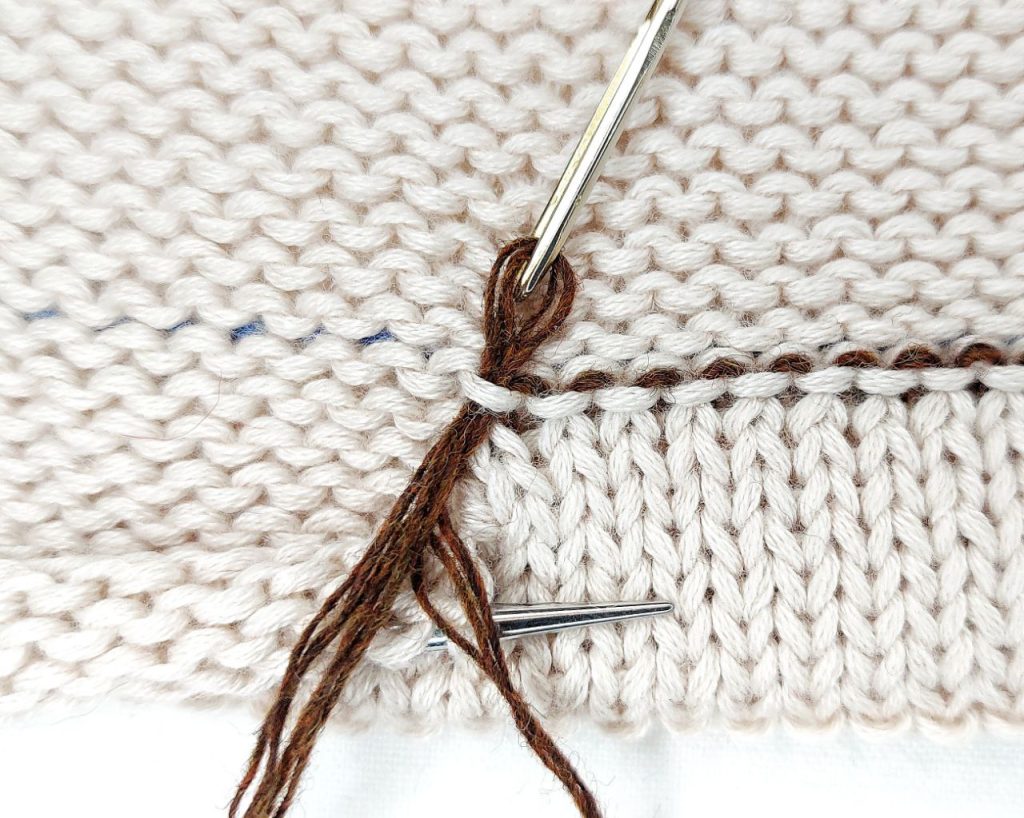
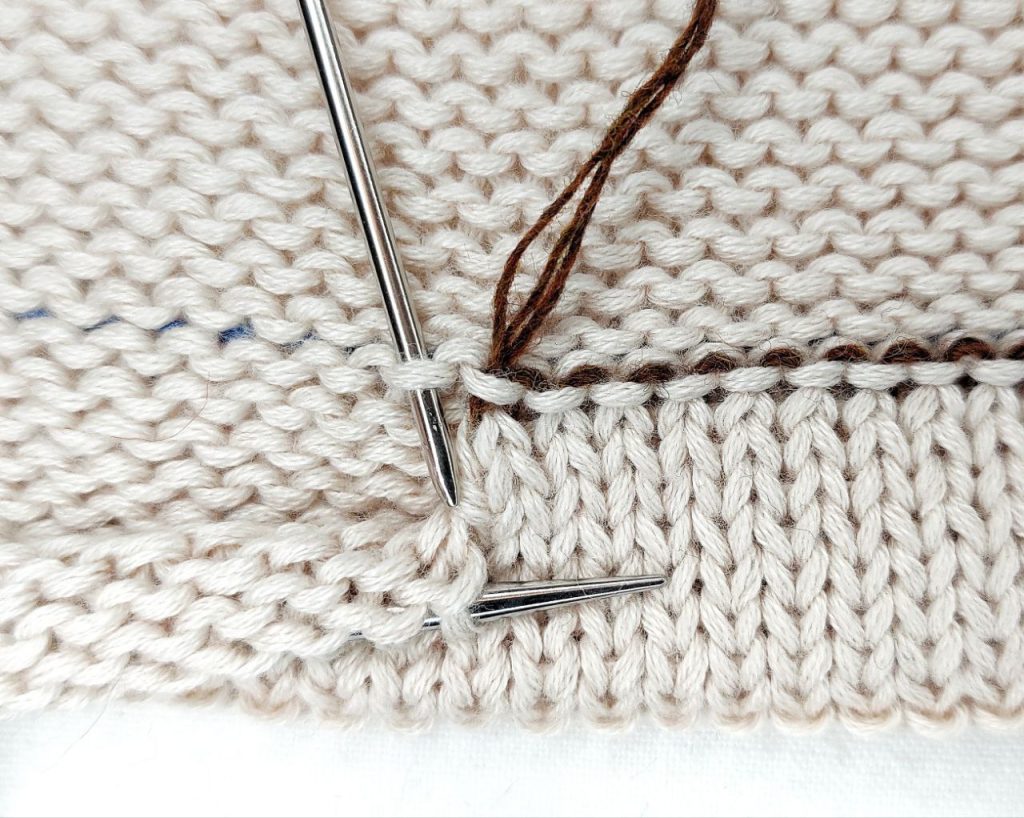
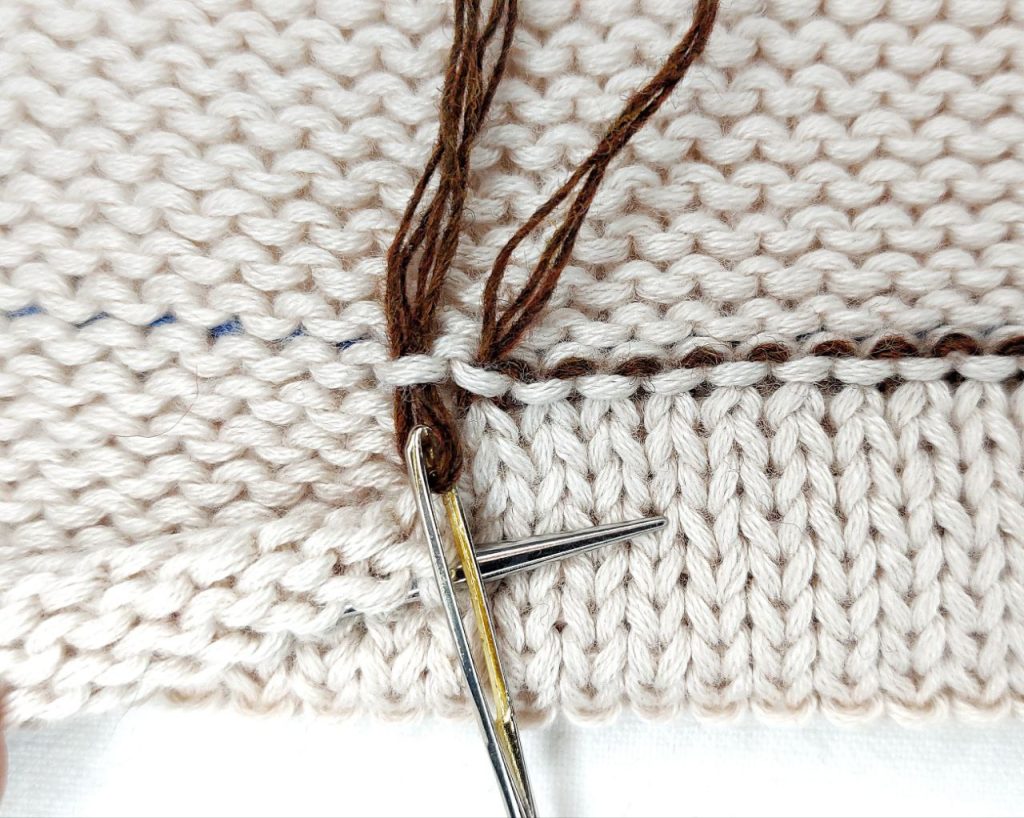
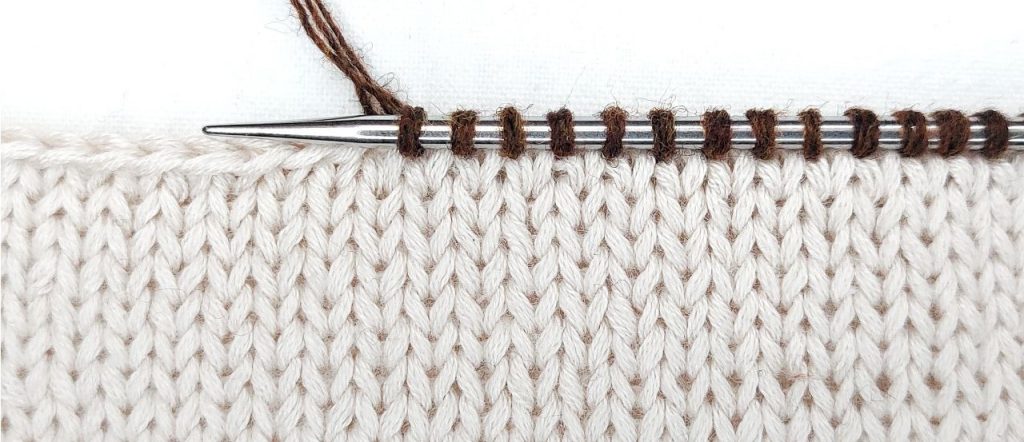
For an elastic edge, join the two sections first, then bind off using a yarn needle and stem stitch or a backstitch method.
The edge of the ribbing will be maximally elastic if you choose the tubular bind-off method for the joining of the two sections. Read more about fabric edge and tubular bind-off here.
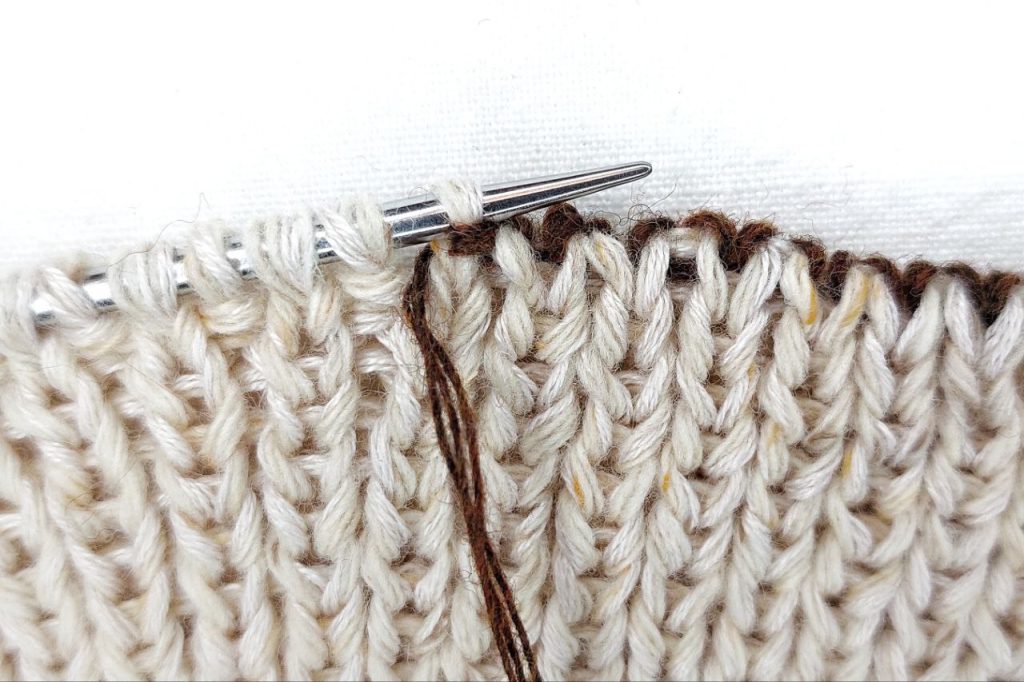
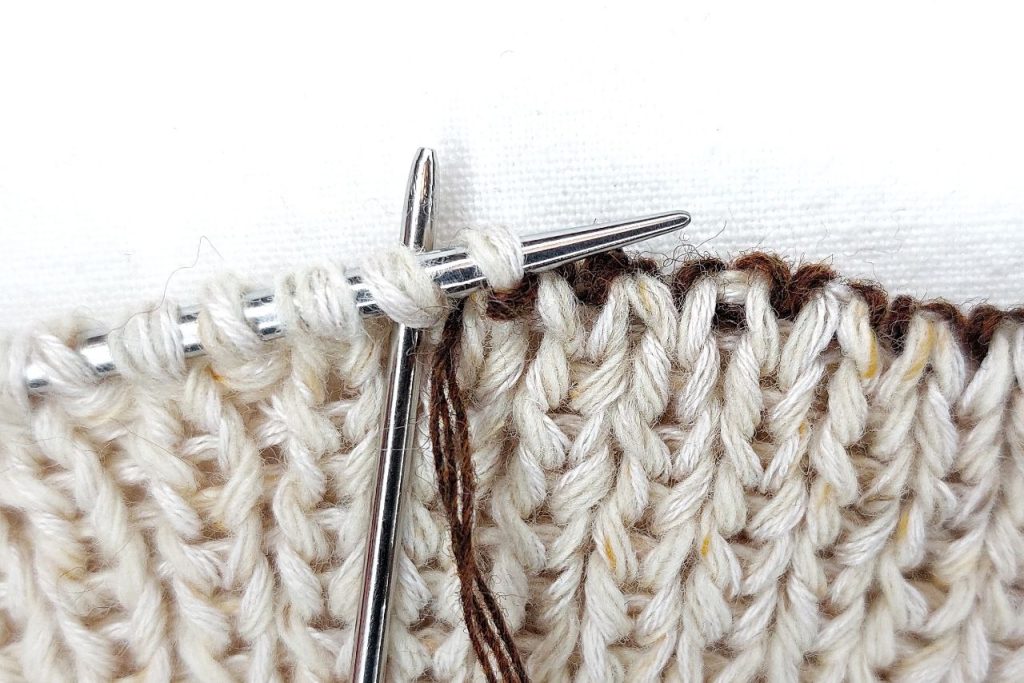
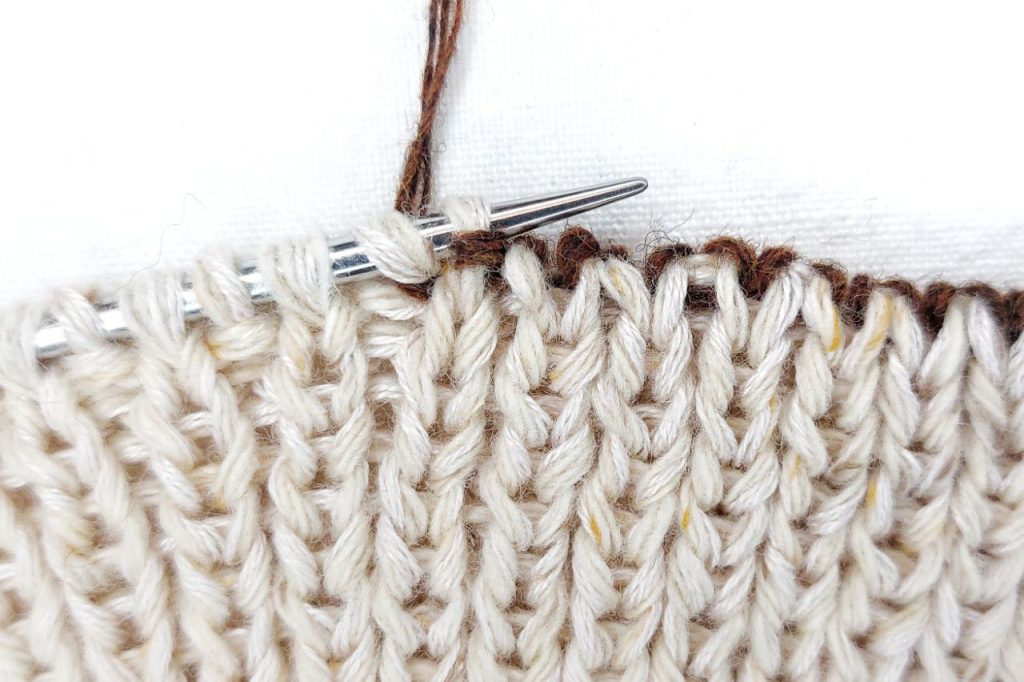
If you want to separate the front section of the double ribbing from the main garment with a horizontal line of purl stitches while performing the Stitch Doubling Row/Round, replace the knit stitches with purl stitches. In this case, I also recommend using purl stitches to join the two sections of the ribbing (including when binding off).
(right side of the garment)
(wrong side of the garment)
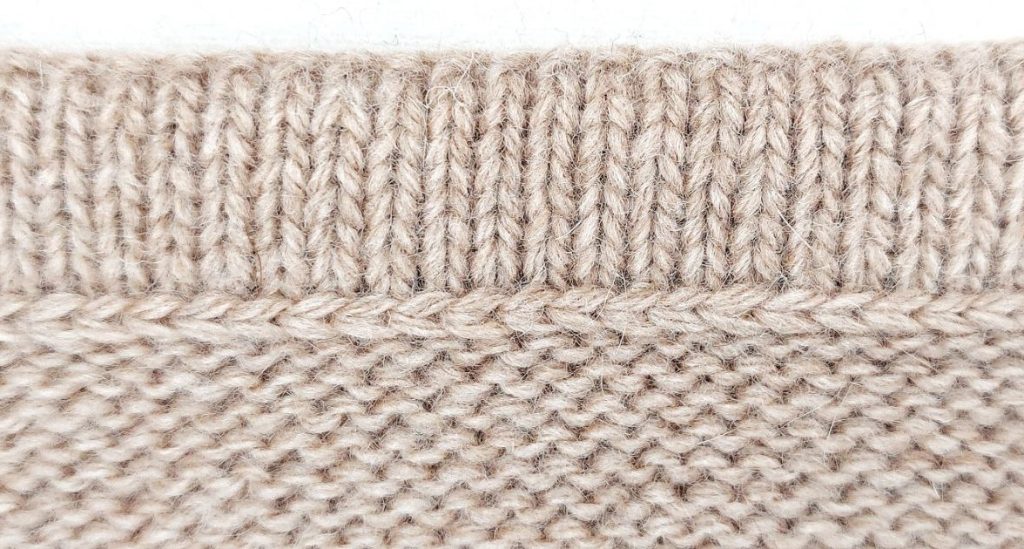
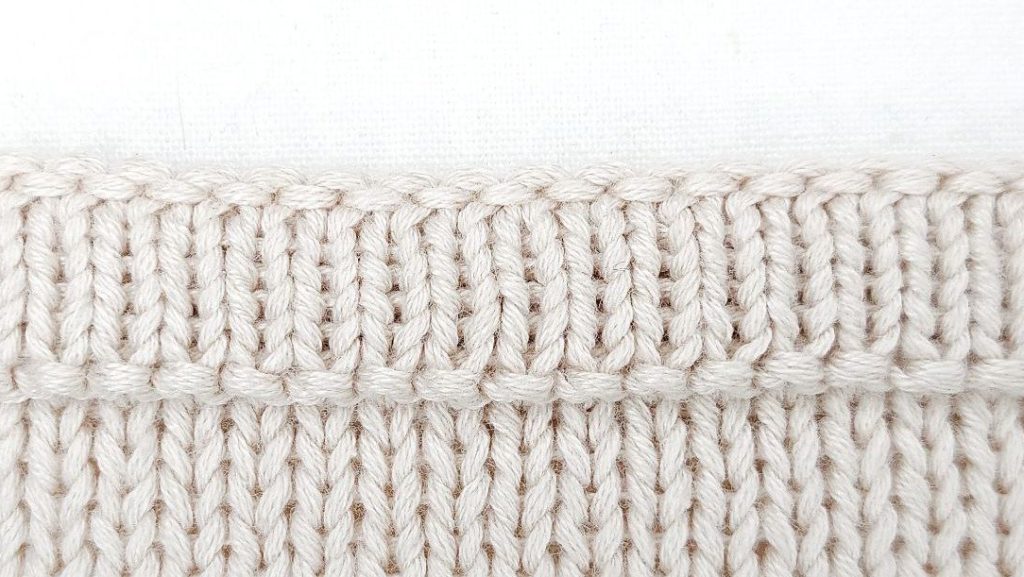
If you want to separate the back section of the double ribbing from the main garment with a horizontal line of purl stitches while performing the Back Sections Shaping Row/Round, replace the stitches as follows:
– Back Sections Shaping Row (Double Ribbing Worked Flat, WS): selvage stitch, *slip 1 with yarn in front, purl 1 twisted. Repeat from * to the end, the last stitch is selvage;
– Back Sections Shaping Round (Double Ribbing in the Round): *knit 1 twisted, slip 1 with yarn in back. Repeat from * to the end of the round.
In this case, the double ribbing will not be separated from the main garment on the right side, and you can join the two sections or bind off the stitches in any way.
(right side of the garment)
(wrong side of the garment)
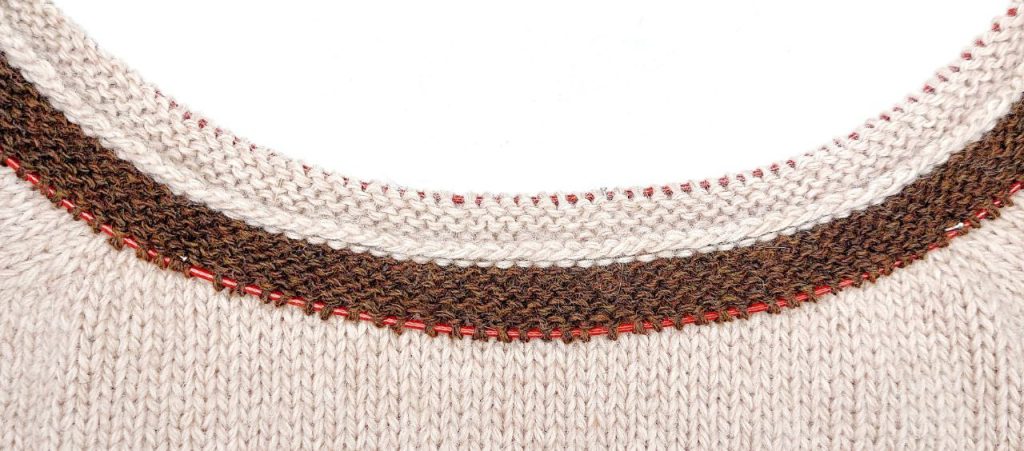
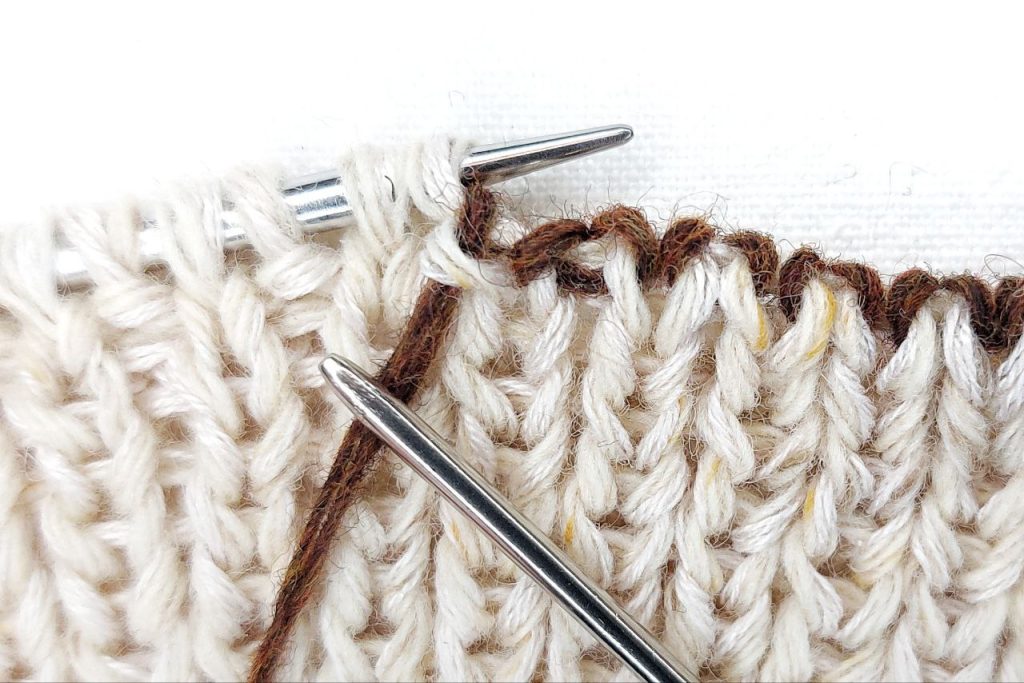
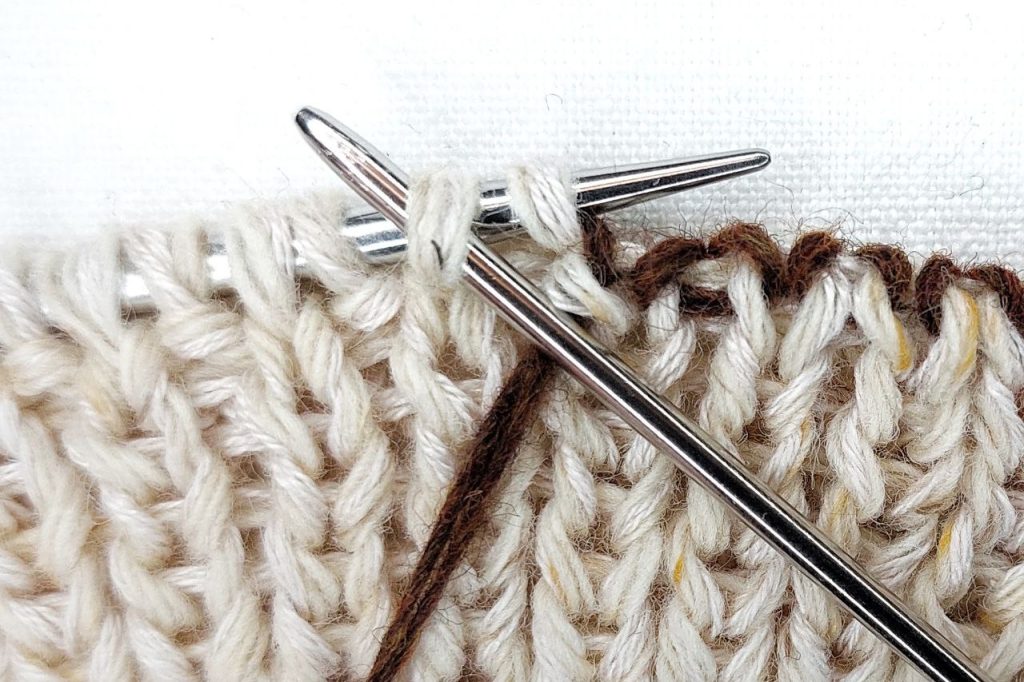
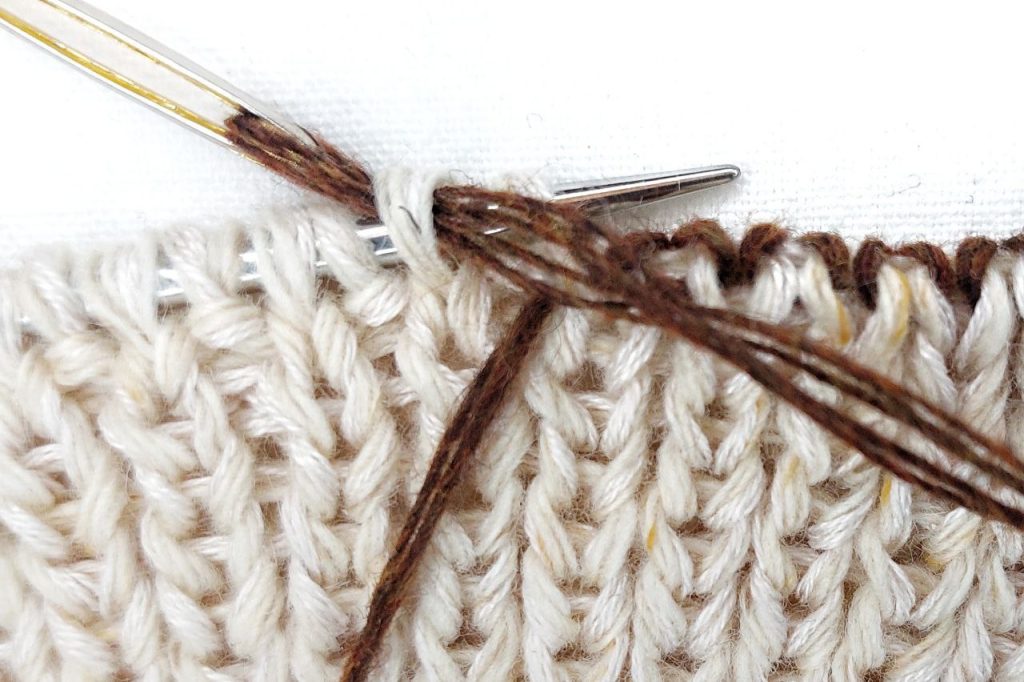
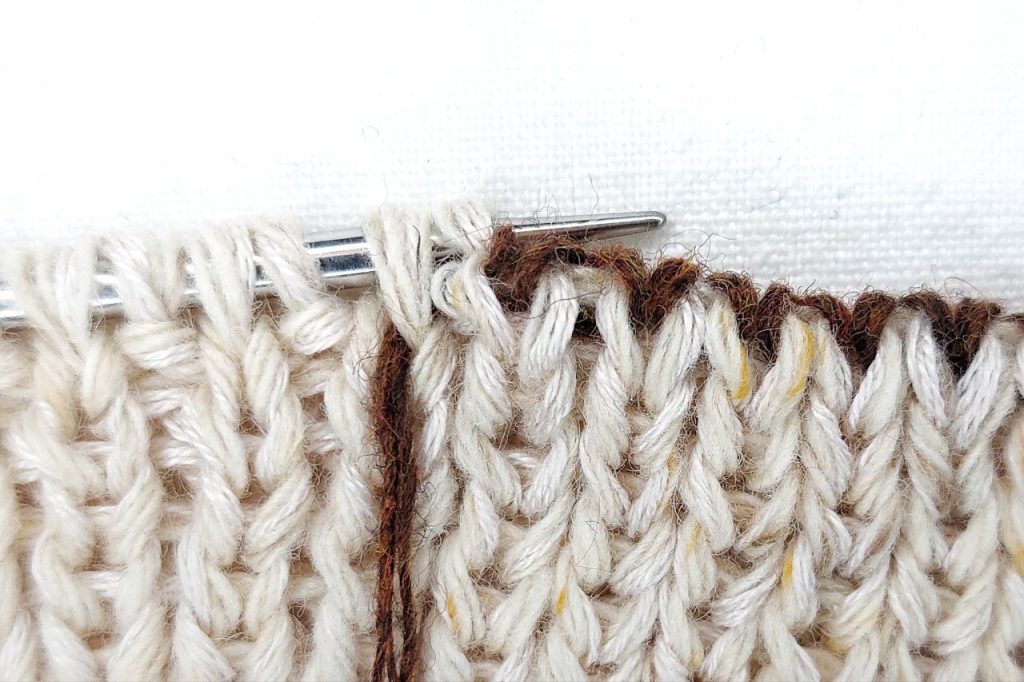
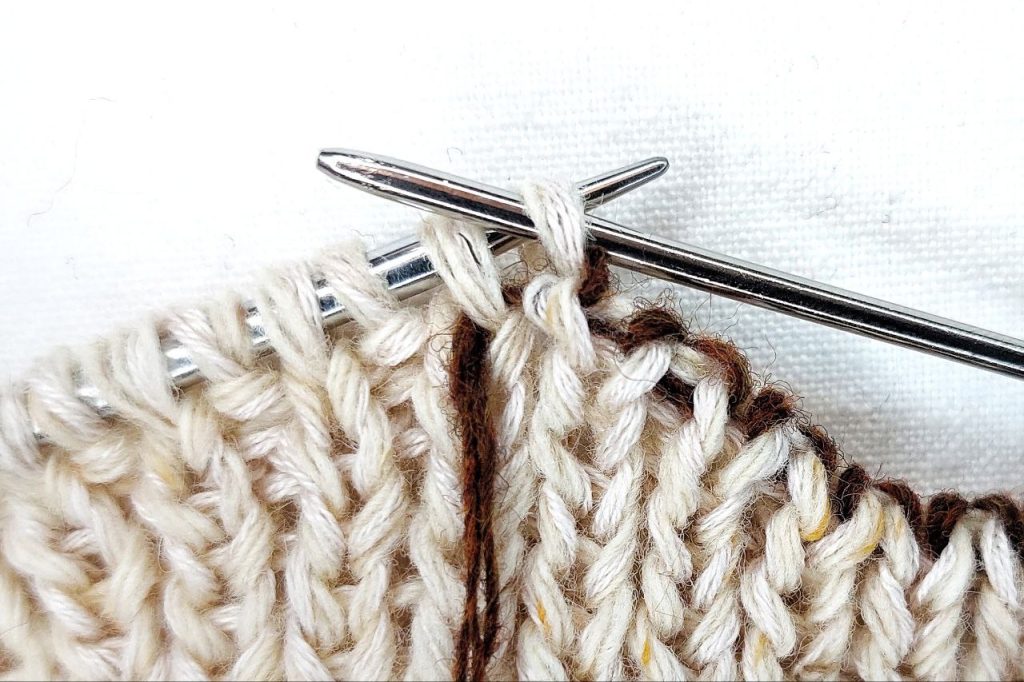
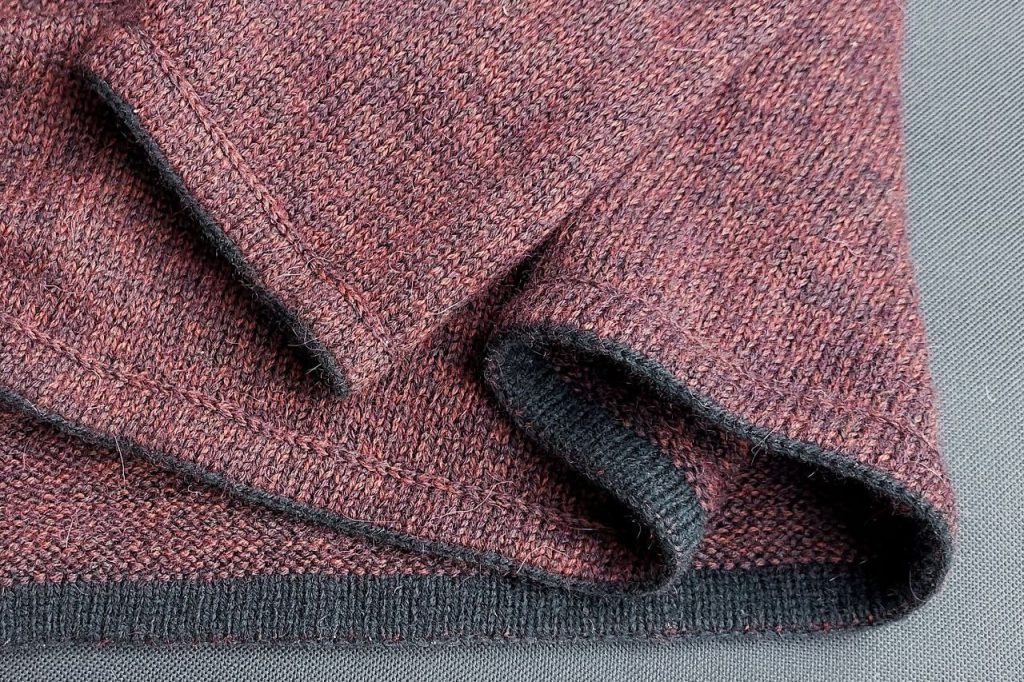
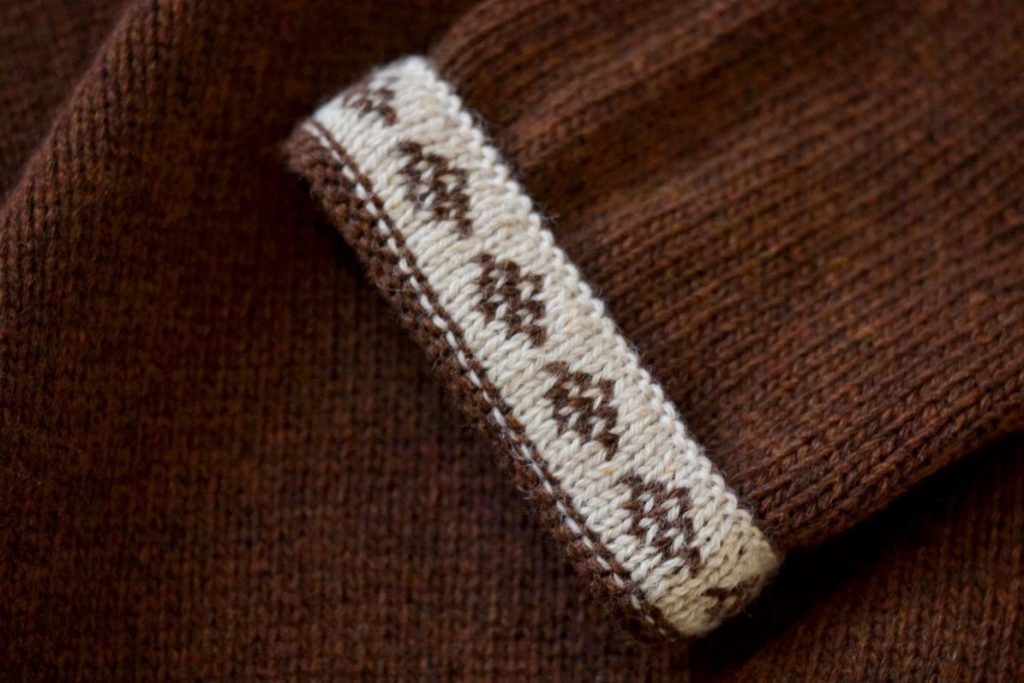
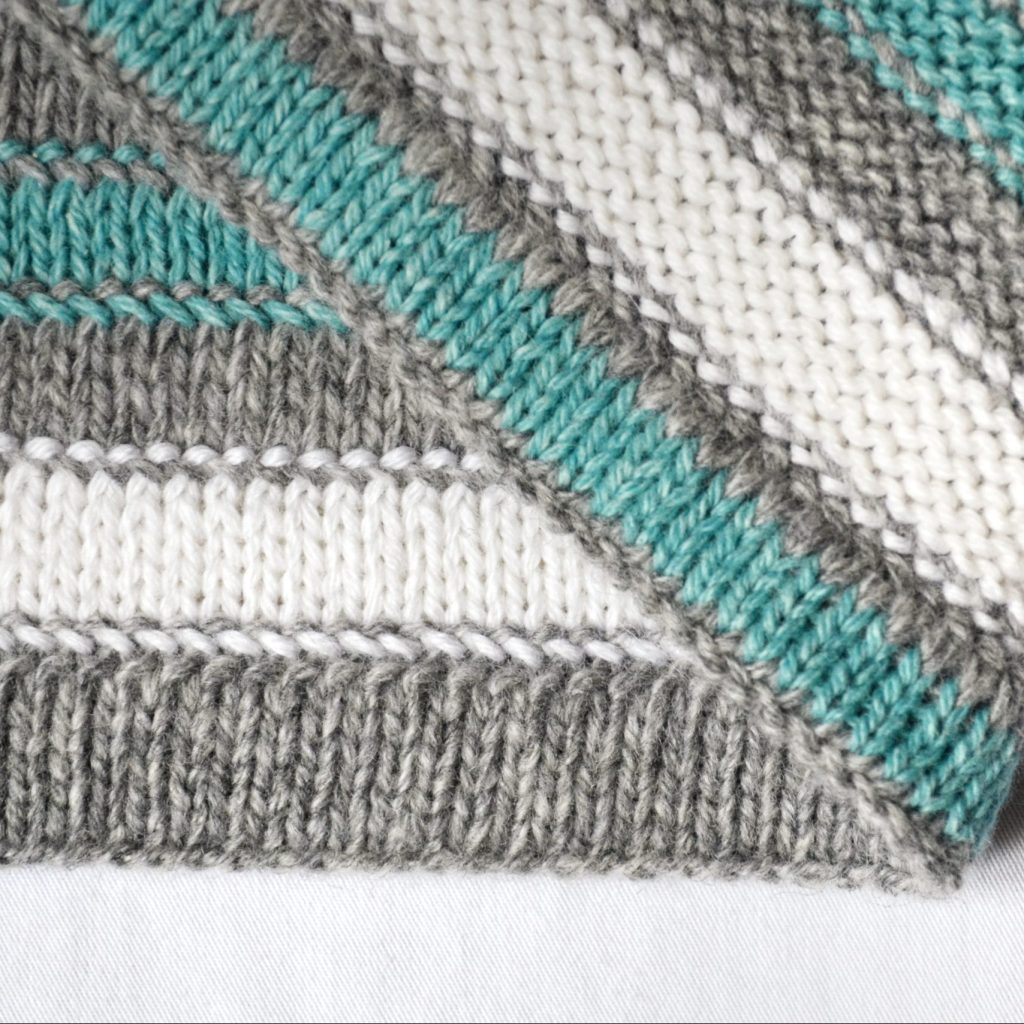
Double ribbing can also serve as a decorative element. You can knit sections in different colors or add separation lines for emphasis.
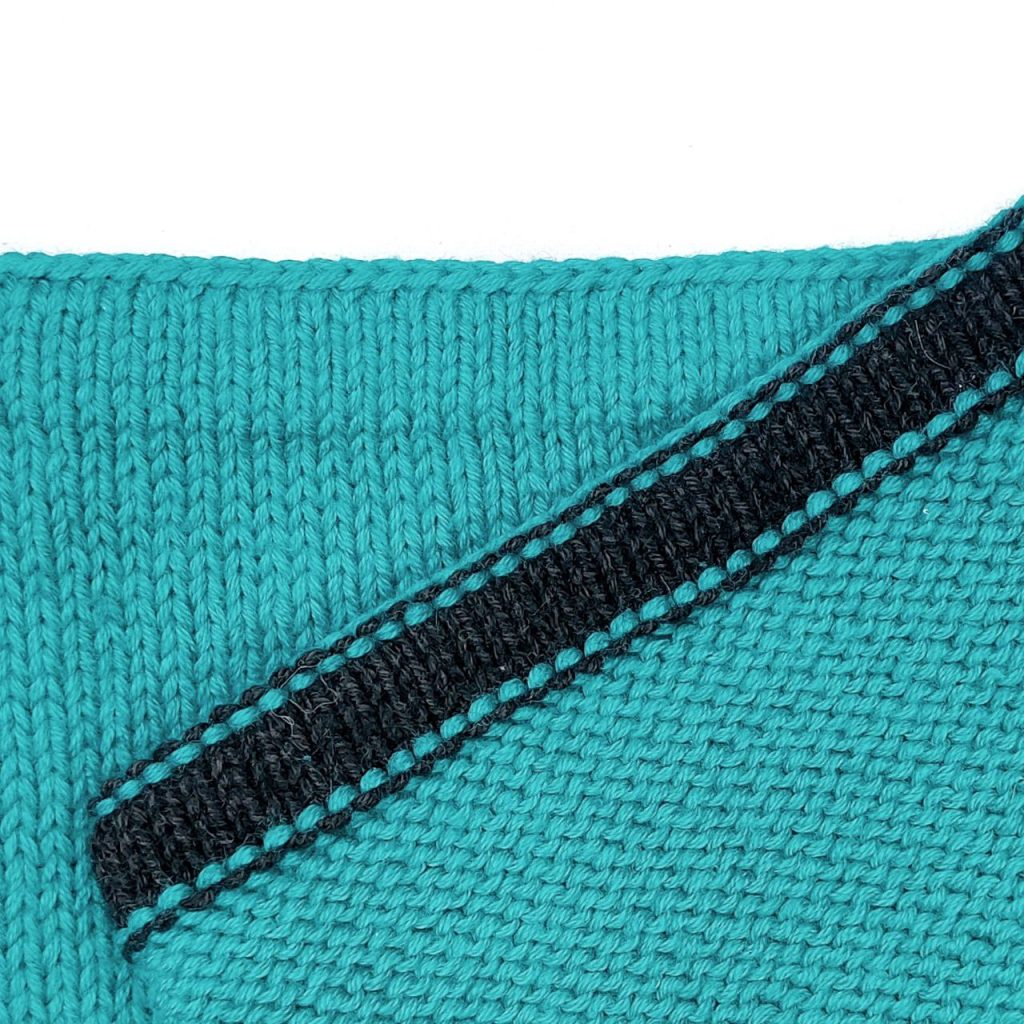
Let’s call the color of the front section of the double ribbing the main color (MC), and the color of the back section the contrast color (CC).
Double Ribbing in the Round
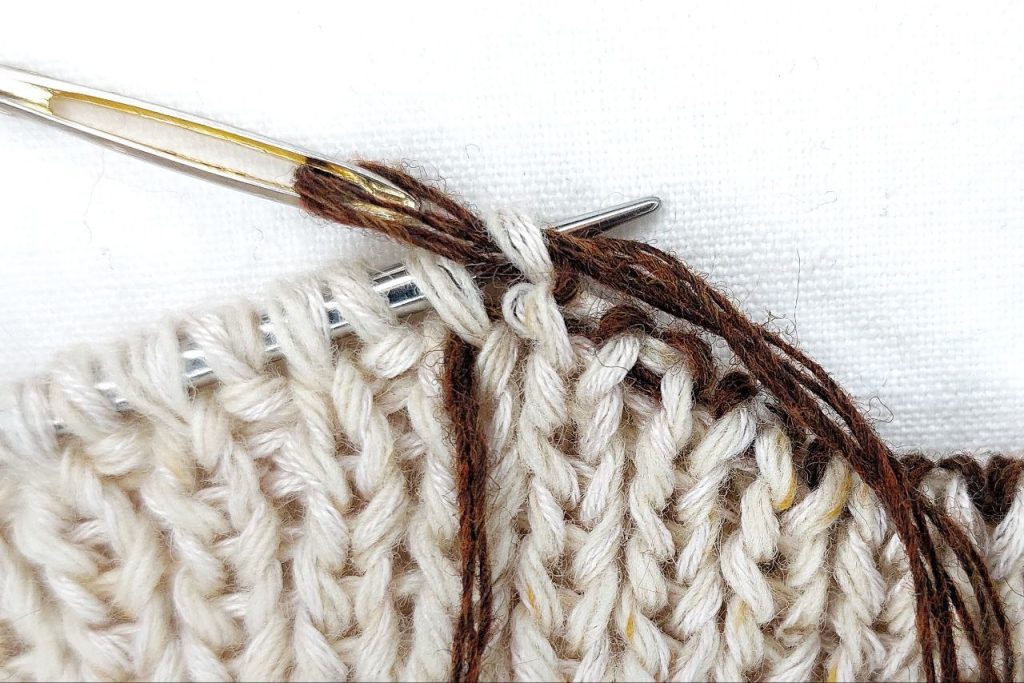
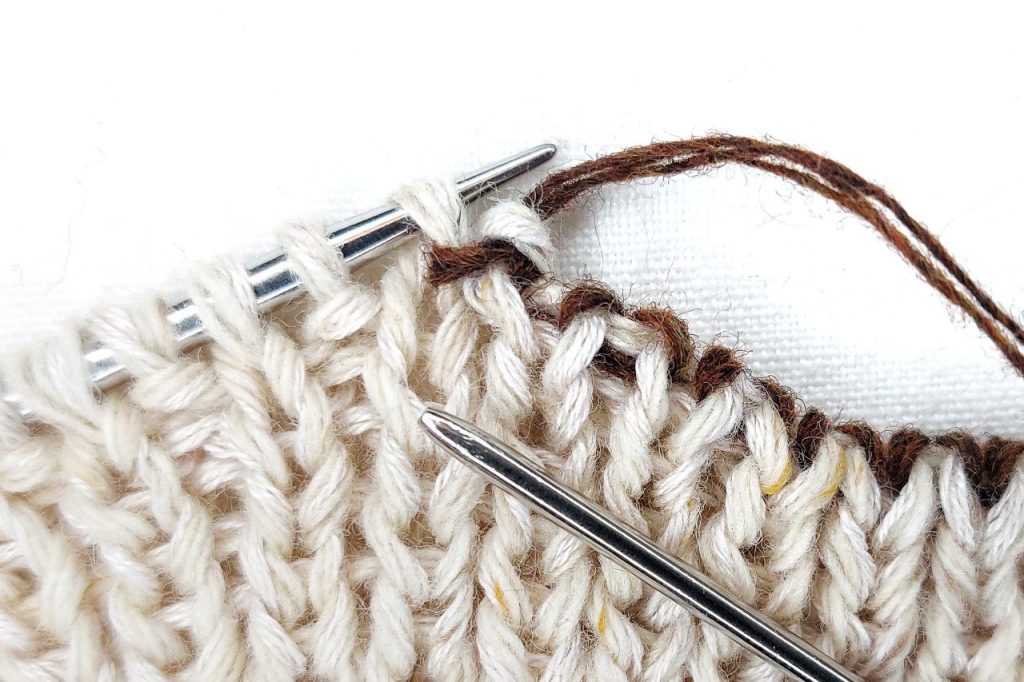
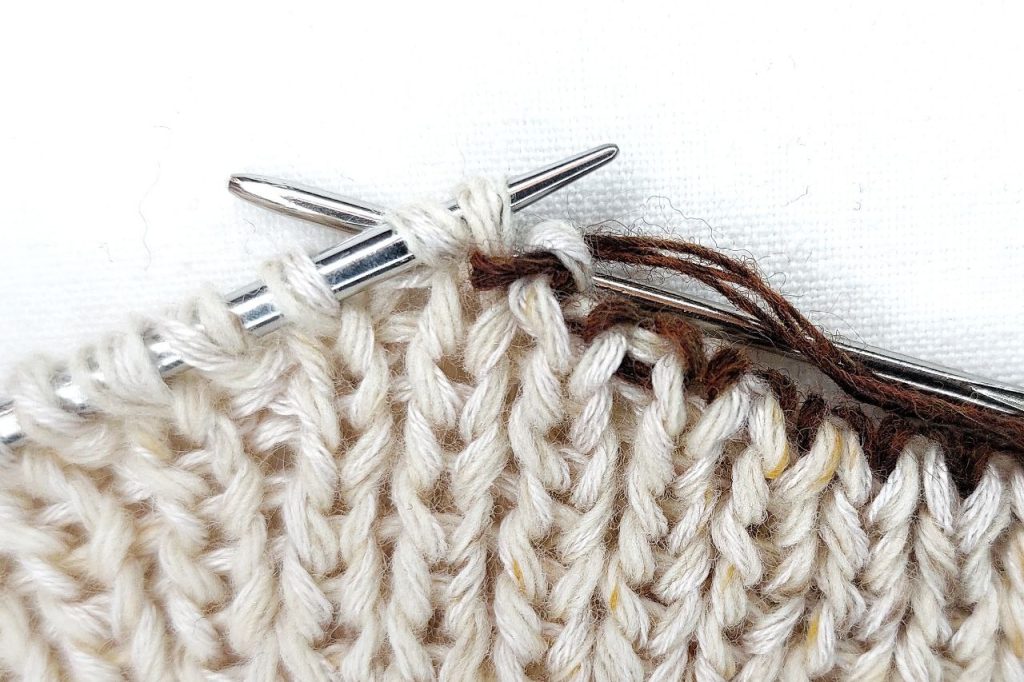
Work the Stitch Doubling Round in MC, and the Back Sections Shaping Round in CC. Then, work the odd rounds of the Main Double Ribbing Pattern in MC, and the even rounds in CC. The joining of the two sections or binding off should be done in MC. While knitting in one color, the other color remains on the side of the work it corresponds to (MC on the right side of the garment, CC on the wrong side).
Double Ribbing Worked Flat
Adjustments to the technique are necessary. You will need double-pointed knitting needles. During the process, you should alternately work the rows for the front and back sections of the ribbing without turning the work.
Stitch Doubling Row (RS, MC): selvage stitch, *YO, knit 1. Repeat from * to the end, the last stitch is selvage.
Do NOT turn the work to the wrong side;
instead, slide the stitches back to the beginning of the row.
Back Sections Shaping Row (RS, CC): slip selvage stitch, *purl 1 twisted, slip 1 with yarn in back. Repeat from * to the selvage stitch, and slip it.
Having completed two rows on RS, turn the work to WS.
Main Double Ribbing Pattern (2 stitches, 4 rows).
Row 1 (WS, MC): selvage stitch, *purl 1, slip 1 with yarn in back. Repeat from * to the end, the last stitch is selvage.
Do NOT turn the work to RS, slide the stitches back to the beginning of the row.
Row 2 (WS, CC): slip selvage stitch, *slip 1 with yarn in front, knit 1. Repeat from * to the end, the last stitch is selvage.
Having completed two rows on WS, turn the work to RS.
Row 3 (RS, MC): selvage stitch, *slip 1 with yarn in front, knit 1. Repeat from * to the end, the last stitch is selvage.
Do NOT turn the work to WS, slide the stitches back to the beginning of the row.
Row 4 (RS, CC): slip selvage stitch, *purl 1, slip 1 with yarn in back. Repeat from * to the end, the last stitch is selvage.
Having completed two rows on RS, turn the work to WS.
Repeat the Main Double Ribbing Pattern until the ribbing reaches the desired width.
Joining/binding off the work as you wish.
If you want to use the contrast color (CC) not only for knitting the back section of the ribbing but also to separate the ribbing from the main fabric, knit the last row of the main fabric in CC before starting the ribbing. In this case, it is also recommended to join the two sections of the ribbing or bind off the stitches in CC.
(you will need to select the desired subtitle language)
Double ribbing can also be incorporated into a pattern or used to embellish specific elements of a garment.


Read more about color stripes here (Instagram).
For instructions on adding internal color accents to double ribbing, refer to the YouTube video (you will need to select the desired subtitle language).