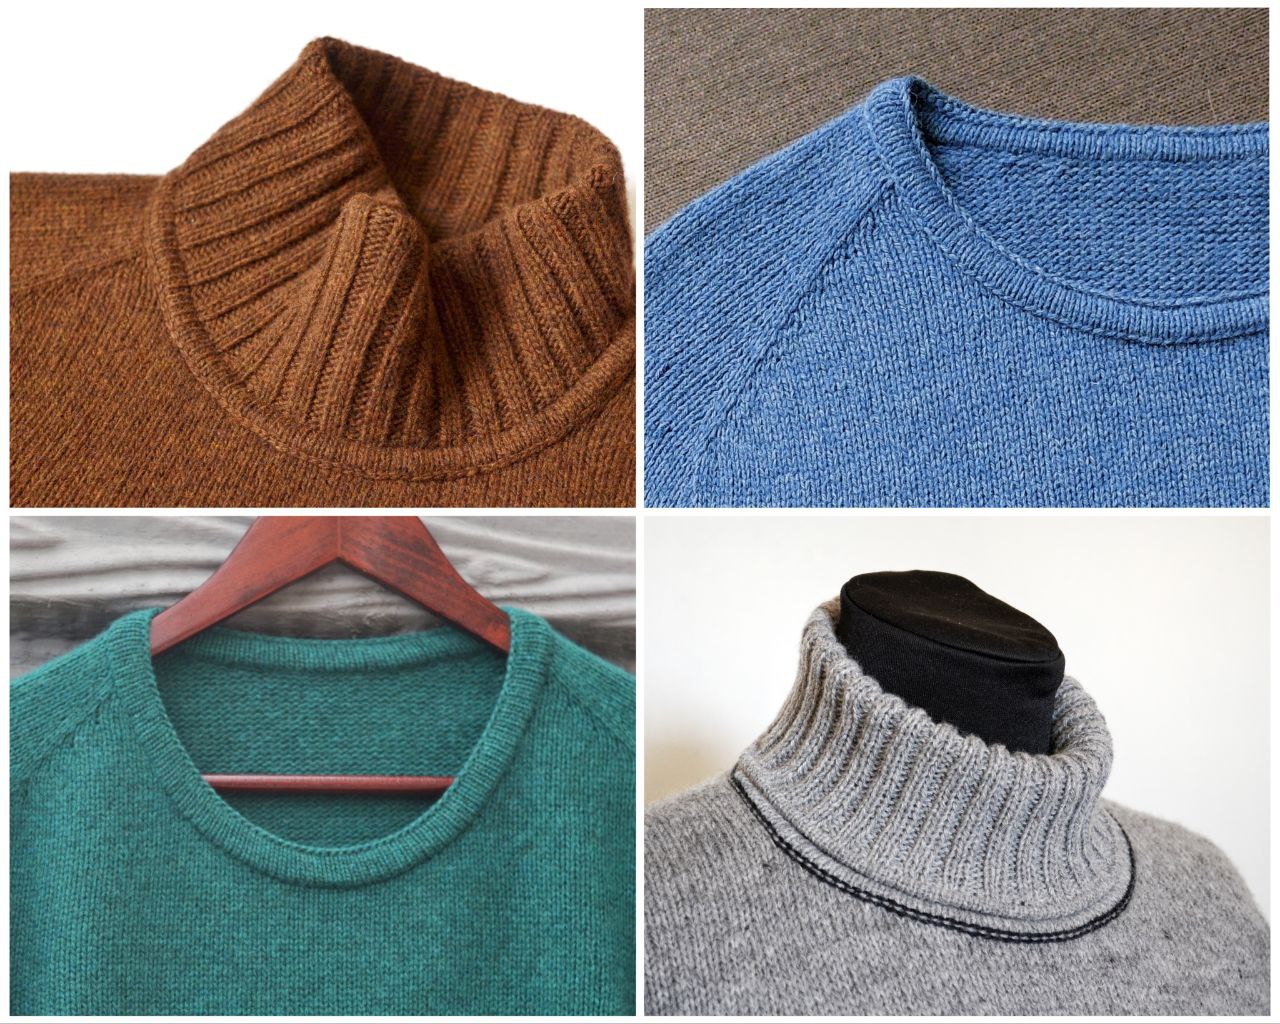
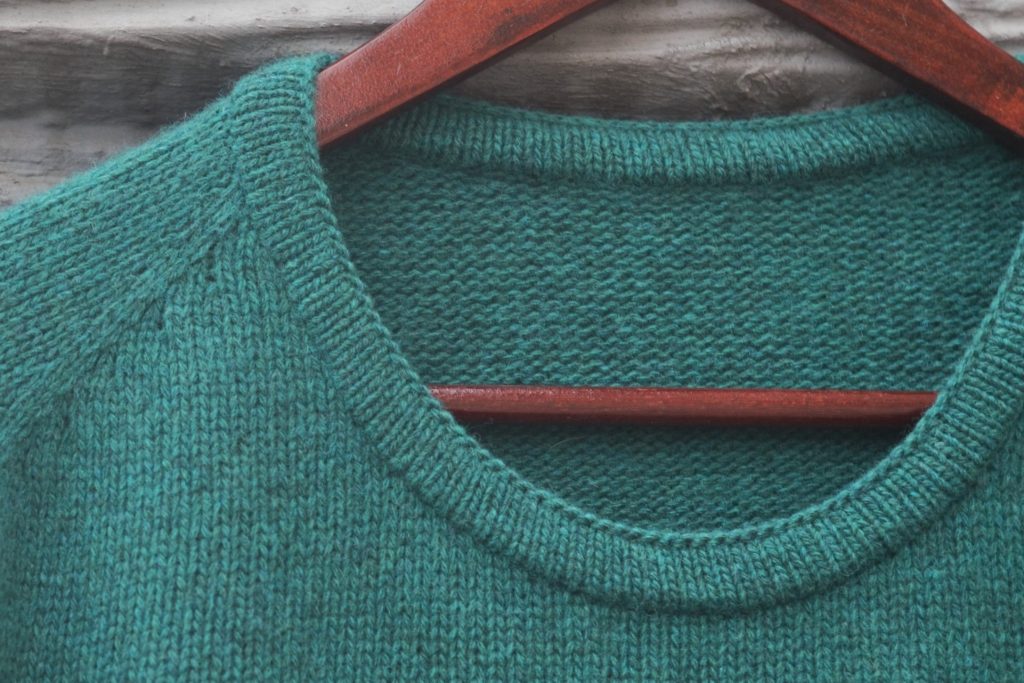
The neckline, like the shoulder seam lines, is the foundation on which the entire garment is built. In my opinion, these lines should be additionally reinforced if we want to preserve the garment’s appearance, prevent deformation, and enjoy wearing it for a long time.
Reinforcement of the neckline can be achieved with the cast-on or bind-off edge when we knit the garment with the neckline joined in the round (or with a closure). In this case, the neckline is shaped by working short rows.


If the neckline is not joined in the round, and it is shaped by increasing stitches (in top-down knitting) or decreasing stitches (in bottom-up knitting), the additional reinforcement can be provided by seams, such as a backstitch seam or a chain stitch.


Today, we will talk about the chain stitch.
The chain stitch as a base for creating a collar, single and double neckbands, and an imitation of backstitch seaming.
The chain stitch can be worked using a yarn needle or a crochet hook.
The chain stitch worked with a yarn needle is more elastic; when worked with a crochet hook, it is more stable.
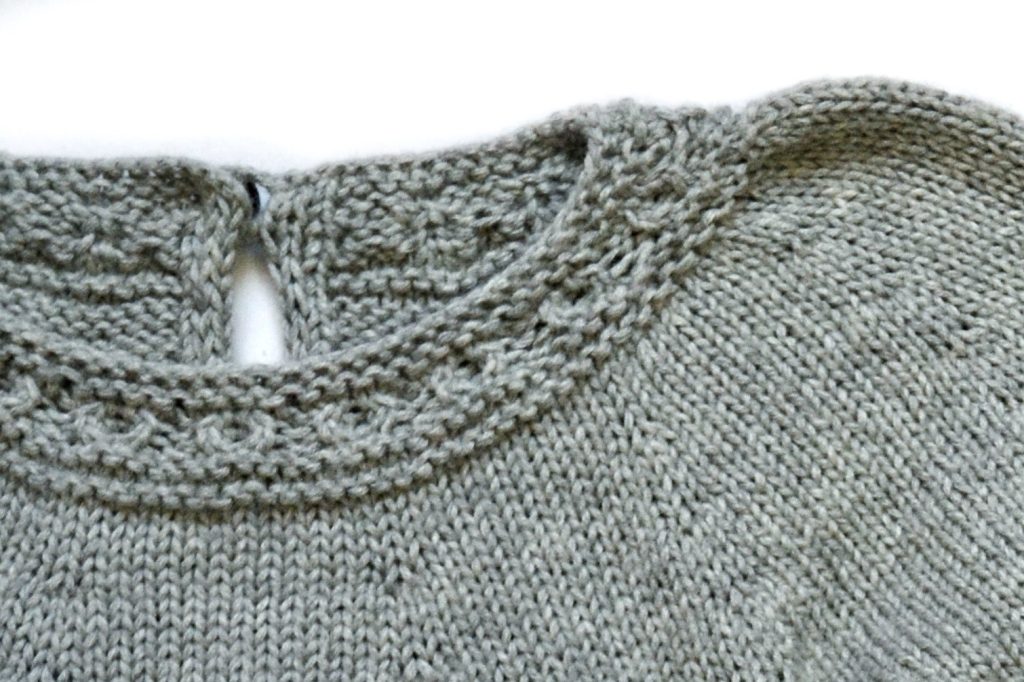
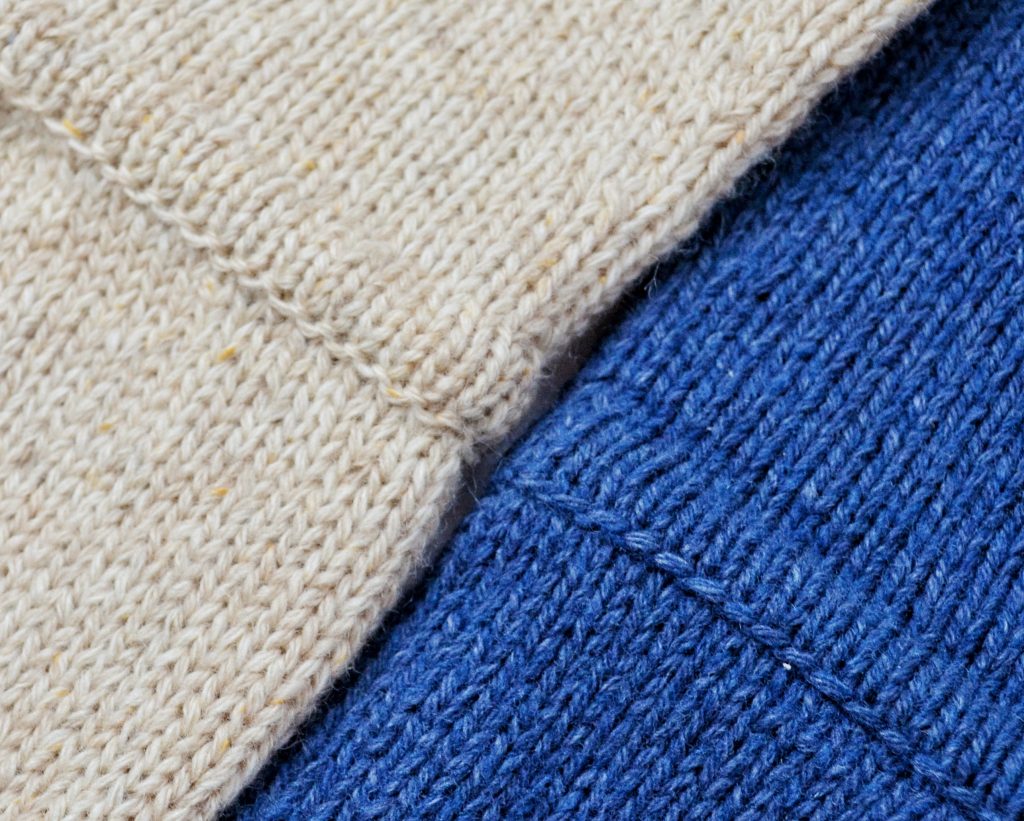
The front side of the chain stitch consists of double loops that look like links of a chain.
The back side of the chain stitch consists of single stitches (back bumps) that look like a backstitch seam.

worked with a crochet hook
worked with a yarn needle
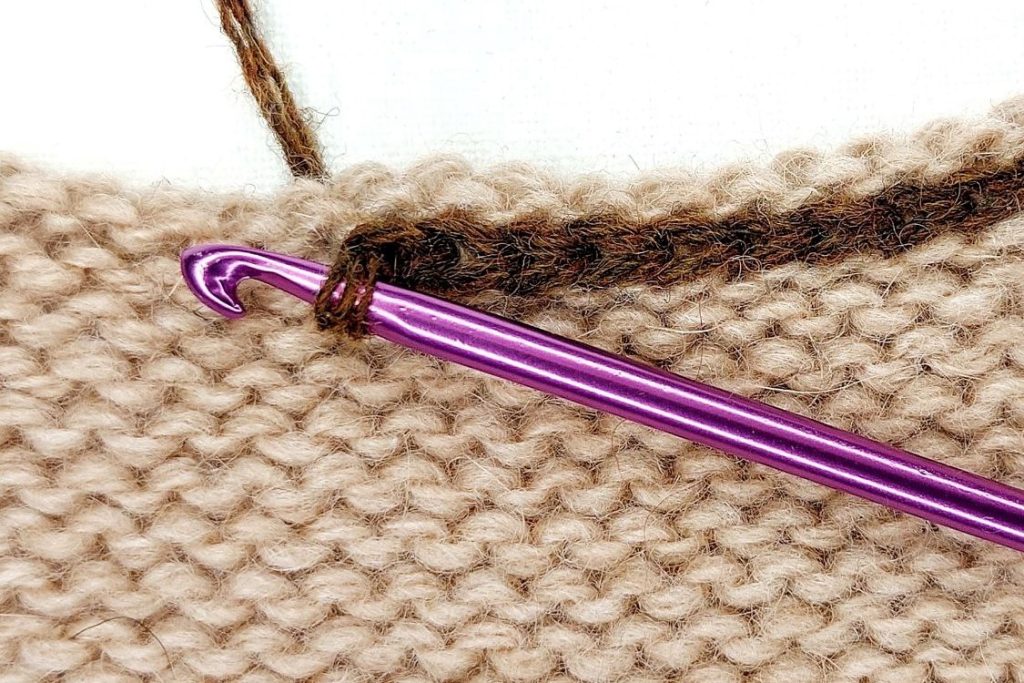
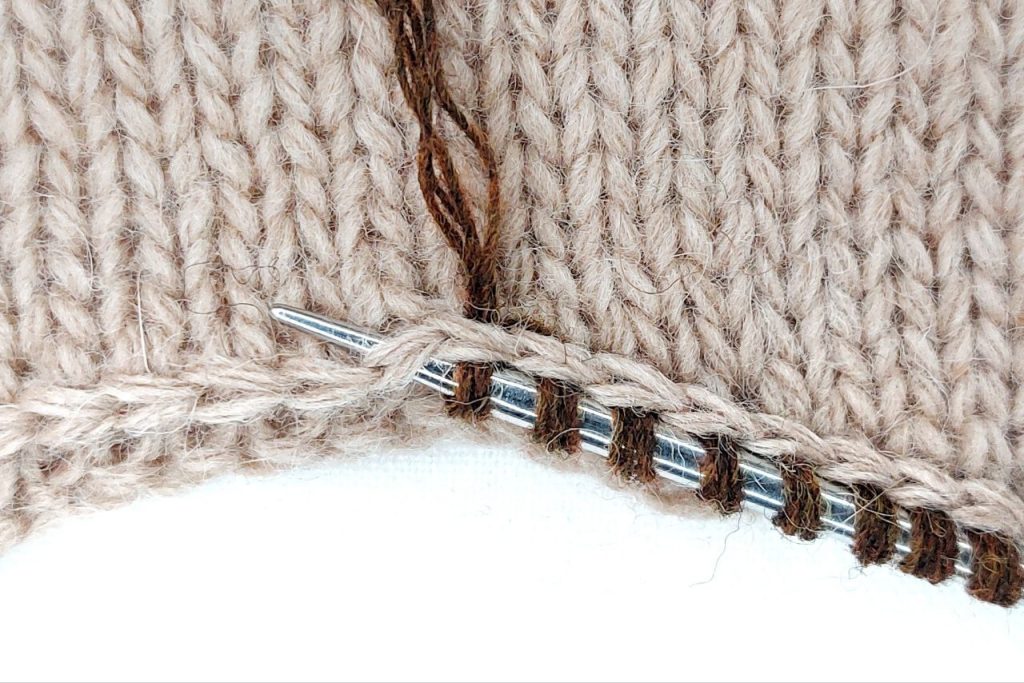
To reinforce the neckline, I recommend working the chain stitch along the edge using a crochet hook.
The stitches of the chain (from the front and/or back side) will serve as the foundation for picking up stitches for the neckband, collar, or the two parts of the neckline’s “pocket”.

based on a chain stitch

based on a chain stitch

based on a chain stitch
I usually choose the crochet hook size for the chain stitch according to the size of the knitting needles used for the garment. The yarn should not be thicker than the one used for the garment.
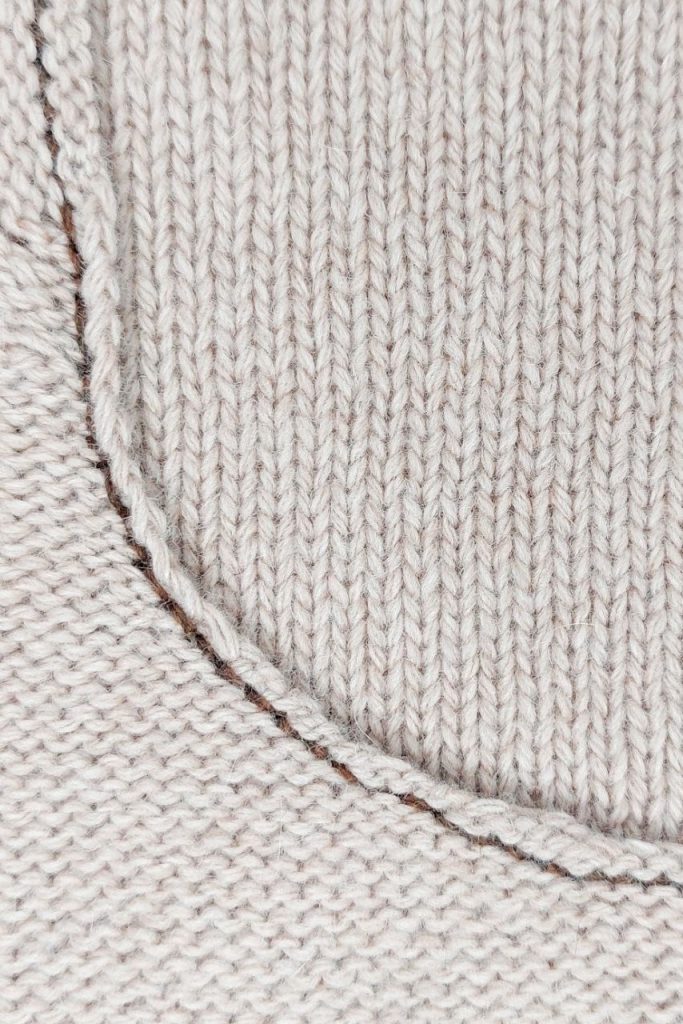
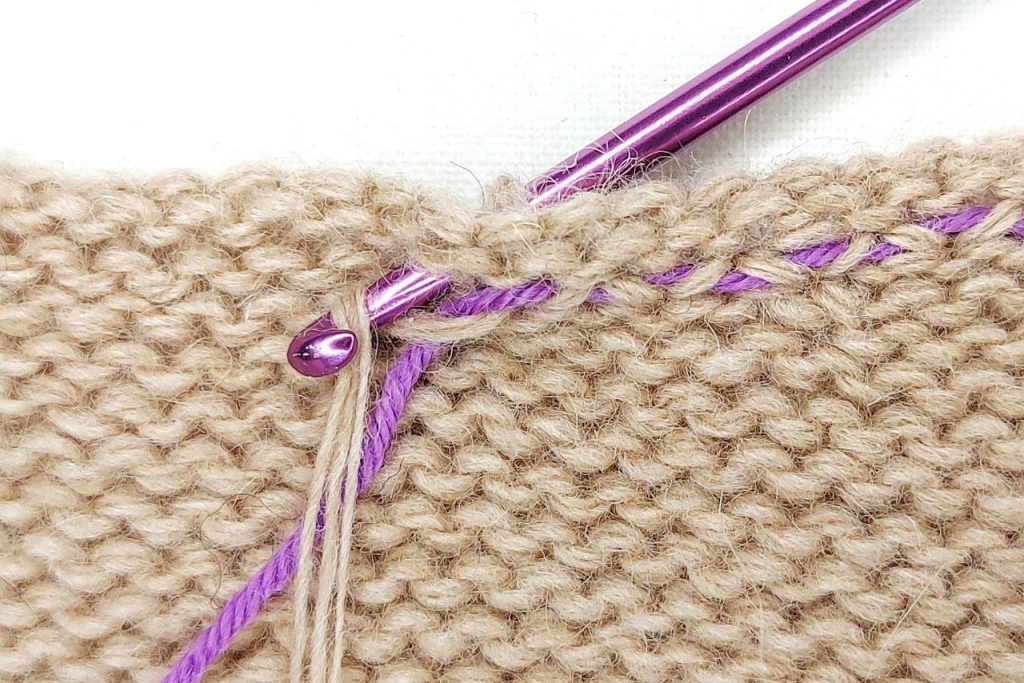
Work the chain stitch along the edge of the neckline, leaving 1-2 rows/stitches from the edge.
The chain stitch can be worked along the neckline either from the right or wrong side of the garment. The appearance of the joining neckline and the neckband/collar depends on which side the chain stitch is worked and how the stitches are picked up from it.
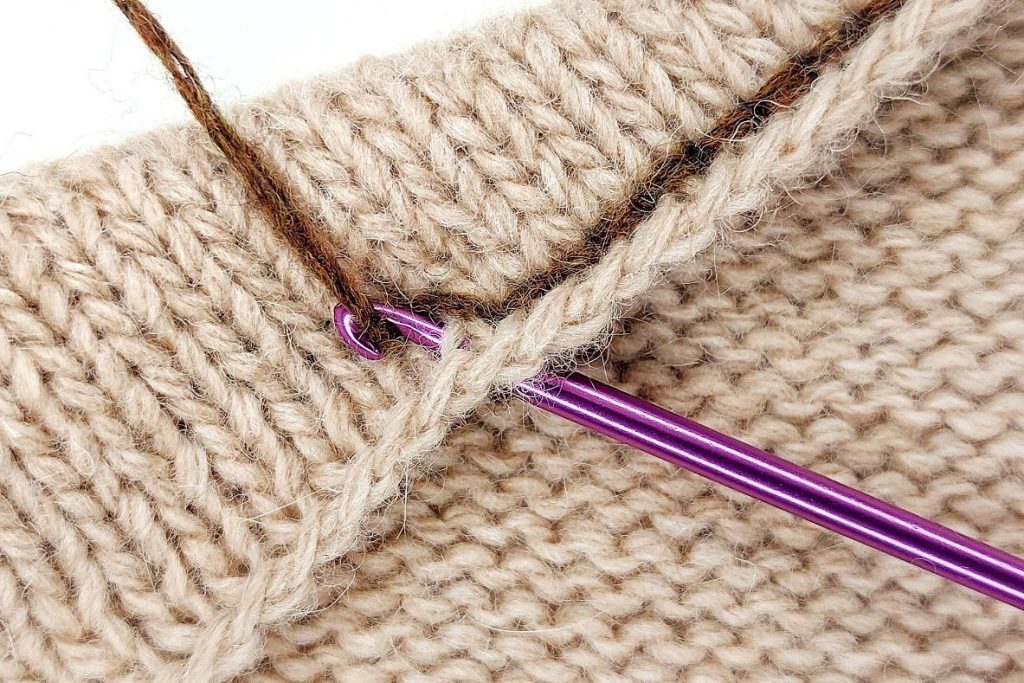
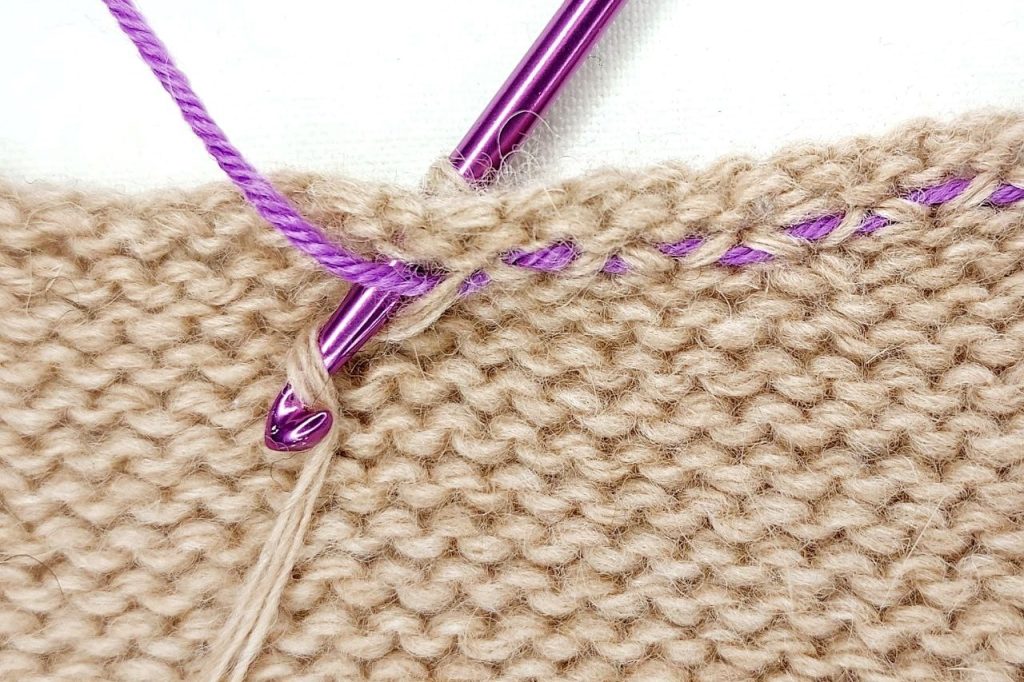
Working the chain stitch from the right side of the garment:
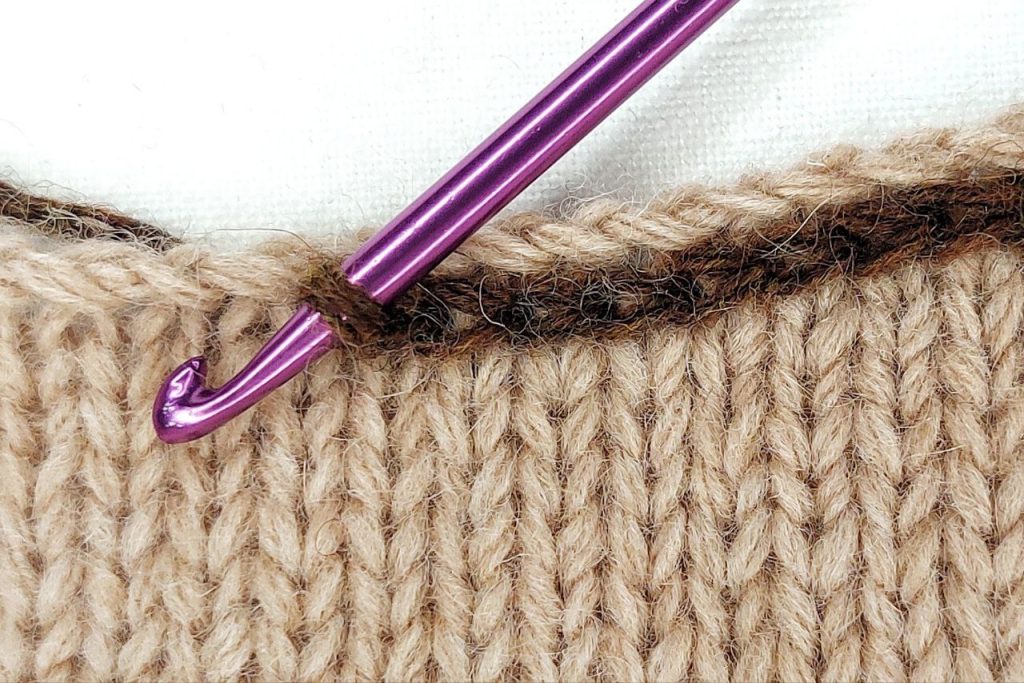
the crochet hook with one (working) chain stitch.
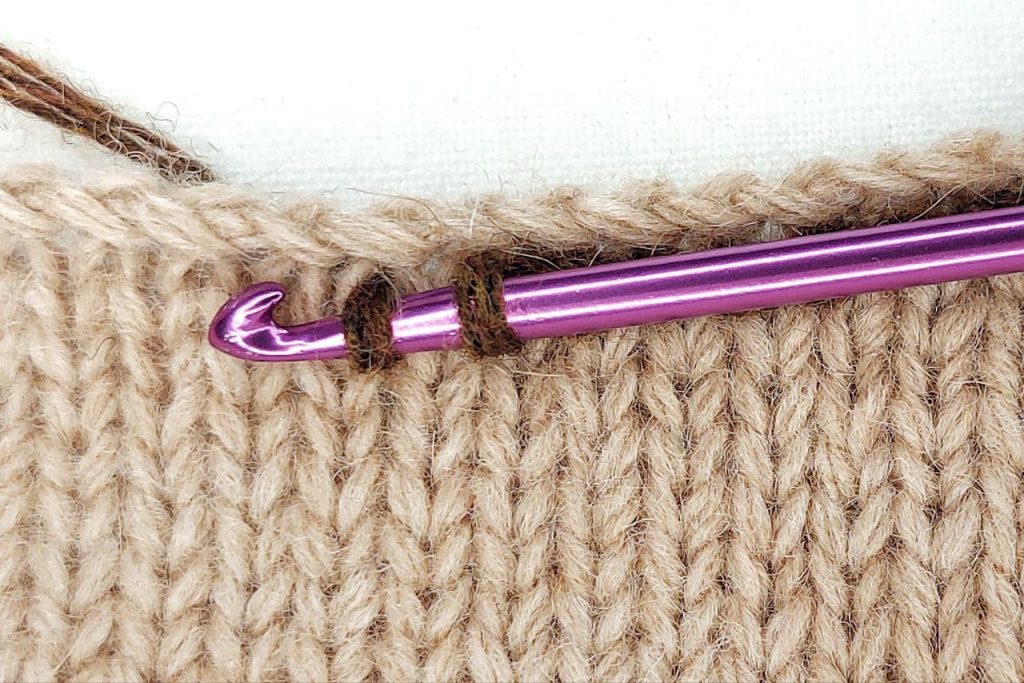
there are two stitches on the crochet hook.
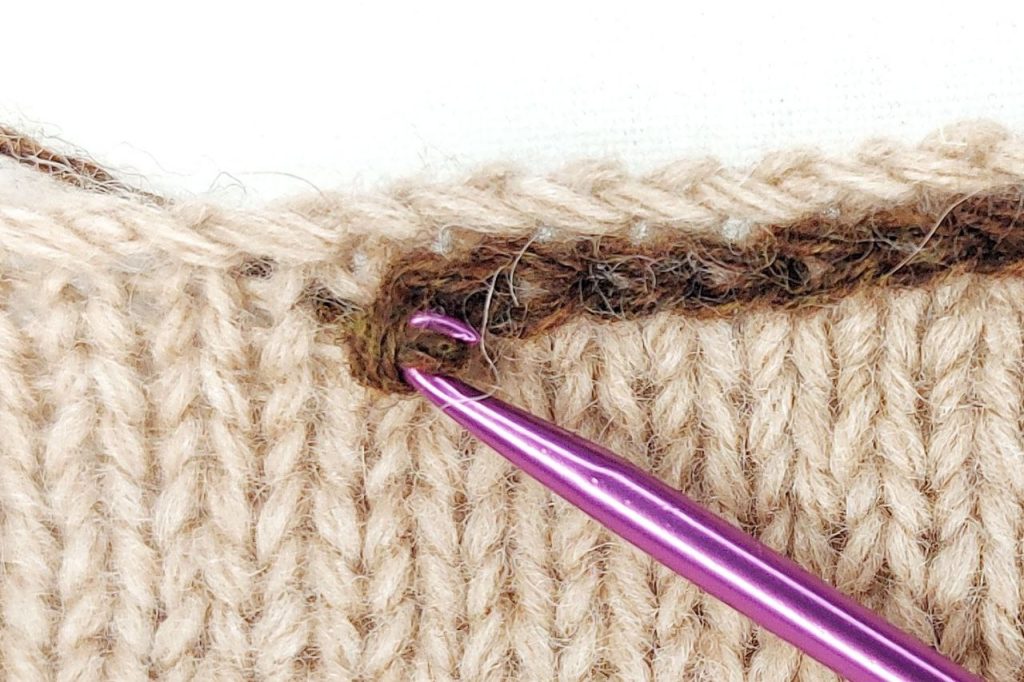
(through the working chain stitch).
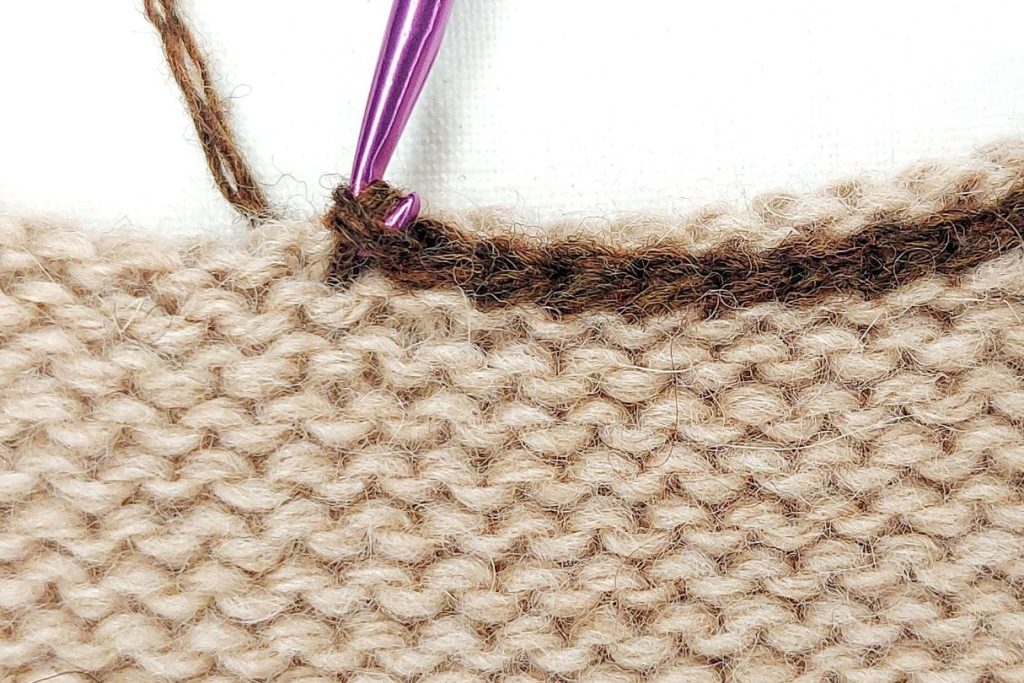
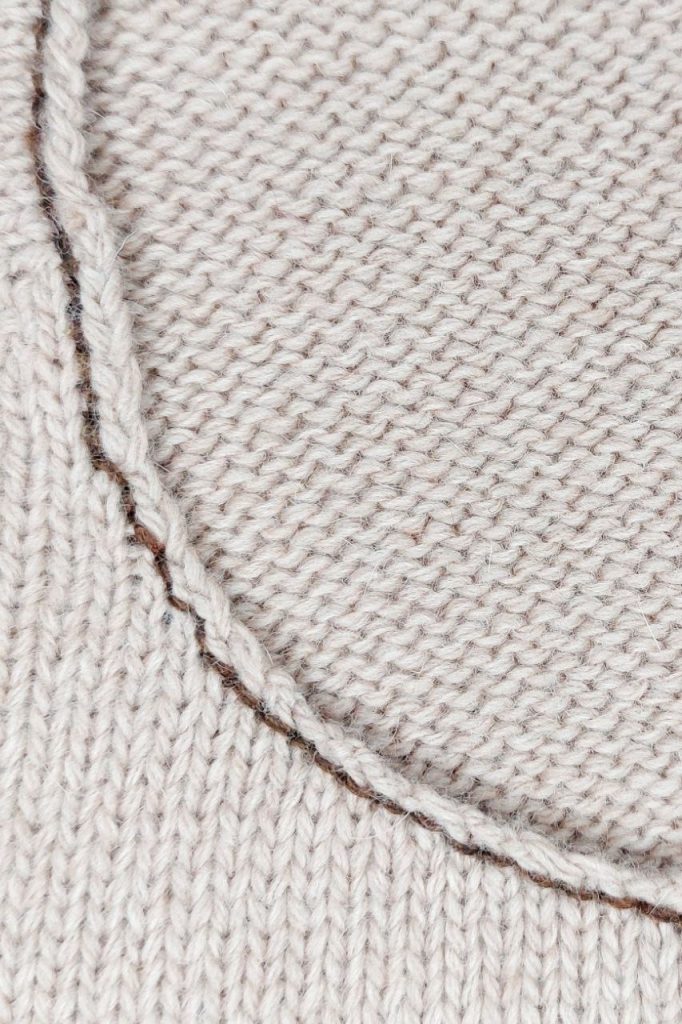
The chain stitches are visible on the right side of the garment; the single stitches (like the backstitch seam) are visible on the wrong side of the garment along the neckline.
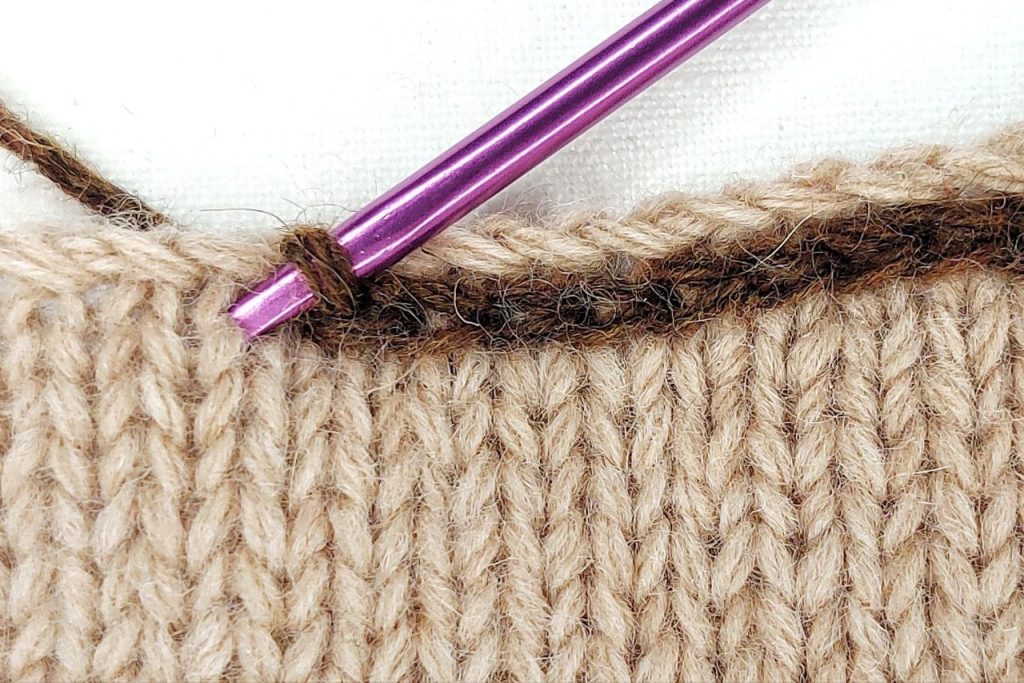
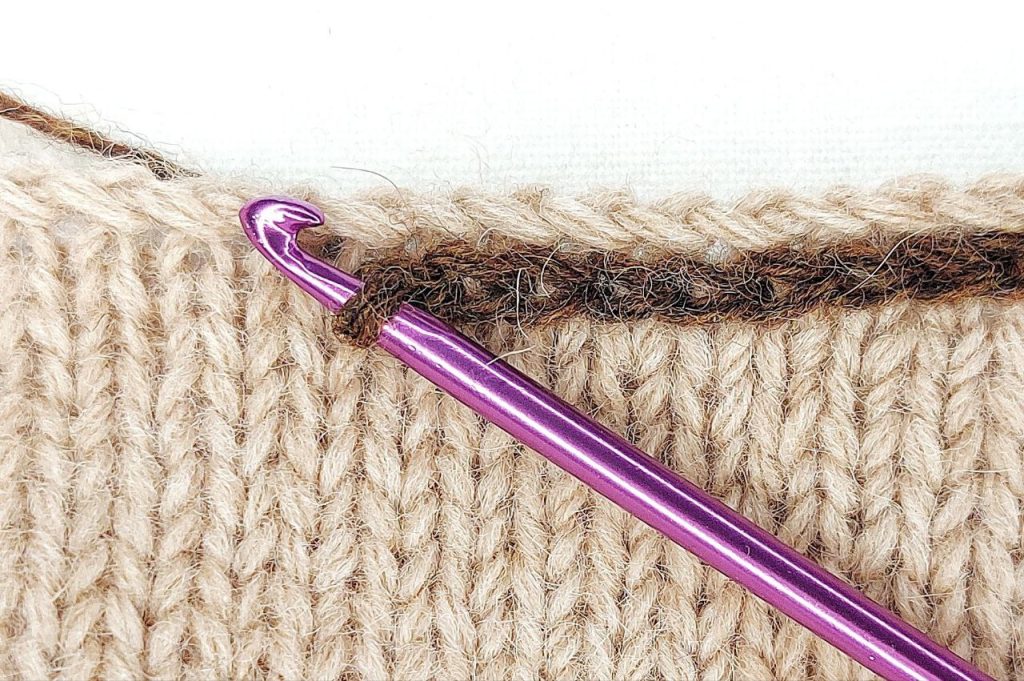
Working the chain stitch from the wrong side of the garment:

the crochet hook with one (working) chain stitch.

there are two stitches on the crochet hook.
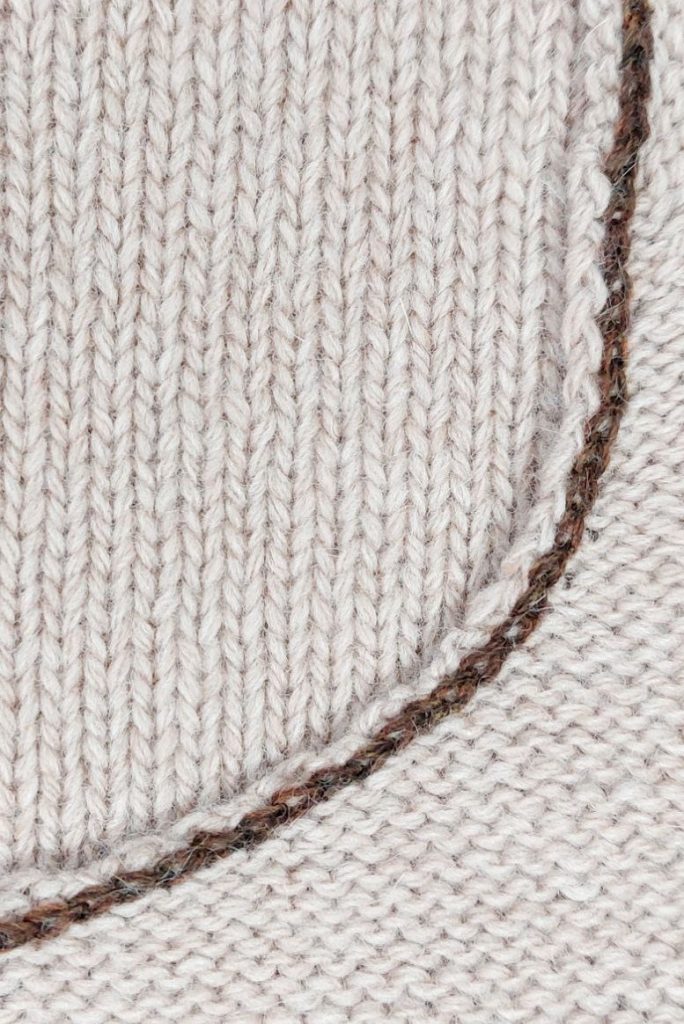
The single stitches (like the backstitch seam) are visible on the right side of the garment; the chain stitches are visible on the wrong side of the garment along the neckline.
In the process of working the chain stitch, ensure that all the chain stitches are the same size as the stitches in the garment.
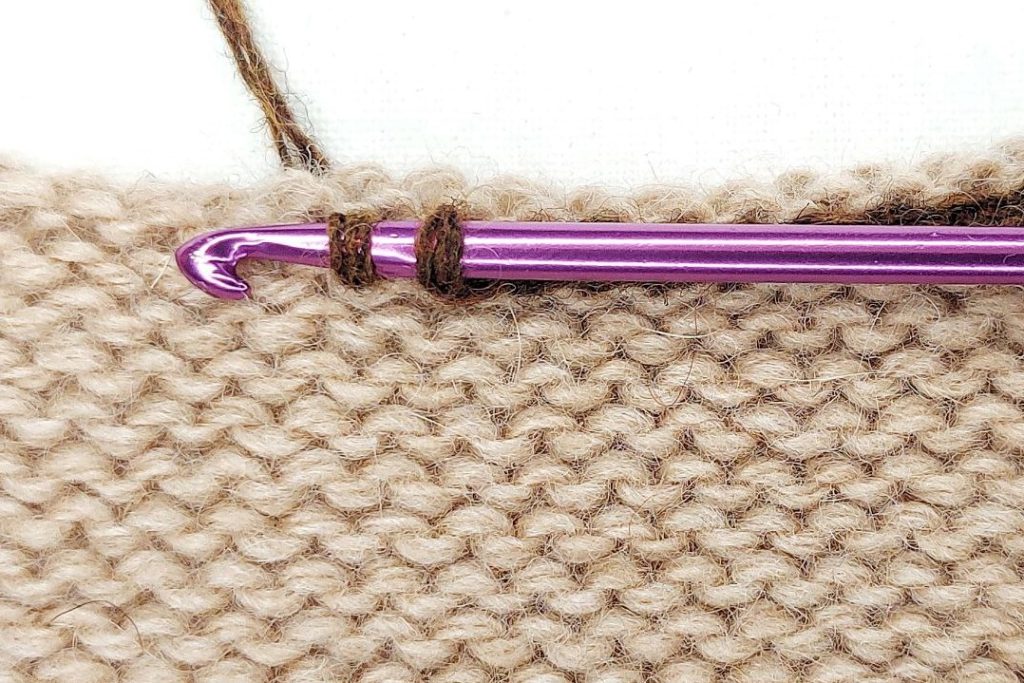
On horizontal sections (such as the back neckline, saddle-shoulders, or the flat horizontal part of the front neckline), insert the crochet hook into each stitch of the main fabric (1).
On vertical sections (such as the initial neck shaping on the front), the chain stitches should correspond to the knitting gauge (2). That is, for standard gauge, where 3 stitches correspond to 4 rows, insert the crochet hook into the main fabric for three consecutive rows (work three chain stitches), and skip the fourth row. If you’re knitting the denser fabric, make two chain stitches every three rows, or even insert the crochet hook into the fabric every other row.
For curved sections of the front neckline (where stitches are increased), work the chain stitch in such a way that the neckline edge is reinforced but not overly tight. The chain stitches should remain consistent in size around the entire neckline. Often, on sections with initial increases (3), chain stitches are worked according to the knitting gauge, while on more clearly rounded sections, one chain stitch corresponds to one stitch of the main fabric (4).

If you plan to knit the neckband or collar with ribbing, make sure the number of chain stitches corresponds to the ribbing’s pattern.
We can also pick up stitches based on the chain stitch either from the front side (double loops) or from the back side (bumps).
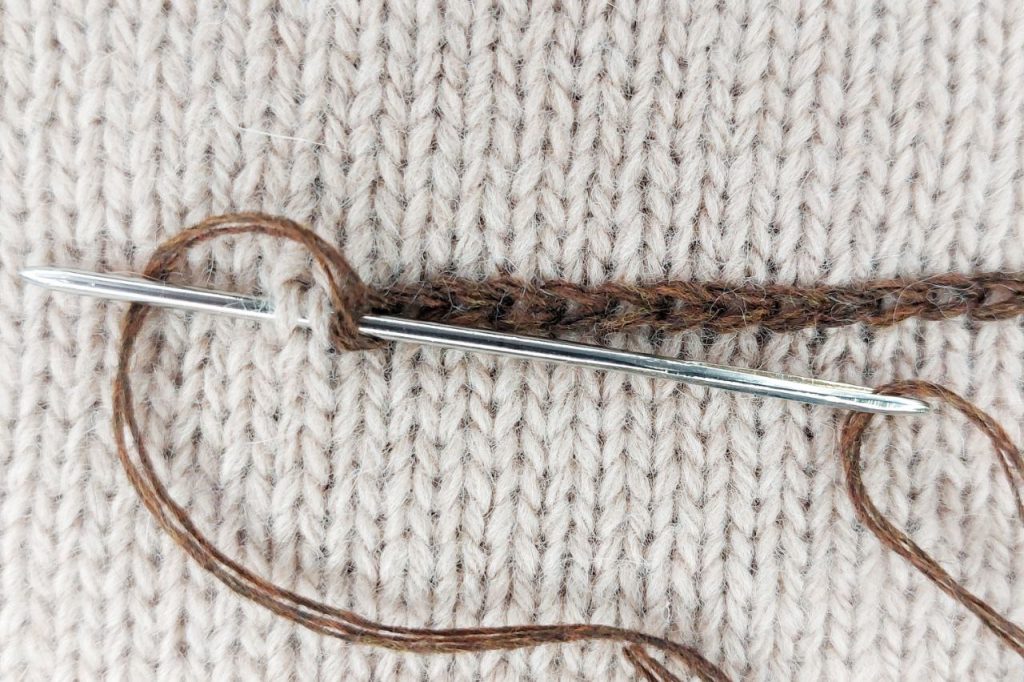
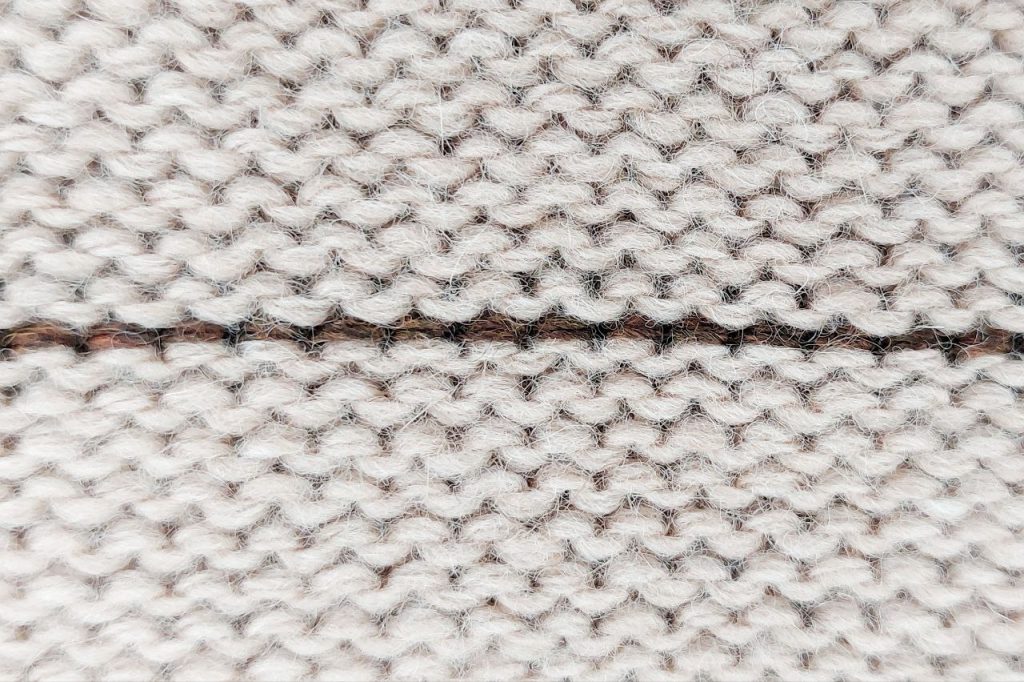
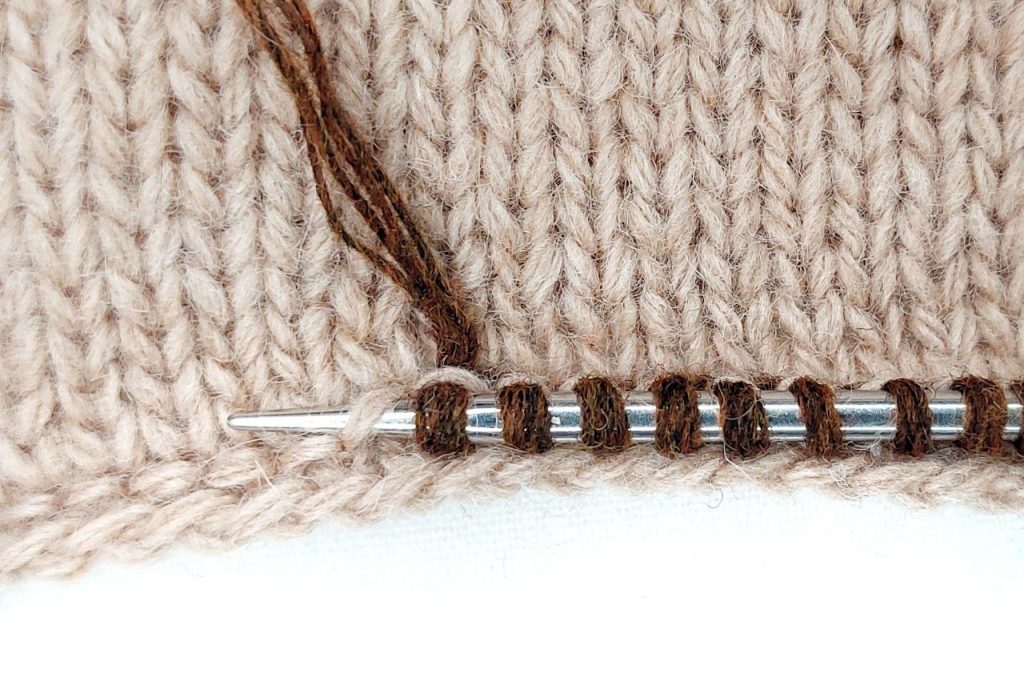
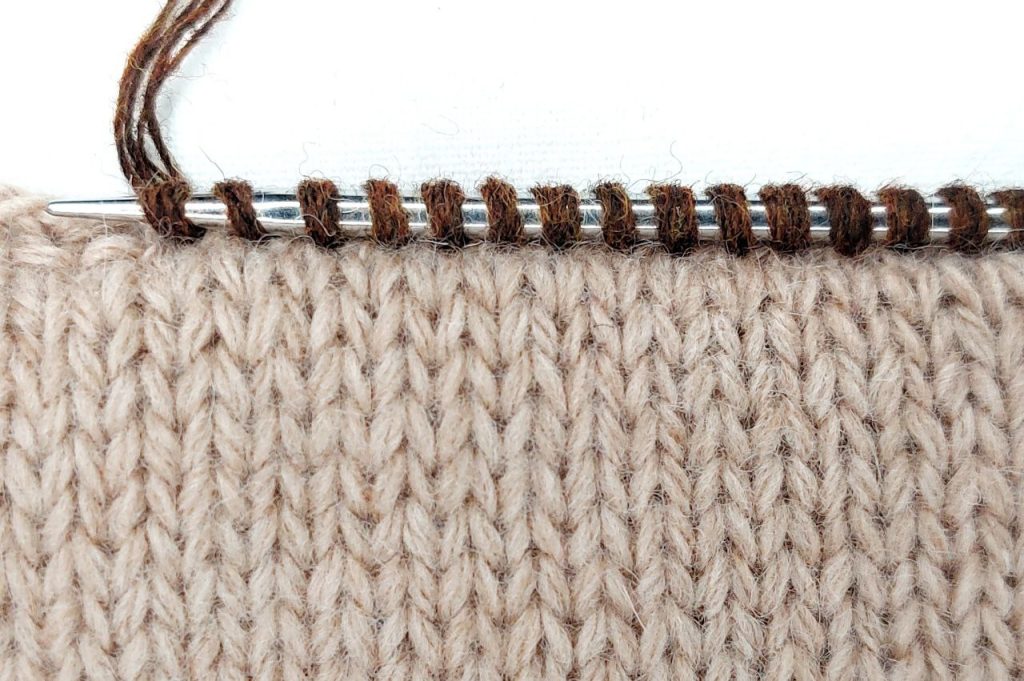
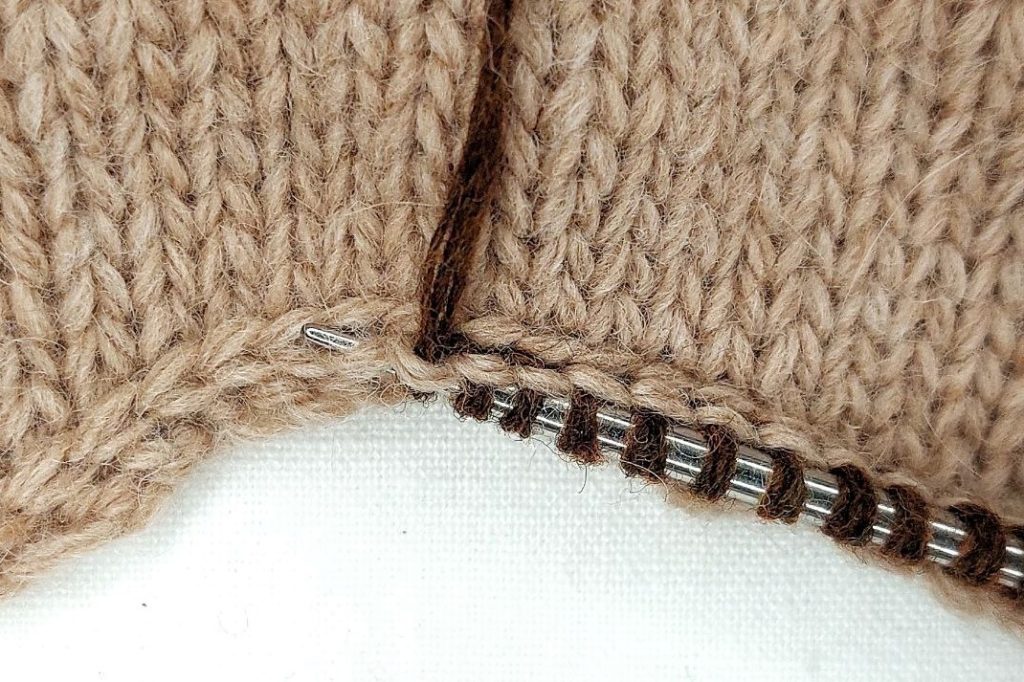
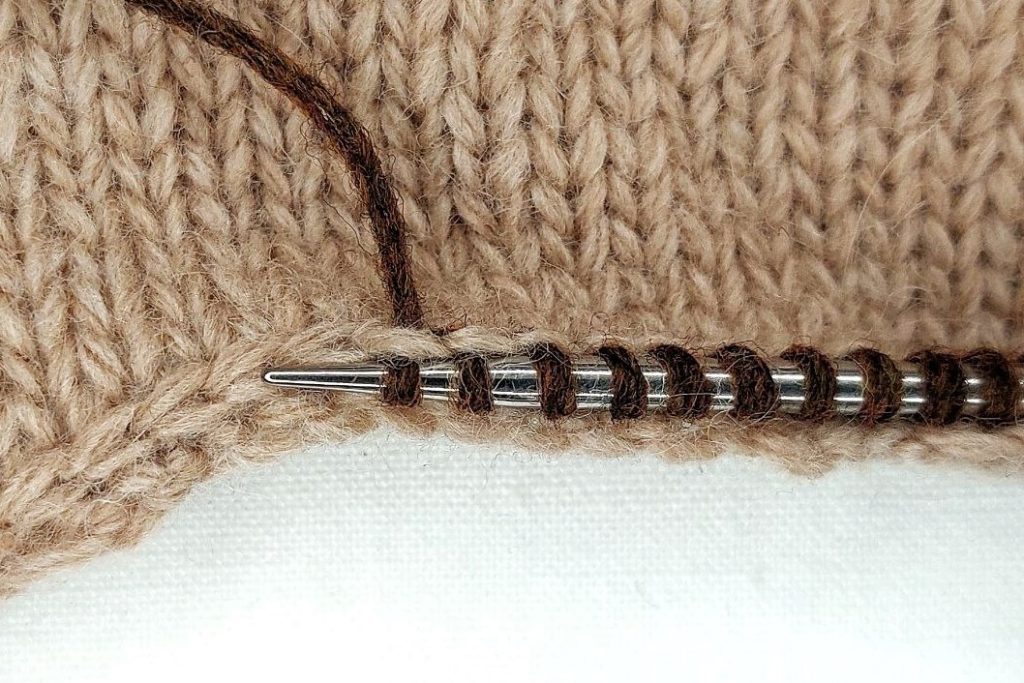
If we need to pick up stitches from the back side of the chain stitch on the garment’s wrong side, and we’re using the same yarn, I recommend highlighting the bumps with a contrasting thread during the work chain stitch.

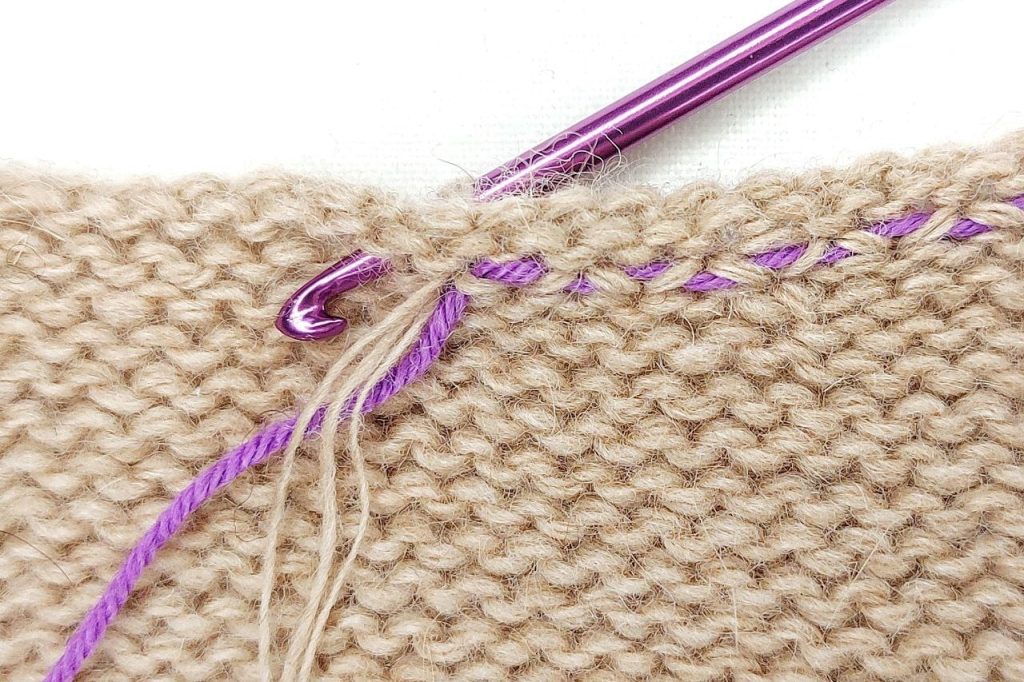
The highlighted bumps will make it easier to pick up stitches.
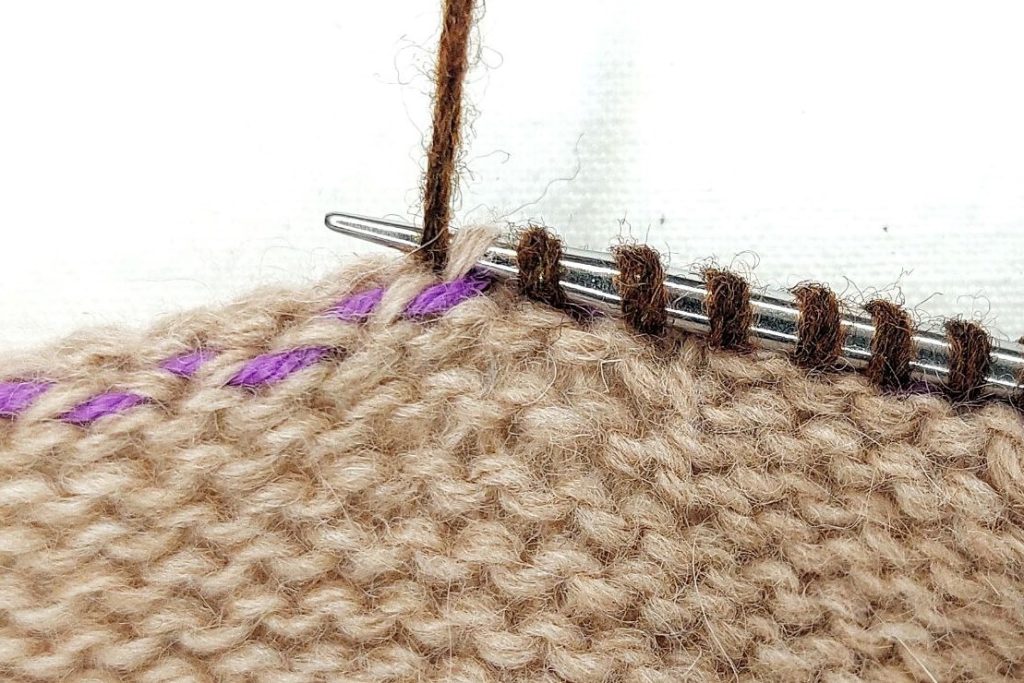
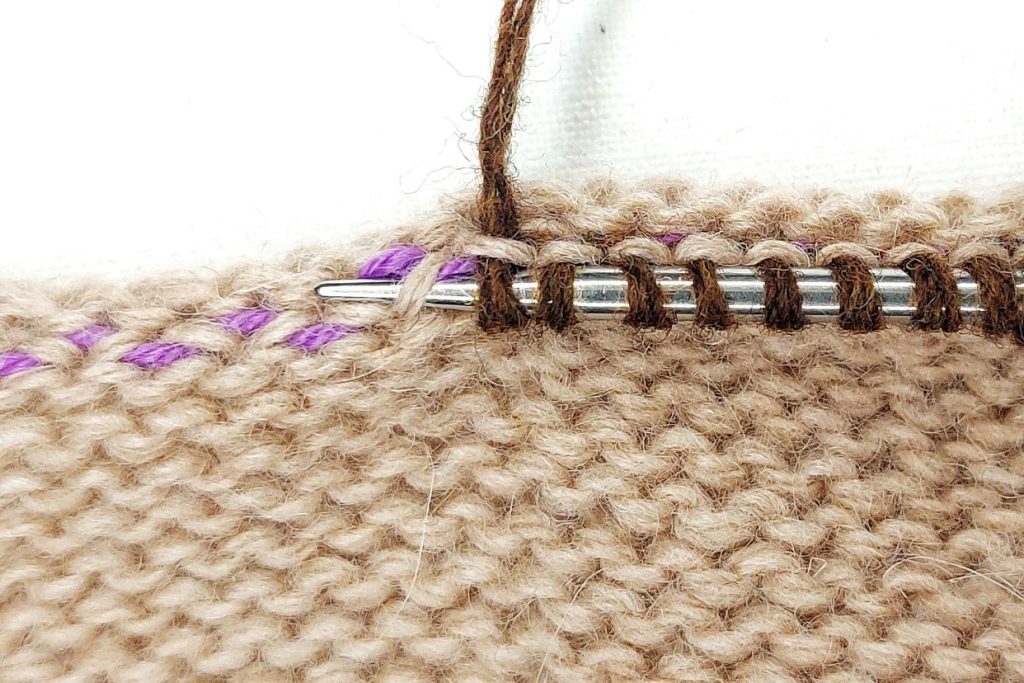
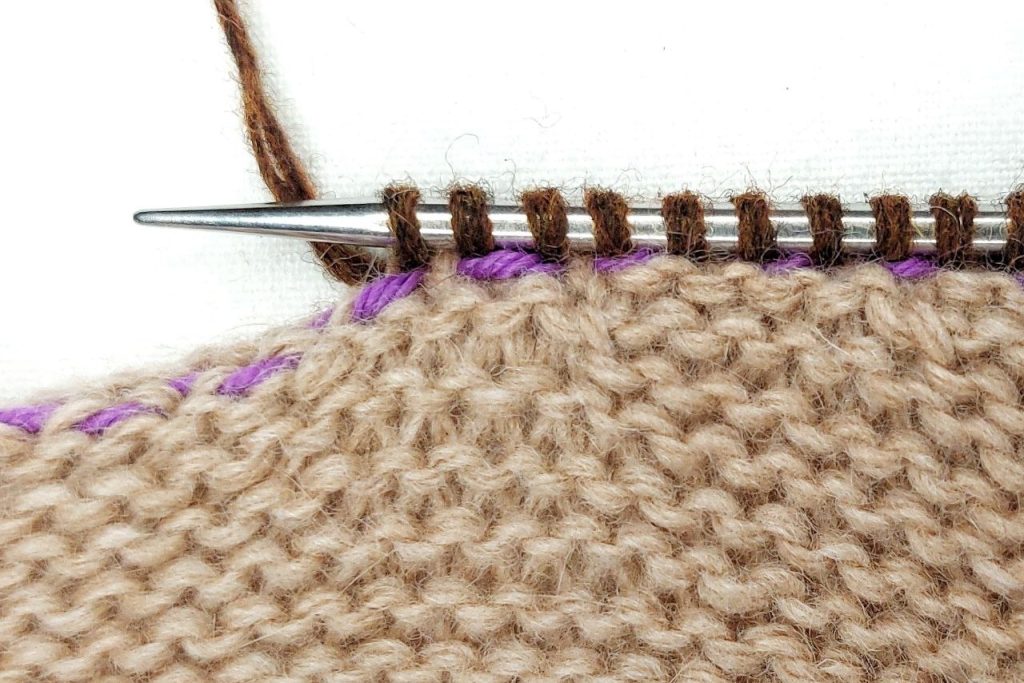
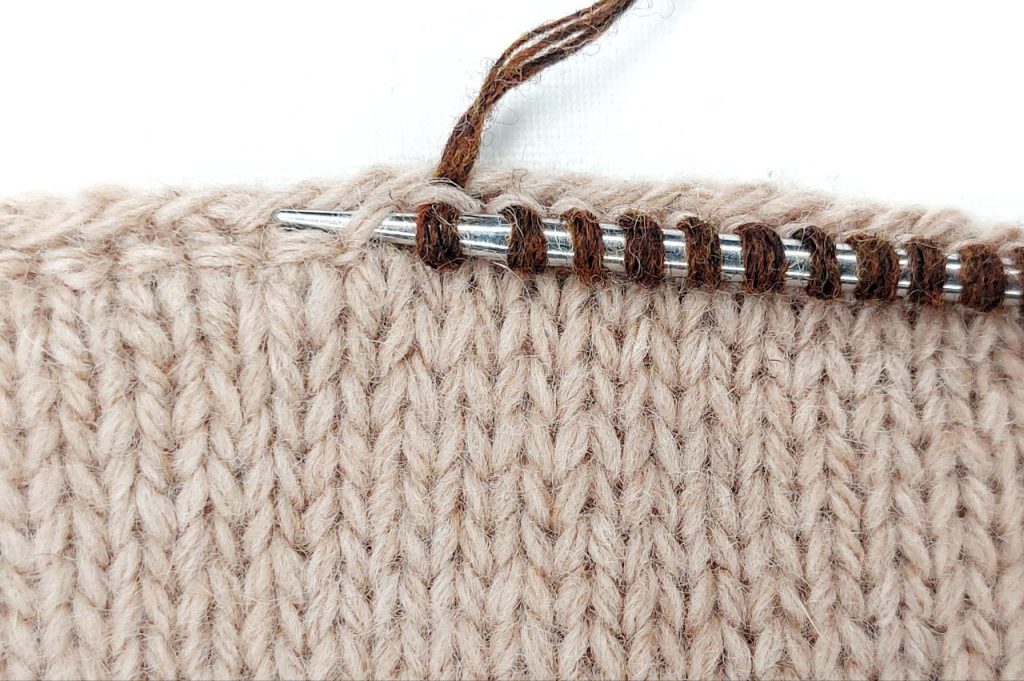
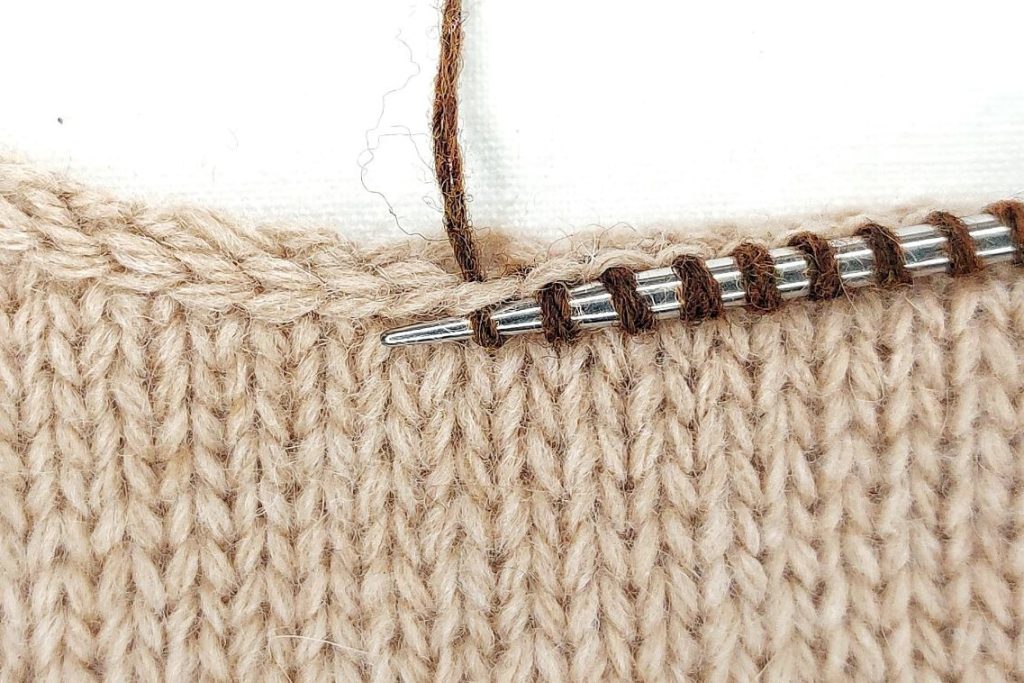
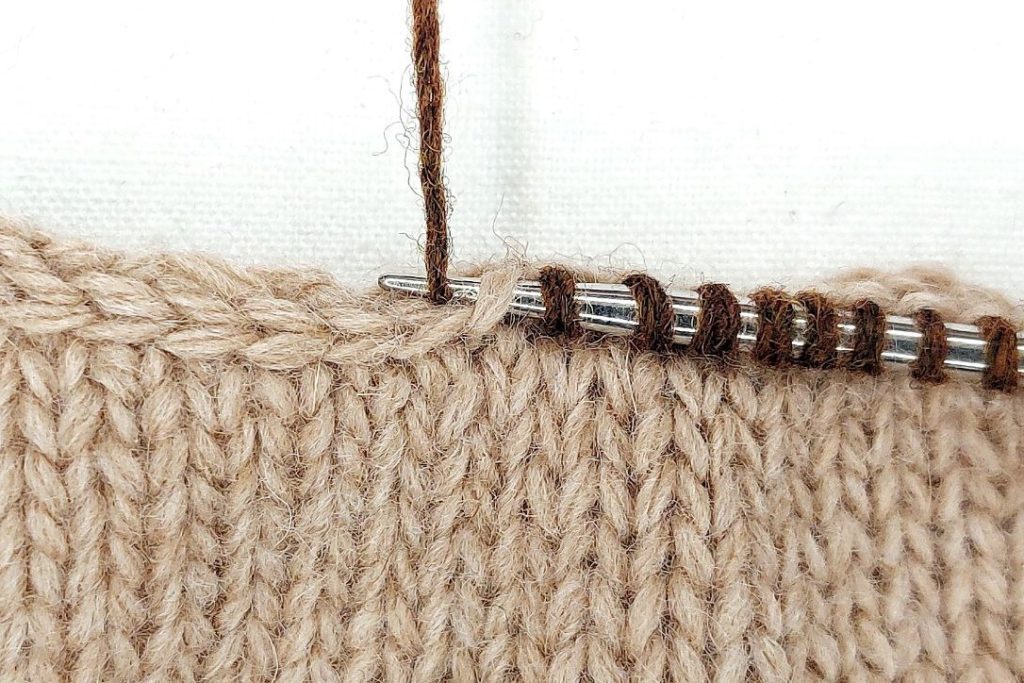
You can also incorporate the knitting needles during the process of making the chain stitch by wrapping the working yarn around the needle cord as you complete each stitch. In this case, we won’t need to highlight the back bumps — they will already be on the needles.
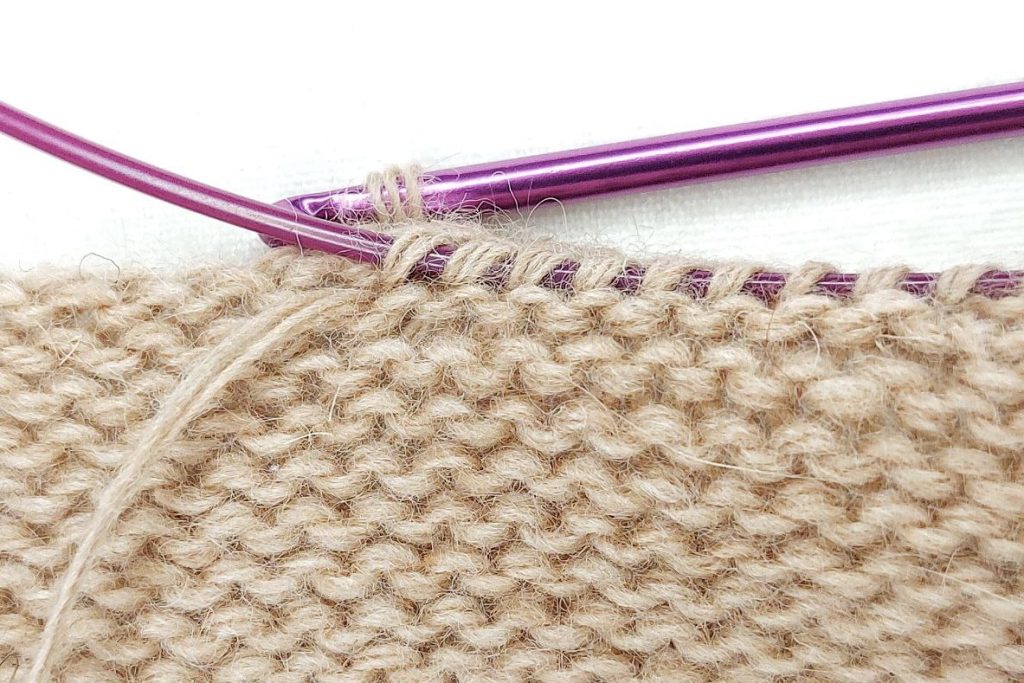
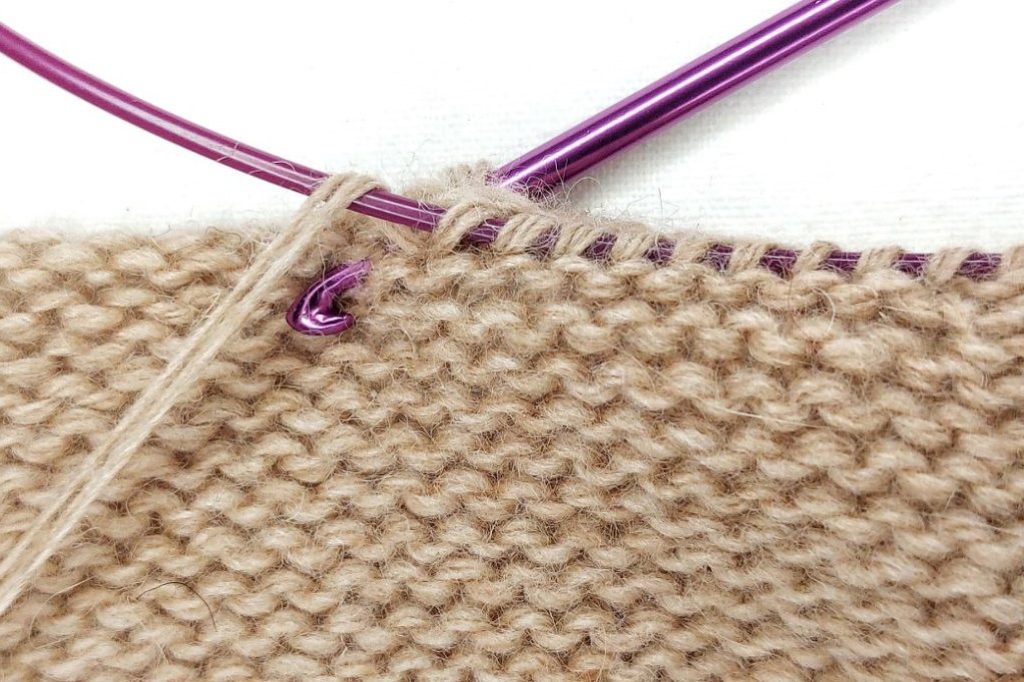
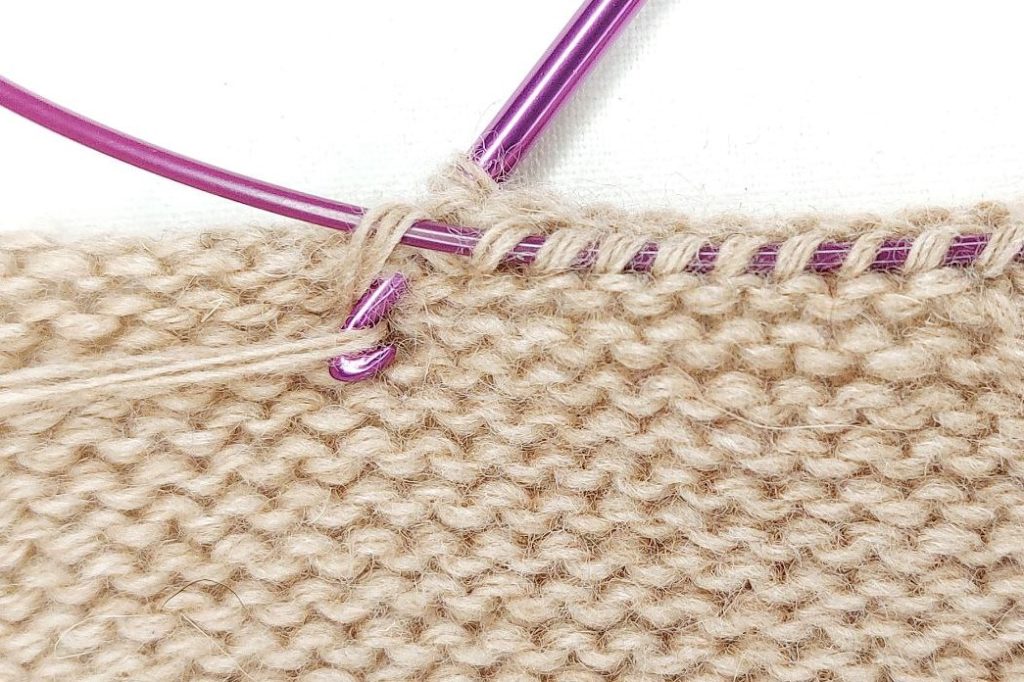
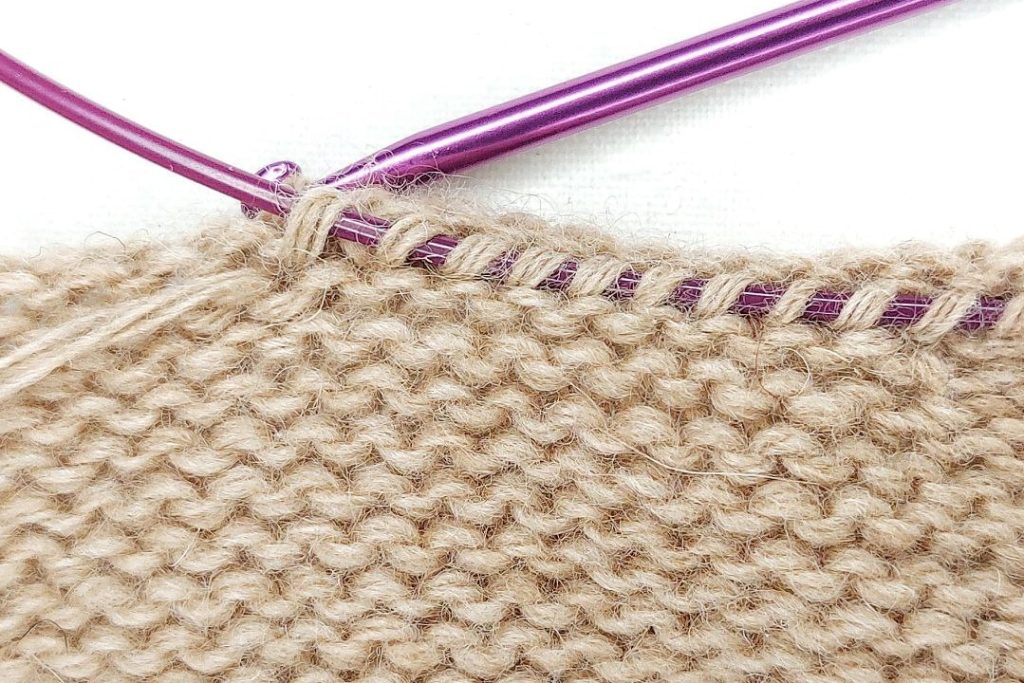
Let’s move on to picking up stitches based on the chain stitch.
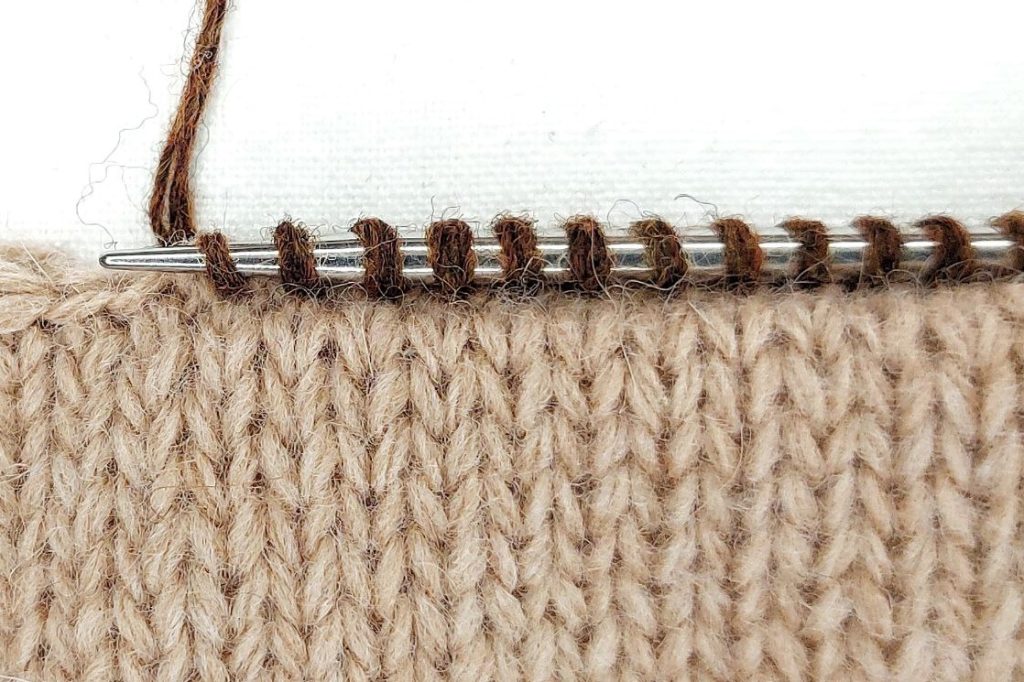
We’ll start with the back side of the chain stitch, which looks like a backstitch seam (back bumps).
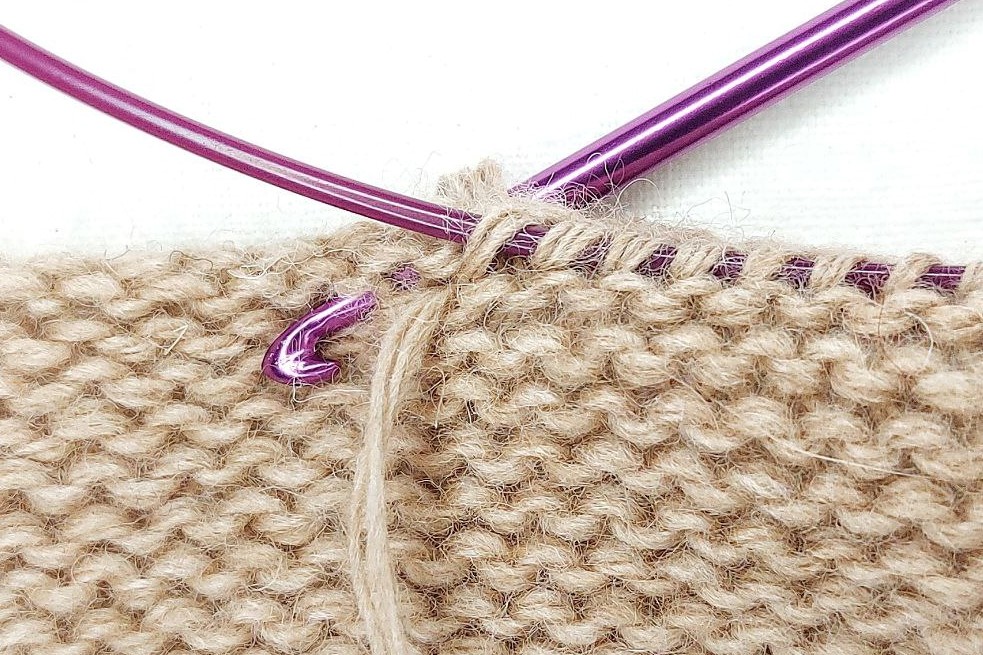
If we place the garment with the neckline closer to ourselves and pick up stitches from the back bumps,
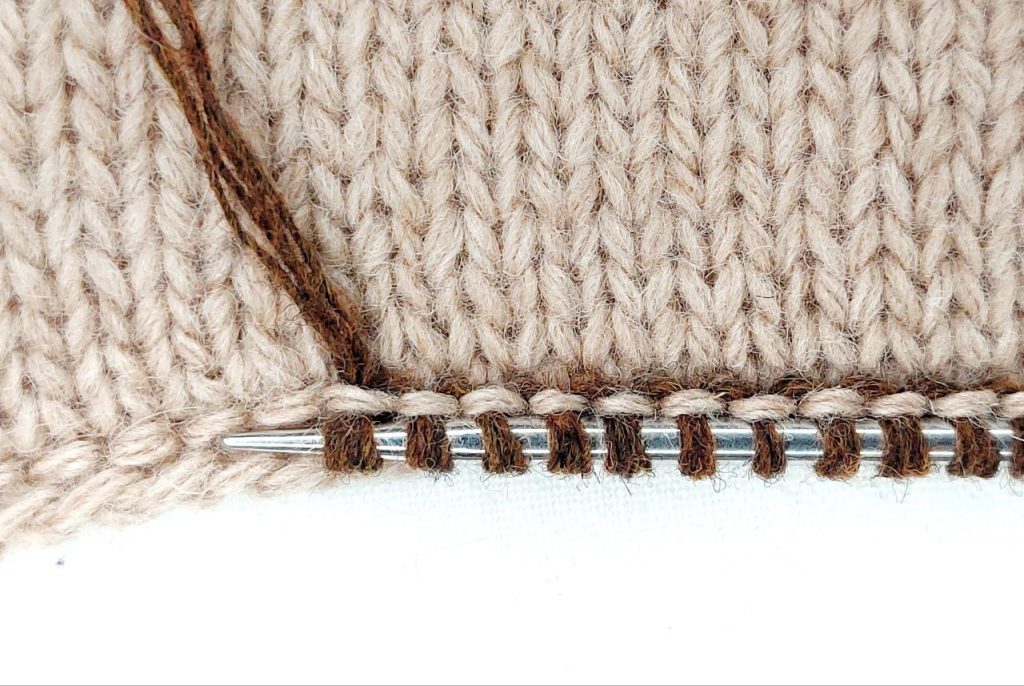
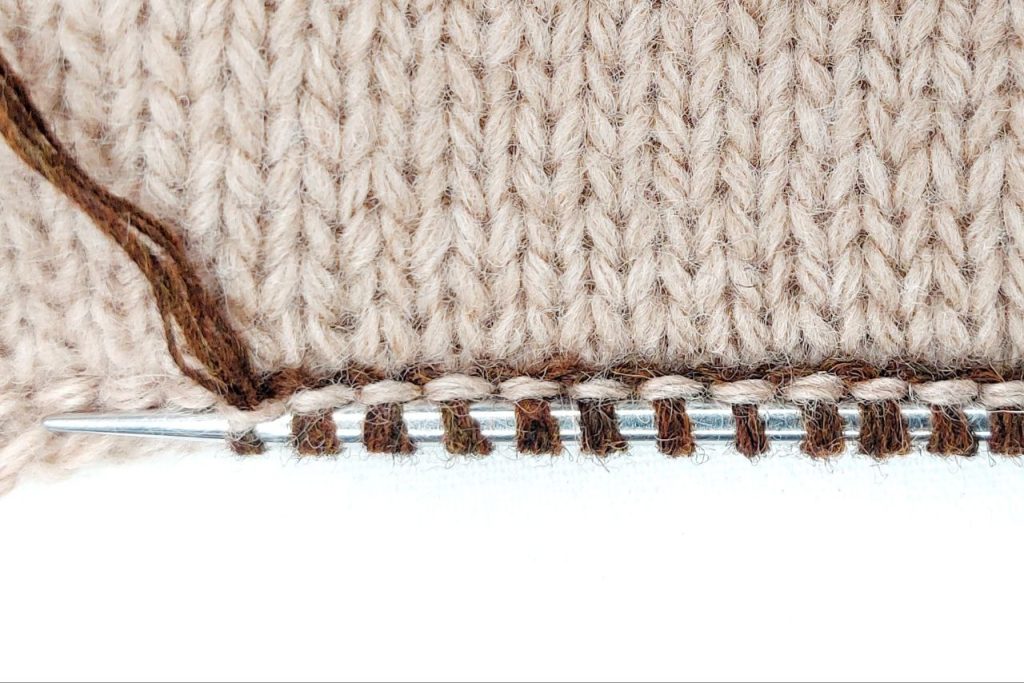
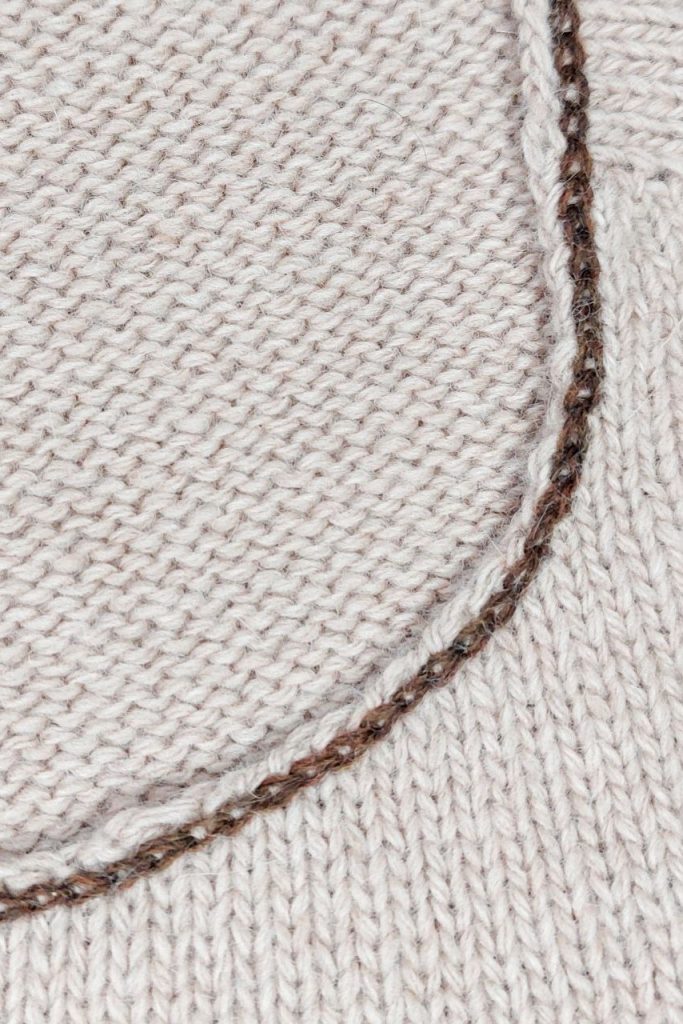
the back bumps of the chain stitch will remain visible, and the joining garment and the neckband or collar will look like a backstitch seam.
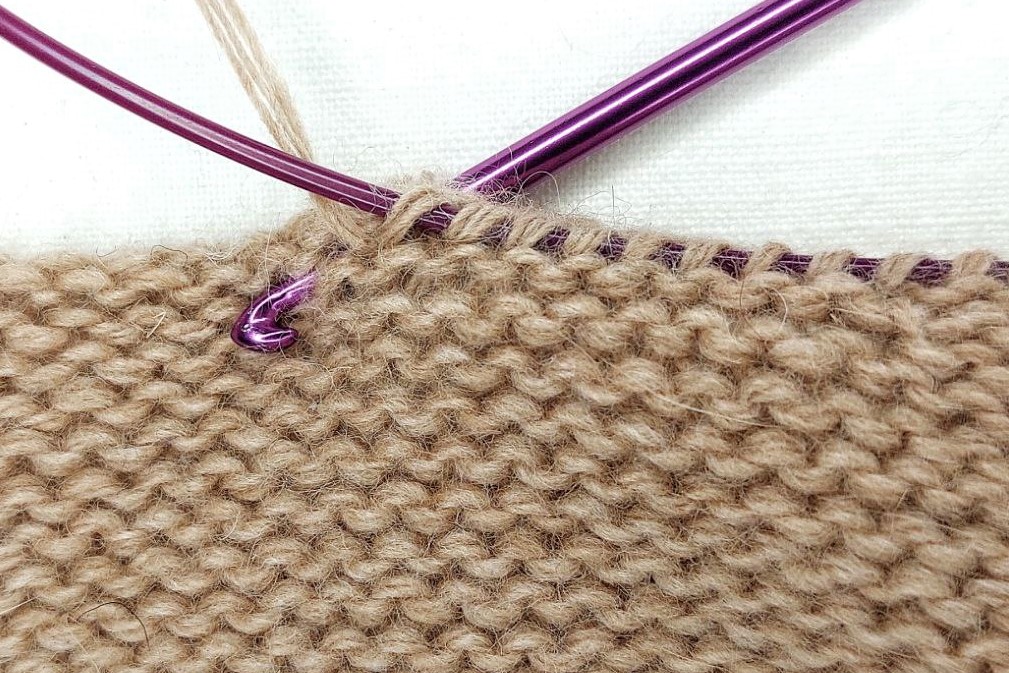
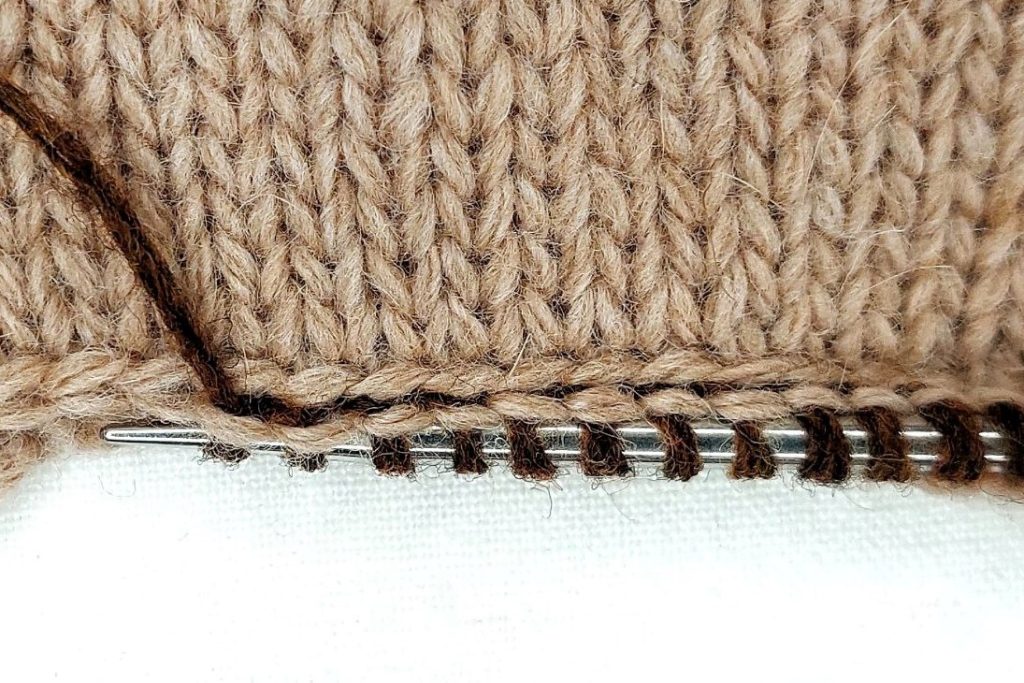
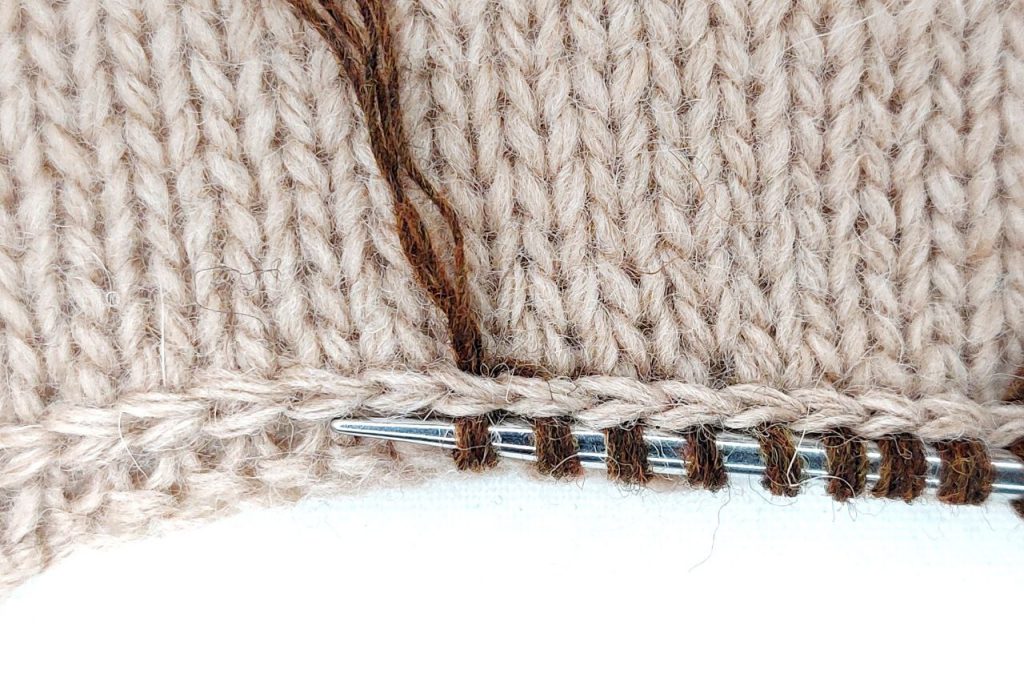
If we place the garment with the neckline away from ourselves and pick up stitches from the back bumps,
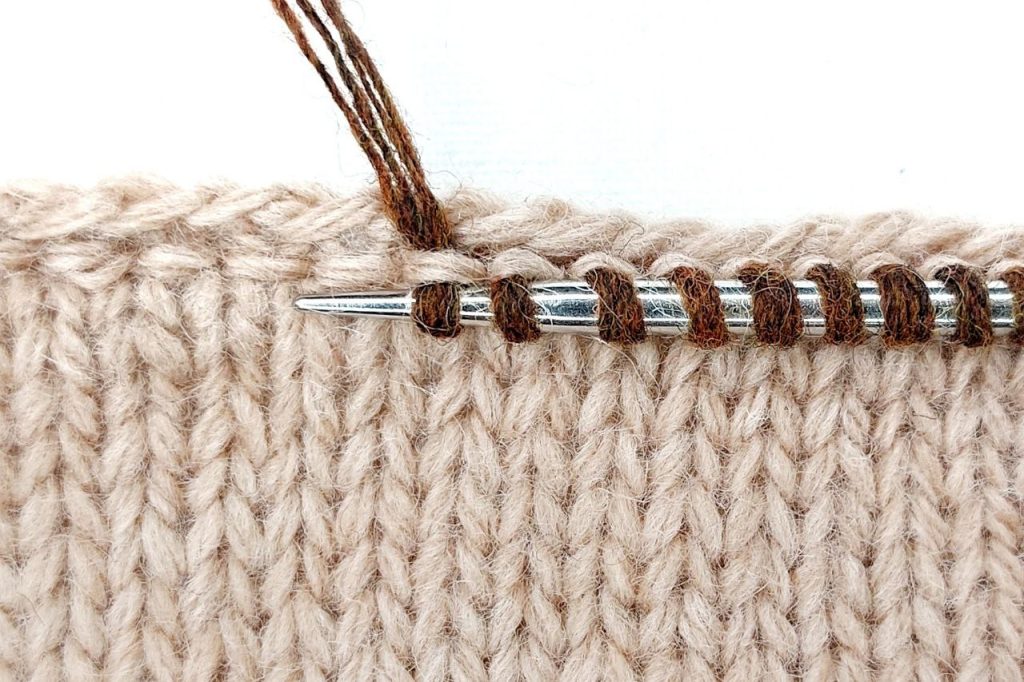
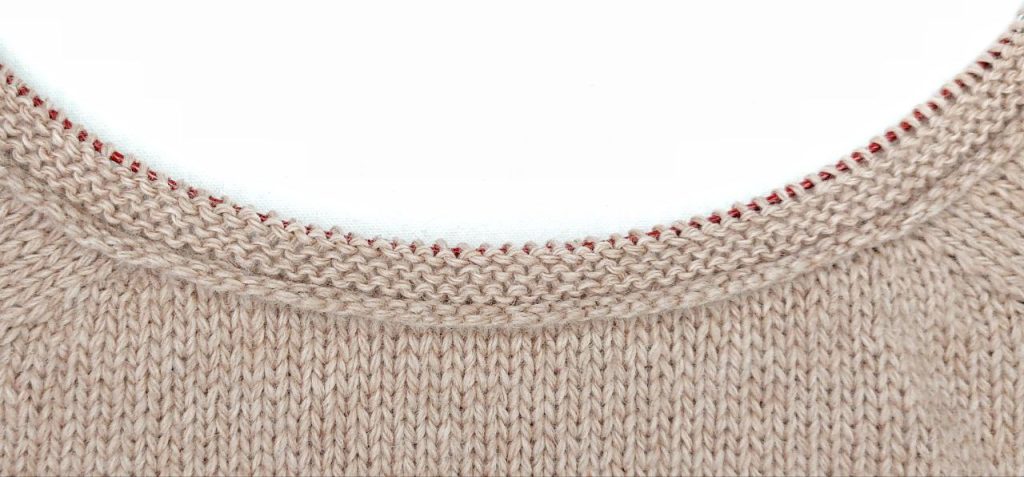
the back bumps will be “inside” (between the garment and the neckband), and the joining will look like a picking up along the edge.

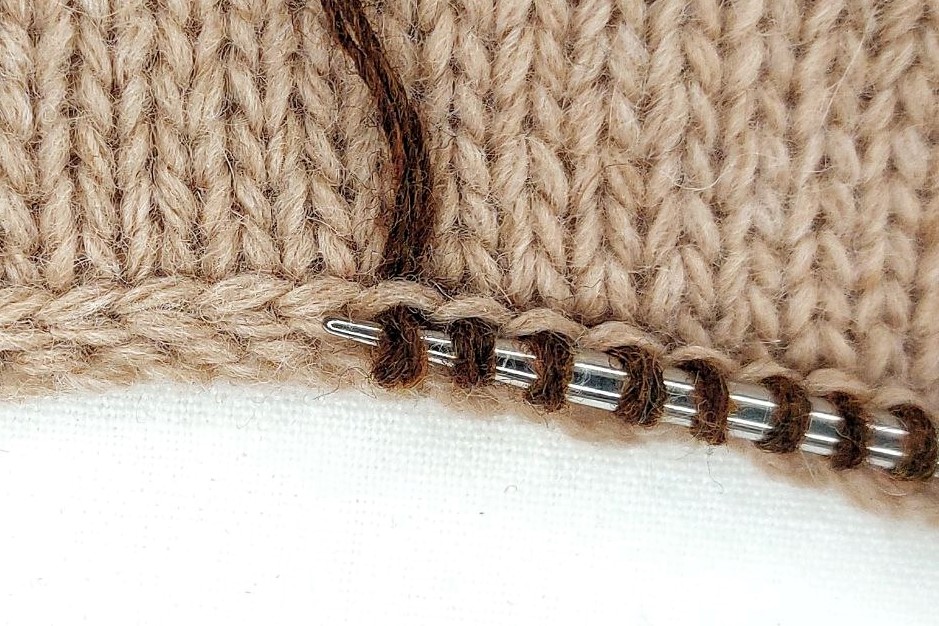
A picking up stitches from the front side of the chain stitch (double loops).
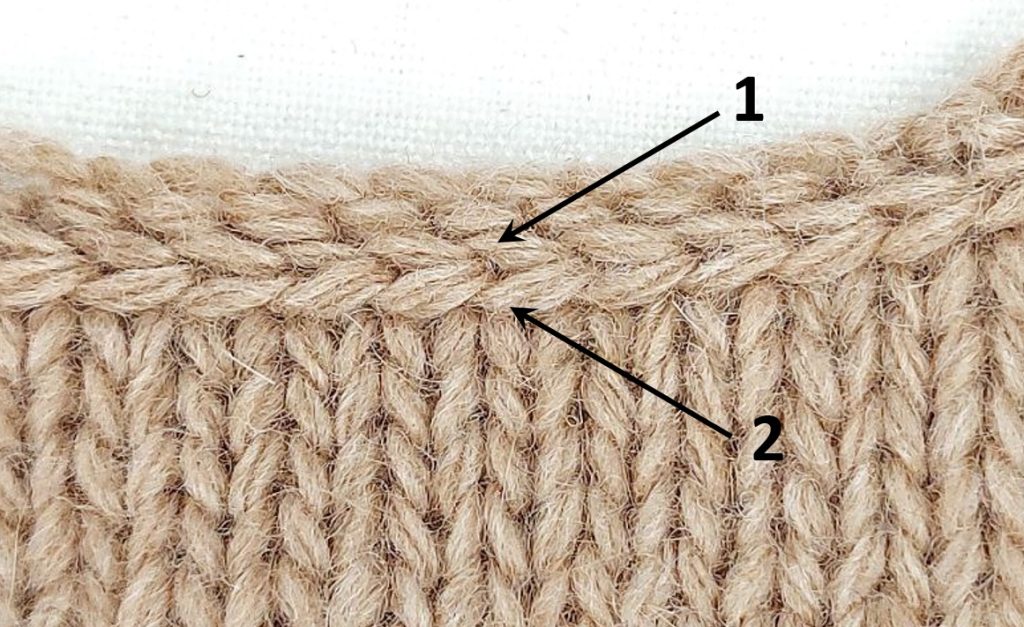
In this case, we can pick up stitches from one of the two loops of the chain. To avoid confusion, let’s define that the loop of the chain closer to the neckline edge (1) will be called the TOP loop, and those further from the edge (2) will be called the BOTTOM loop.
If we place the garment with the neckline away from ourselves and pick up stitches from the BOTTOM loops (2),
the chain stitches will be “inside” (between the garment and the neckband), and the joining will look like a picking up along the edge too.
If we place the garment with the neckline closer to ourselves and pick up stitches from the BOTTOM loops (2),
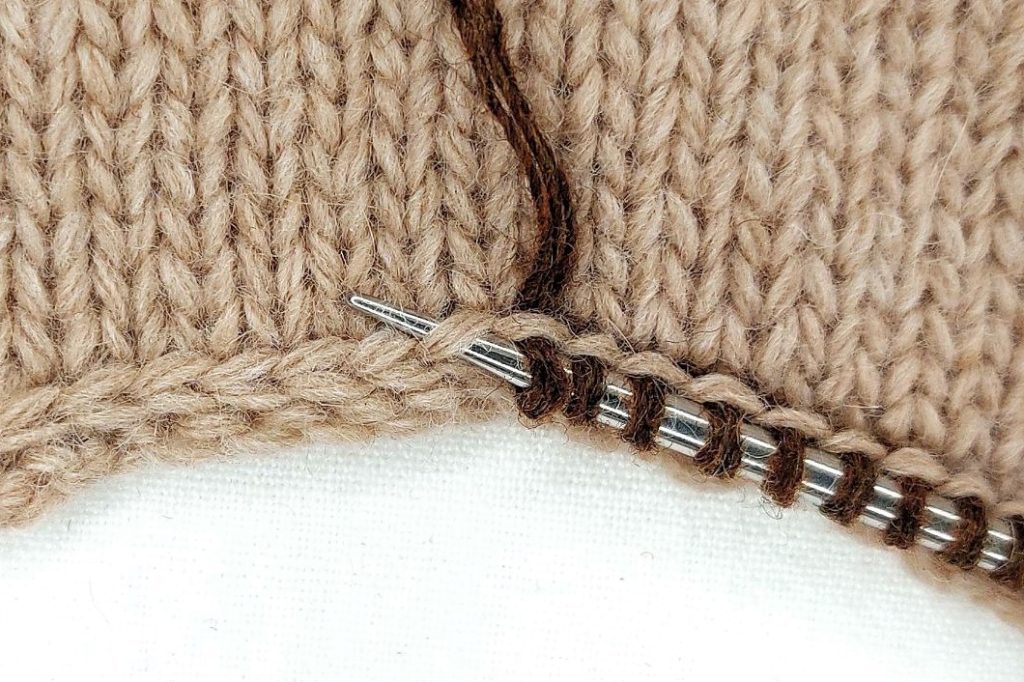
these loops of the chain stitch will remain visible, and the joining garment and the neckband or collar will look like a backstitch seam.
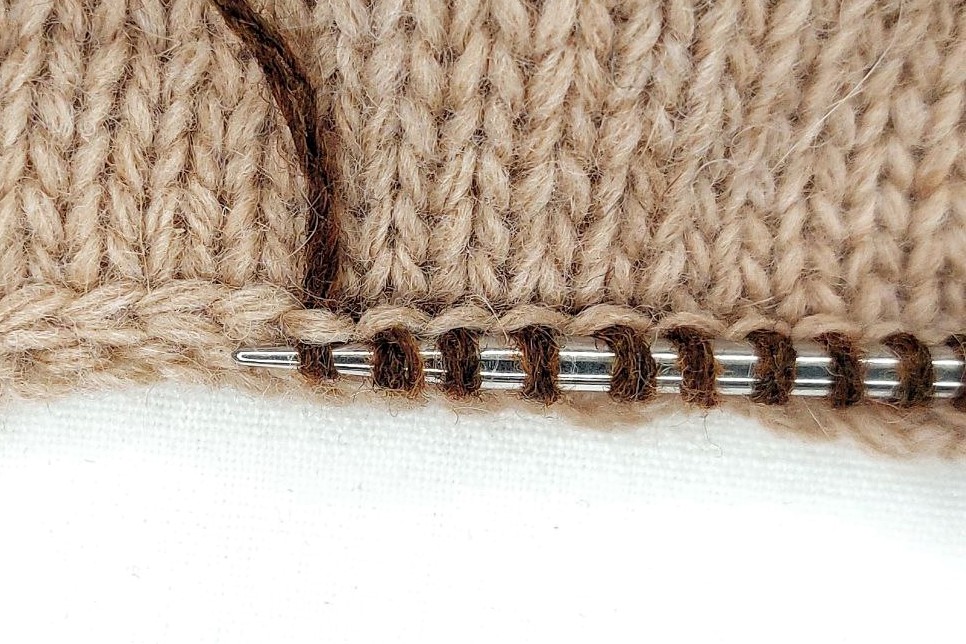
If we place the garment with the neckline closer to ourselves and pick up stitches from the TOP loops (1),
both loops of the chain stitch will remain visible, with horizontal bars of the picking-up stitches between them.
This picking-up method is particularly interesting if the chain stitch and the picking-up stitches are worked in different colors.

If we place the garment with the neckline closer to ourselves and pick up stitches from both loops (1 and 2),

only two loops of the chain stitch will be visible. The working yarn will pass below the chain stitch. The joining garment and the neckband or collar will look like a chain.
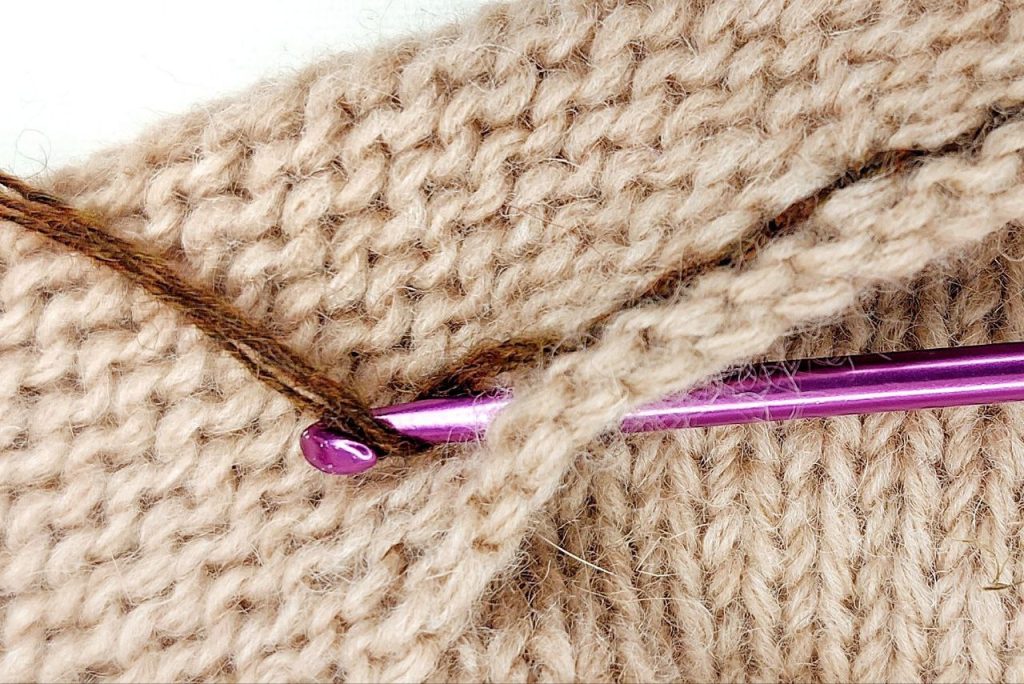
If it’s difficult to pick up stitches from the chain stitch with just a needle, use a crochet hook instead.
Double neckband and the “pocket” of the neckline.
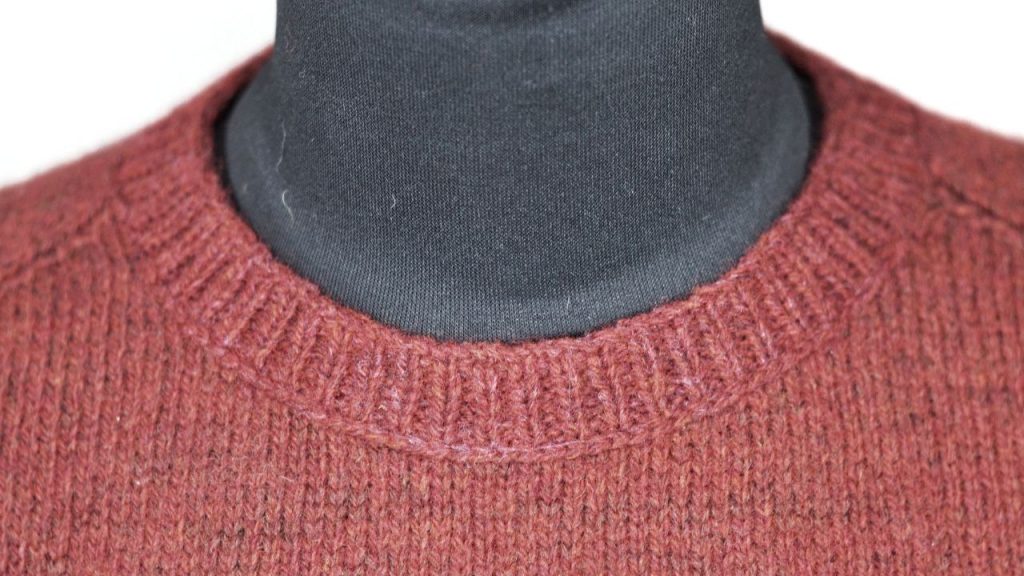
If you want to knit a collar or a single neckband, it’s enough to pick up stitches from the chain stitch on the garment’s right side.
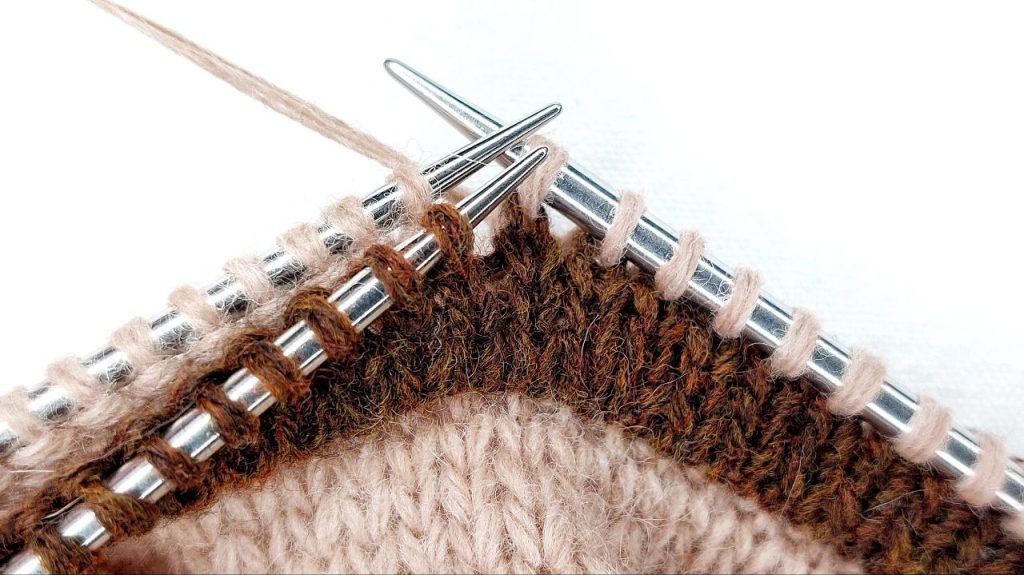
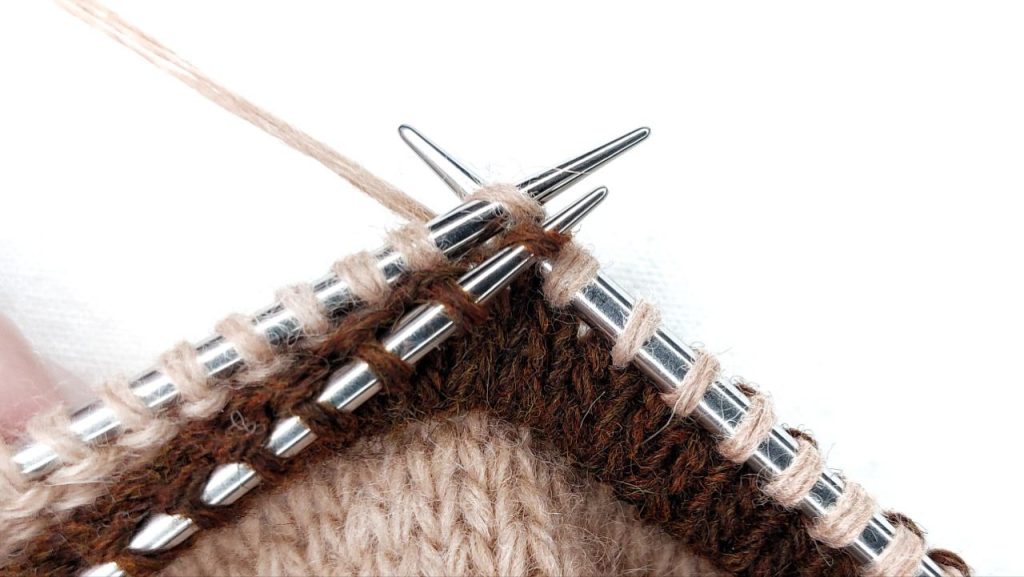
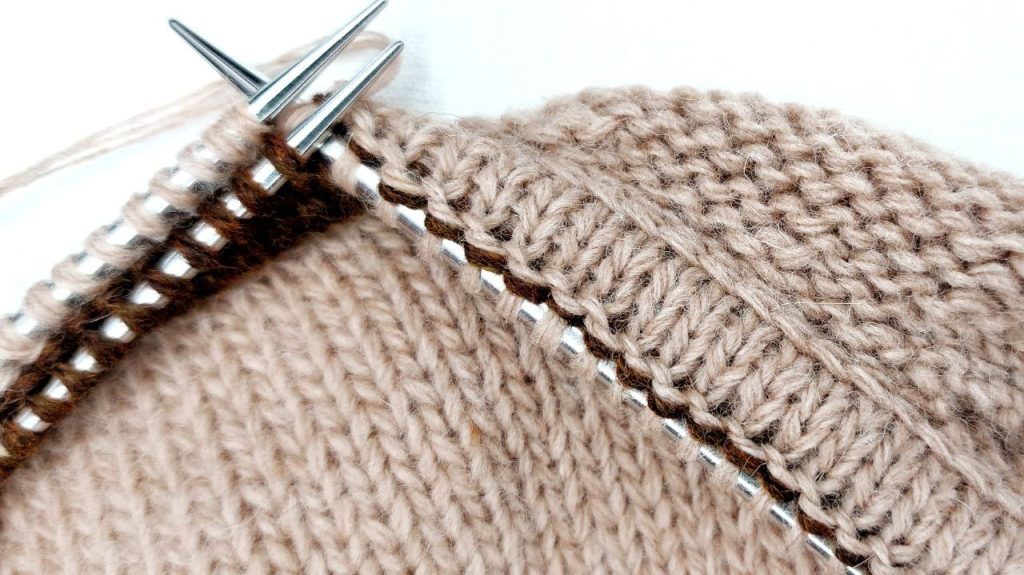
If you want to finish the neckline with a double neckband or place the edge of the neckline inside the “pocket,” you will need to pick up stitches on both sides of the garment (from both sides of the chain stitch) and knit the two parts of the neckband (or the neckline’s “pocket”) alternately.
(knitted from the chain stitches on the garment’s wrong side)
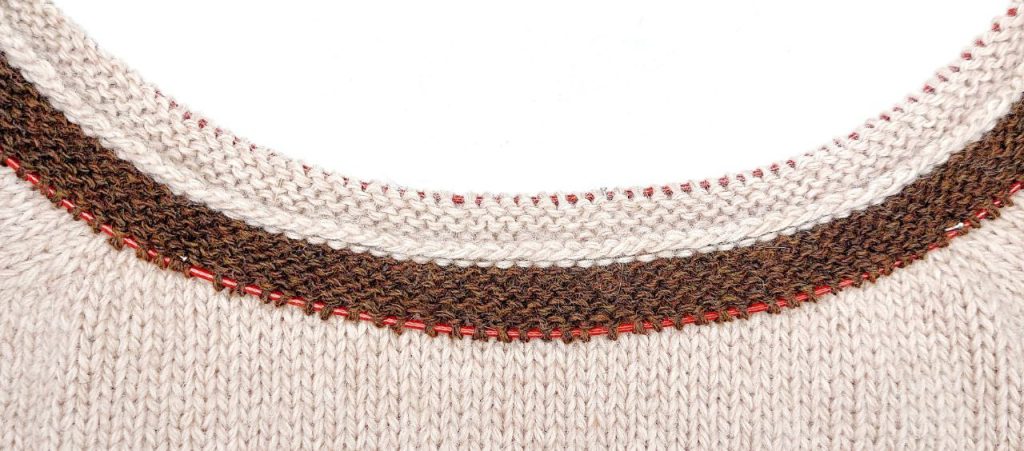
(knitted with brown yarn from the chain stitches
on the garment’s right side)
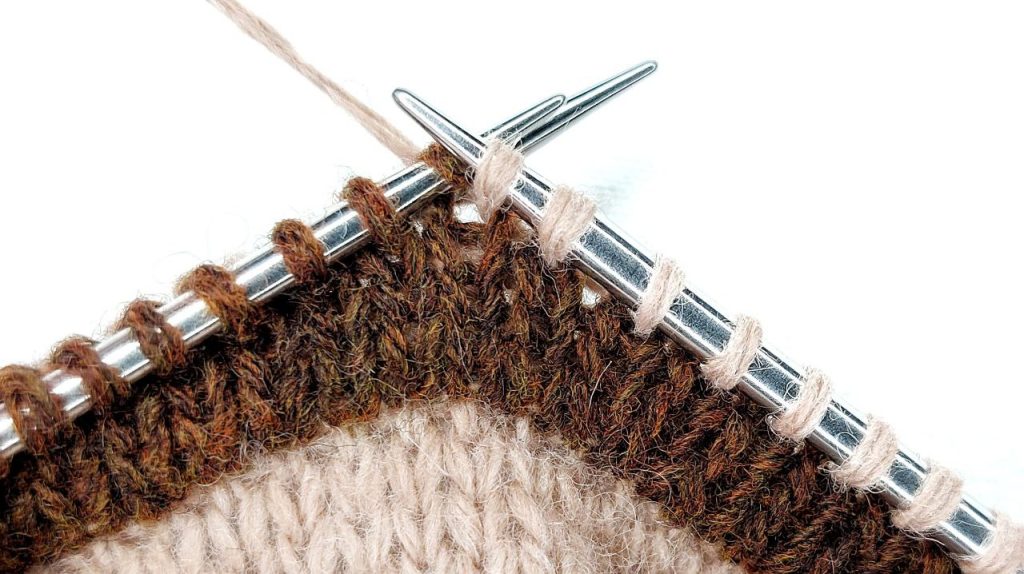
The width of the two parts can be the same (the same number of rows/rounds worked).
Alternatively, the front part of the double neckband can be made wider (work one or two more rows/rounds than the back part). In this case, the neckband will appear more bulkier.
Having worked both parts of the double neckband, join them together using the three-needle method.
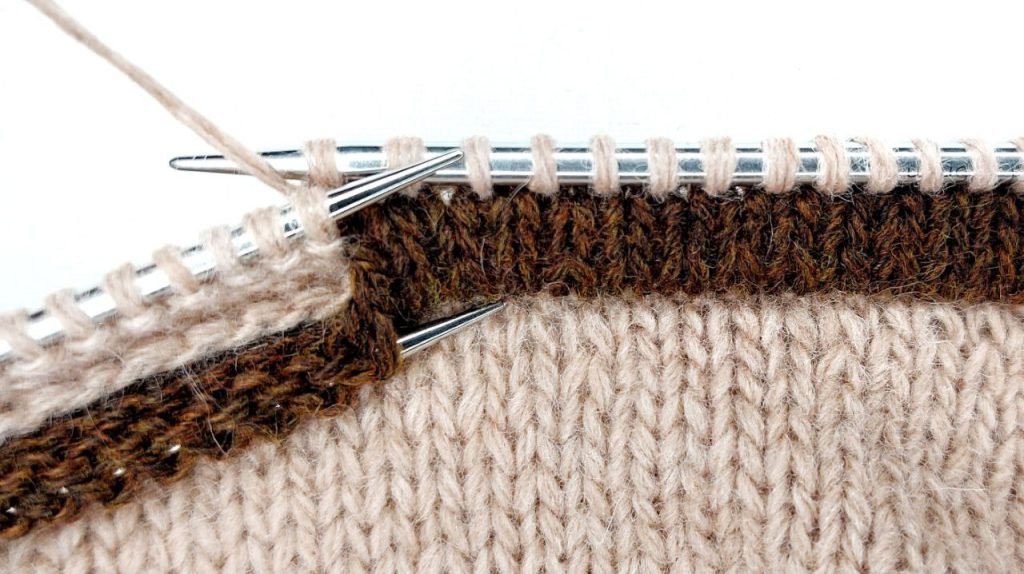
When using the three-needle method, make sure that the stitches of the front and back parts of the double neckband are joined without any shifting.
If you’re knitting a narrow neckband (1–2 cm), you can immediately bind off the stitches while joining their two parts.

If you’re knitting a neckline’s “pocket” which will be continued as a collar, its width is 0.7–1.5 cm. After joining the two parts of the “pocket”, continue knitting the collar.


Working a chain stitch, picking up stitches, knitting, and joining two parts of the double neckband and neckline’s “pocket” on the video:
(you will need to select the desired subtitle language)
(you will need to select the desired subtitle language)