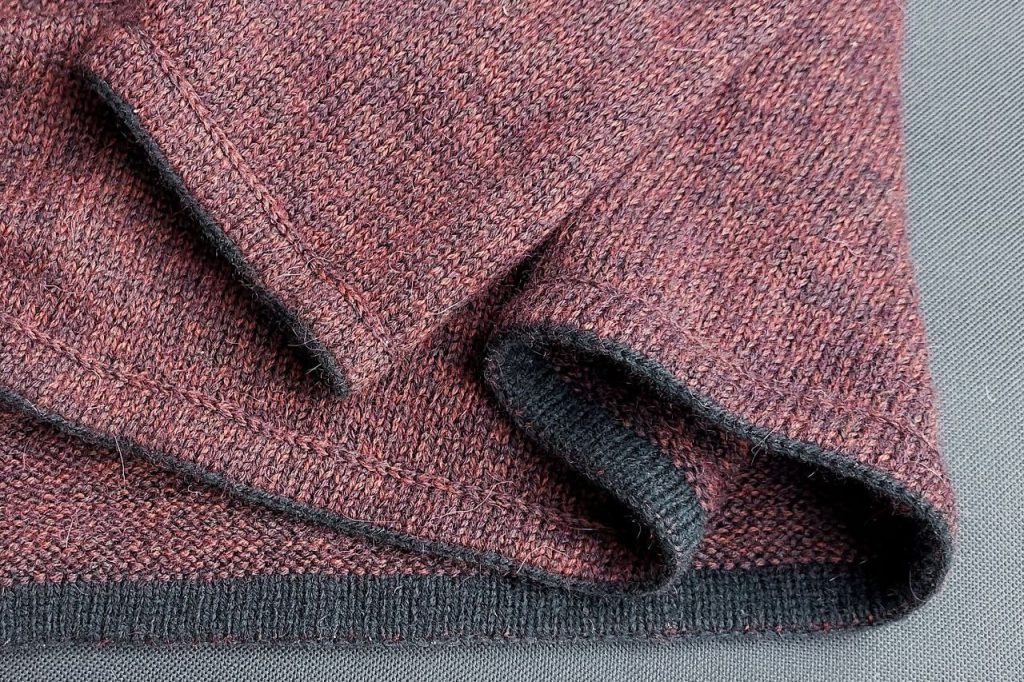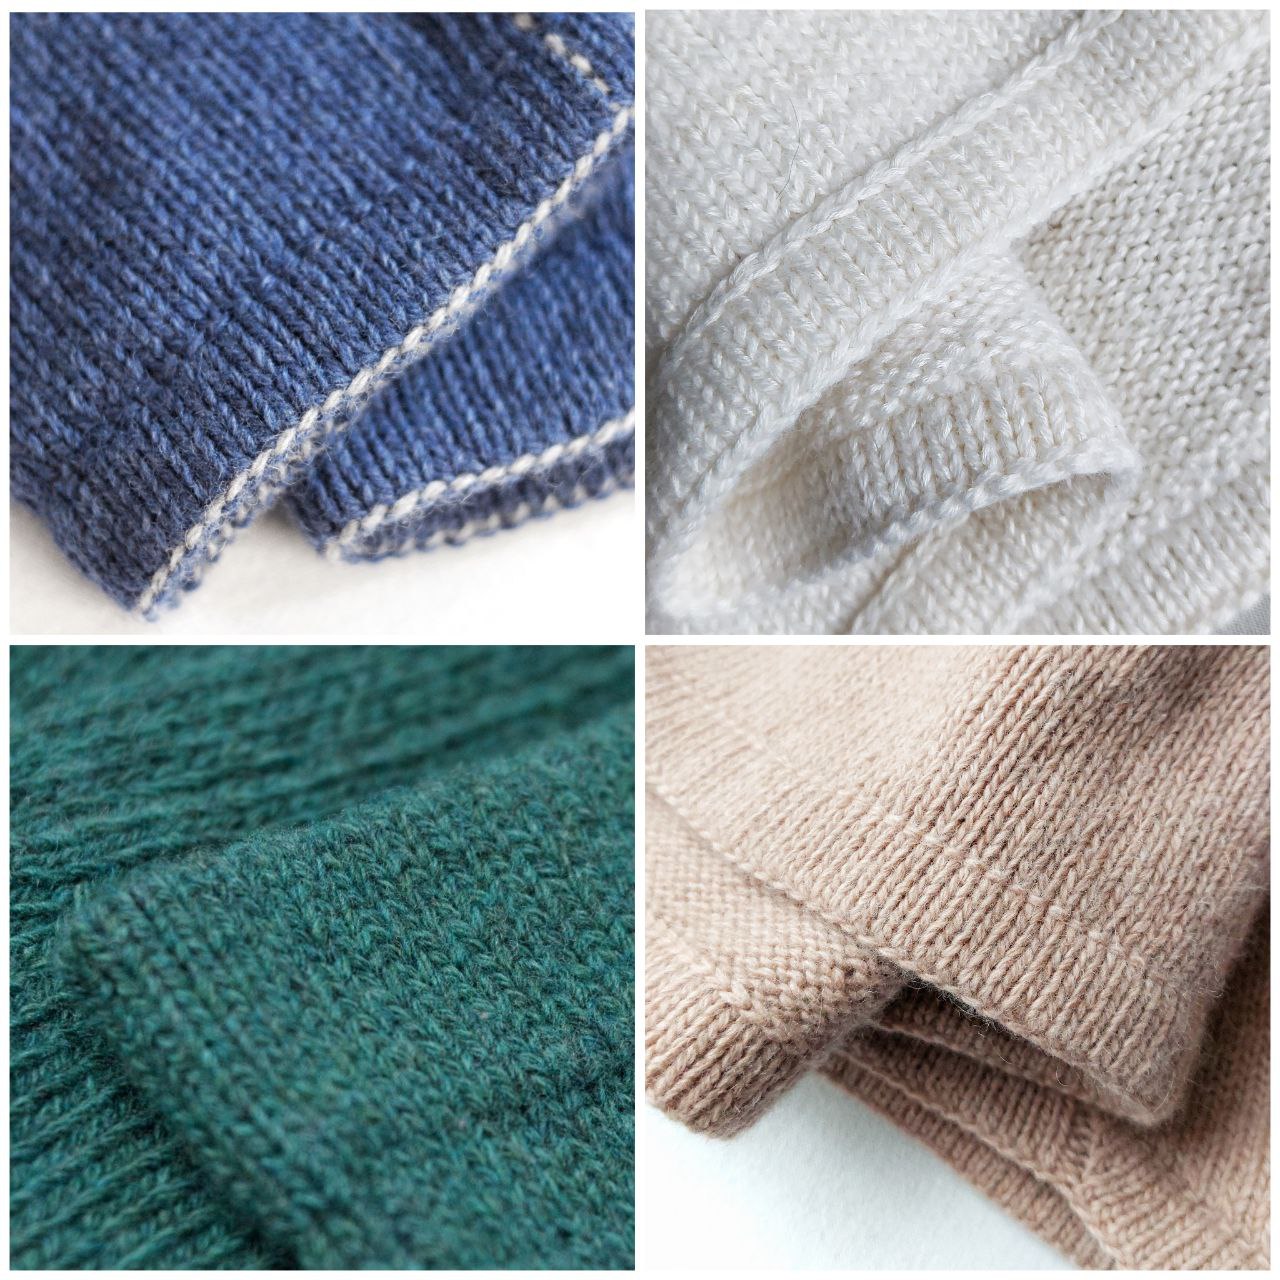
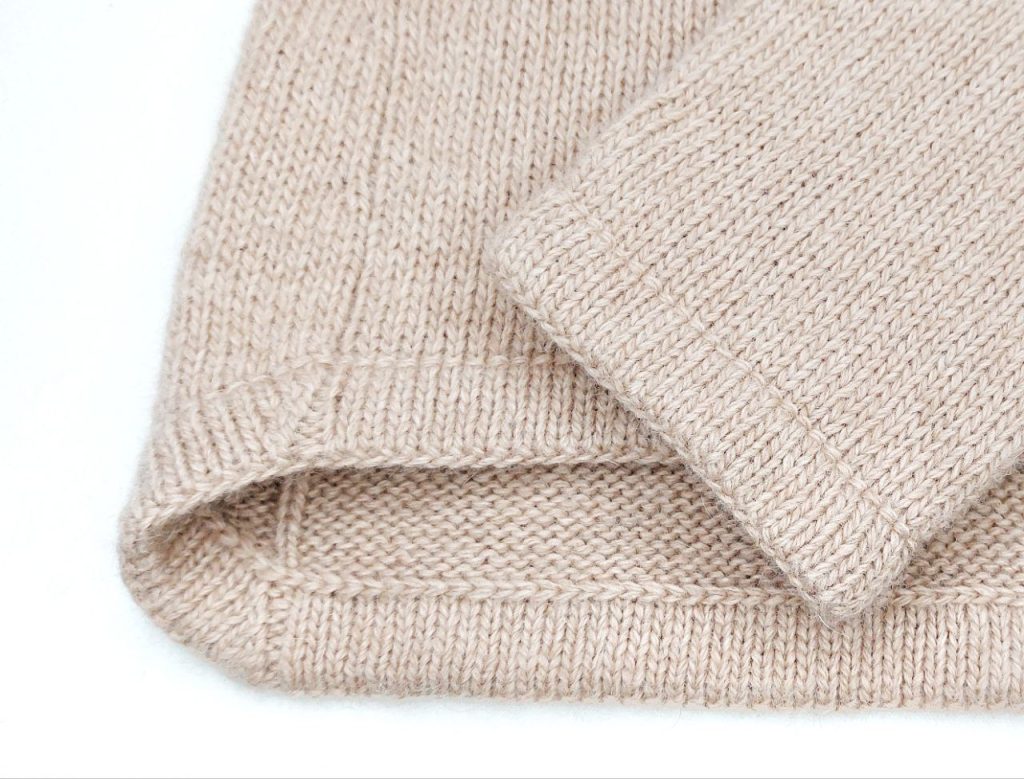
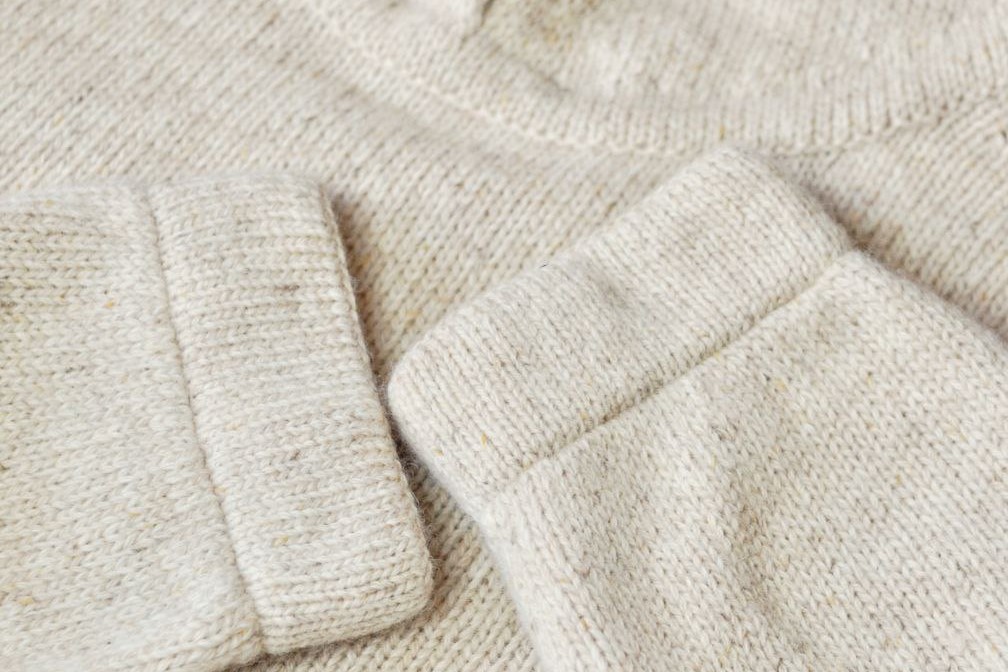
Folded Hem is an edge that folds under to keep the knitting from curling or stretching.
The knitted fabric is folded to the wrong side and fixed with a crochet hook or needle.
Fixing with a crochet hook makes a solid edge that will not stretch; fixation with a needle makes an edge more elastic.
Folded Hems can be used for the lower edges of knit garments or the neckline.
It can be worked at the same time as the piece (continue knitting without binding off) or picked up after it is complete.
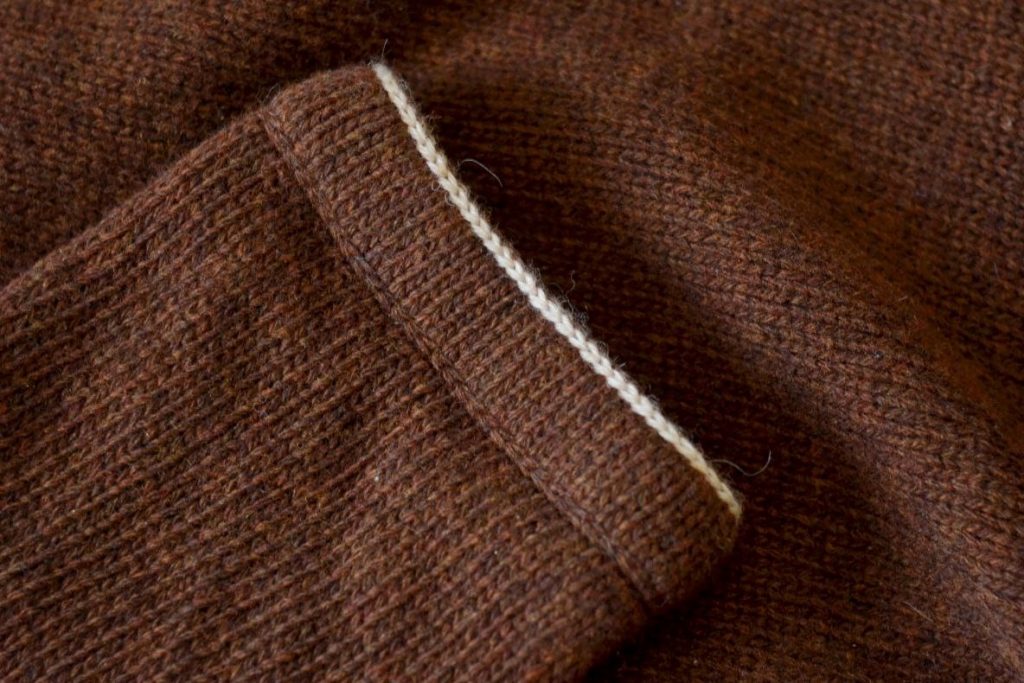
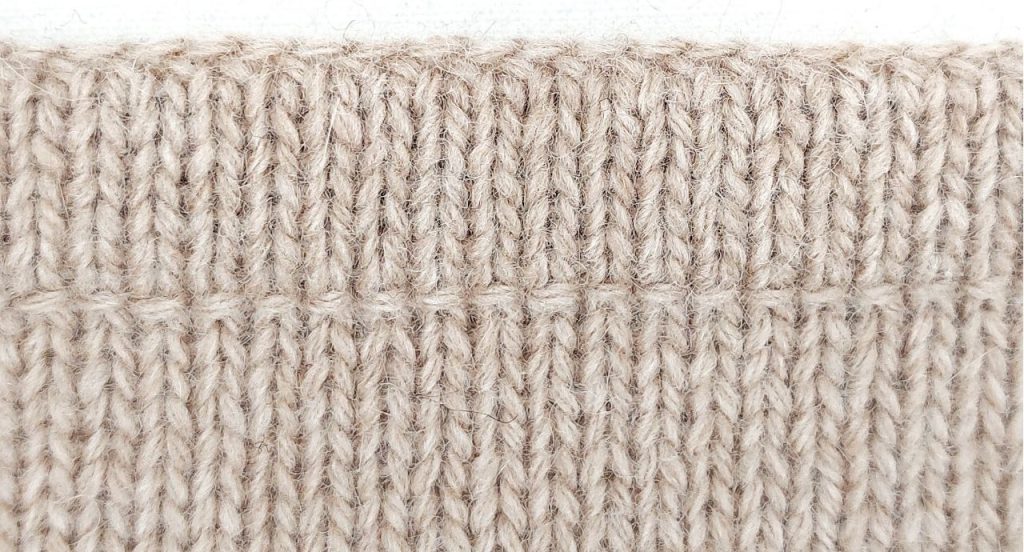
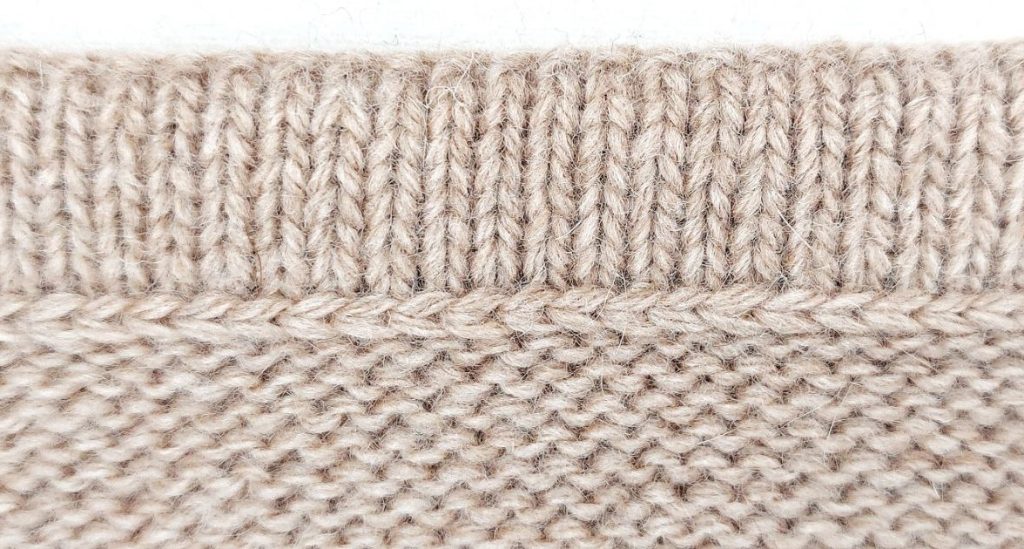
The edge of the hem can be sharp (turning ridge) or rounded (without turning ridge). The edge with slipped or twisted stitches is a more solid.
I recommend using thinner knitting needles for knitting the hem (0.5…1.5 mm thinner than the needles used for the main body). You can remove one thread from the work if the yarn consists of 5-6 threads.
You may have to increase or decrease stitches once the hem is complete, depending on the gauge of the stitch pattern above the hem.
Today we will consider the hems that are worked at the end of the knitting.
Knitting algorithm:
1. Work the desired depth of the hem front part in a stockinette stitch.
2. Work the hem bending (turning ridge, fold line). Some options are presented below.
3. Work the hem inner part in a stockinette stitch (the number of rows / rounds of the hem inner part is one less than the front part).
4. Fold the hem up along the fold line with right side out. Link the open stitches of the hem inner part with the main body. Use a crochet hook or yarn needle.
We get a voluminous hem if link the stitches of the last row / round of the hem inner part with the last row / round of the main body; if link with the first row / round of the hem front part the hem will be a flatter one.
Some options of linking are presented below.
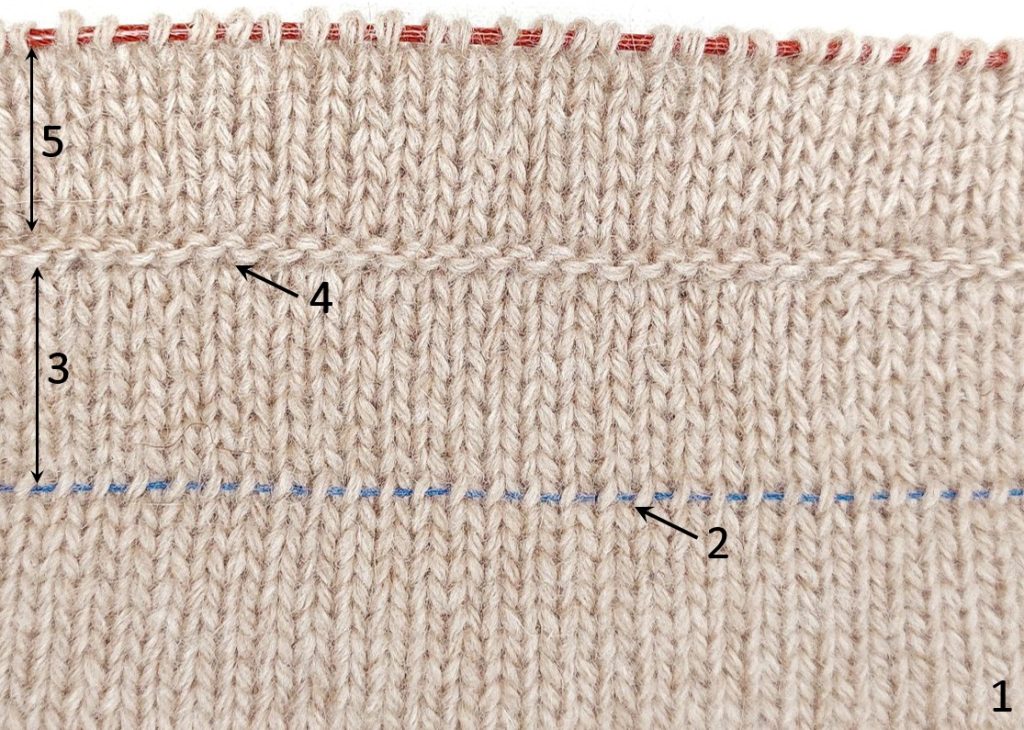
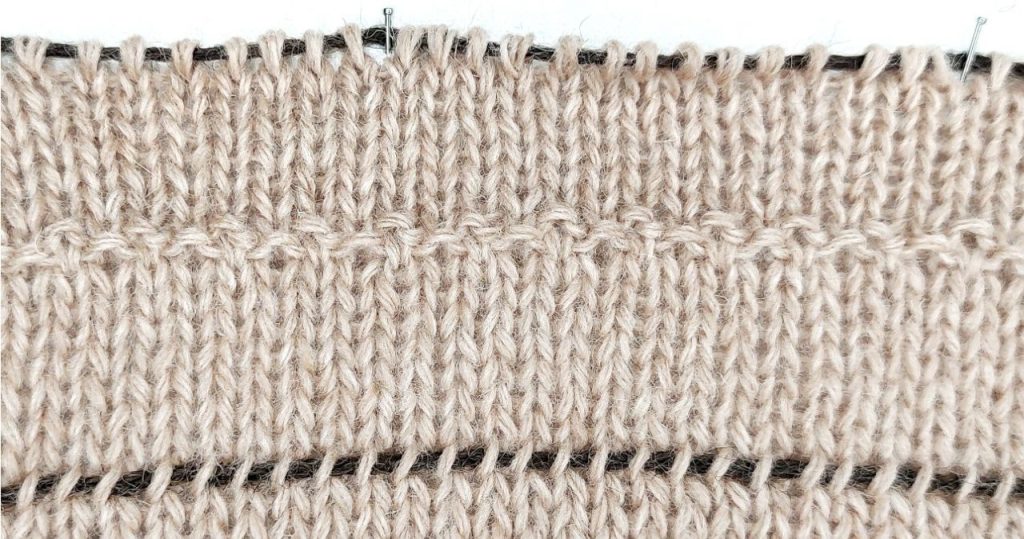
2 – marking of the separation of the main body and the hem,
3 – front part of the hem,
4 – hem bending (turning ridge),
5 – inner part of the hem
Recommendations before starting work:
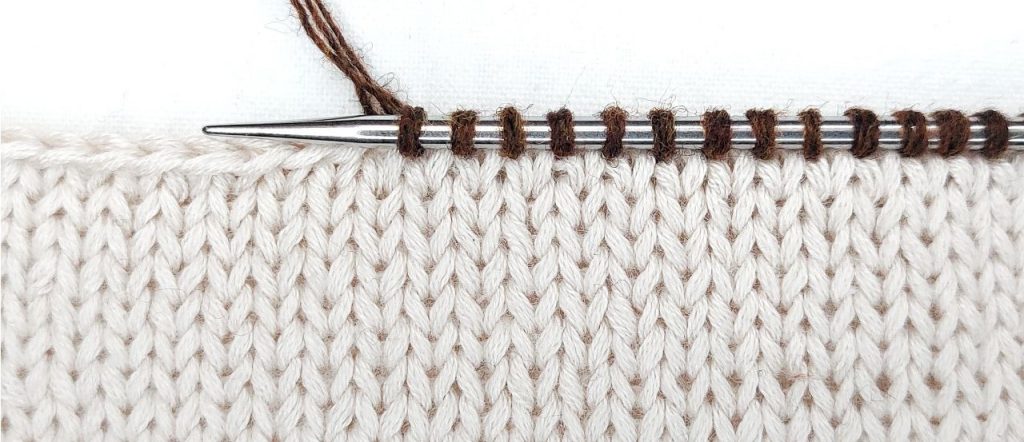
1. The last knitted row / round of the main body (before knitting the hem) can be marked with a contrasting yarn for simplify the linking process.
2. Also you can transfer the stitches from the knitting needles to a waste yarn for simplify the linking process.
3. Try a sample before you begin.
4. If you want to get a solid edge that will not stretch, bind off the stitches of the main body before working the hem. Pick up the stitches for knitting the hem along the bound off edge.
Options of the hem bending (turning ridges):
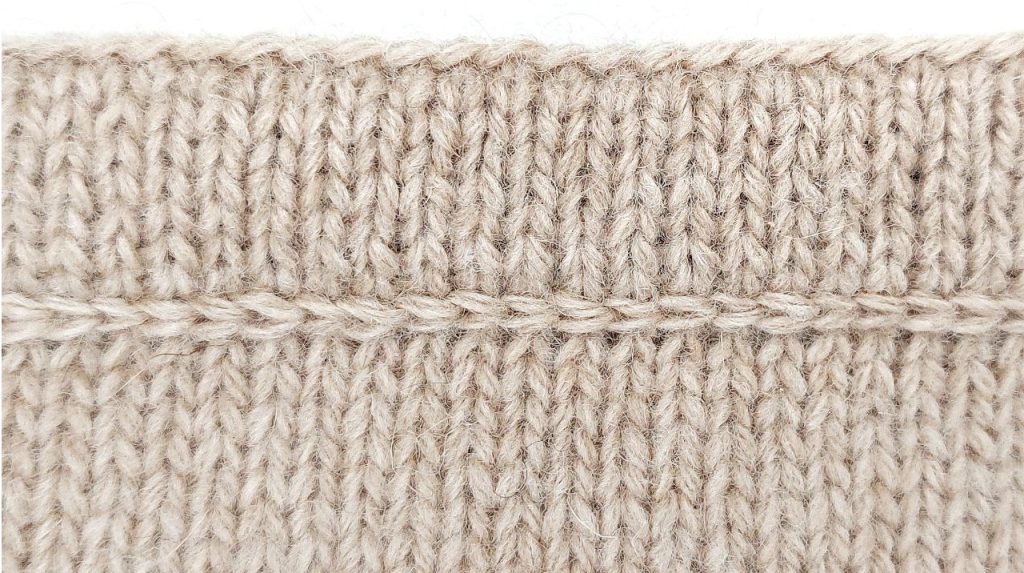
1. Purl one row / round or work one row / round with twisted purl stitches.
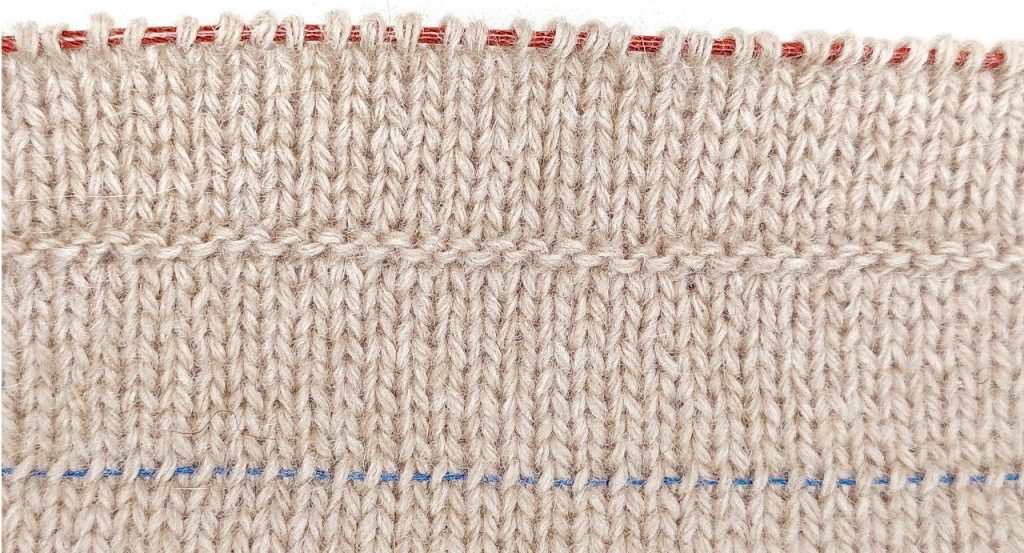
To get a more elastic edge, you can work the row / round before the hem (the last row / round of the front part), the bending row / round and the next row / round (the first row / round of the inner part) with even thinner knitting needles (1.5…2mm).
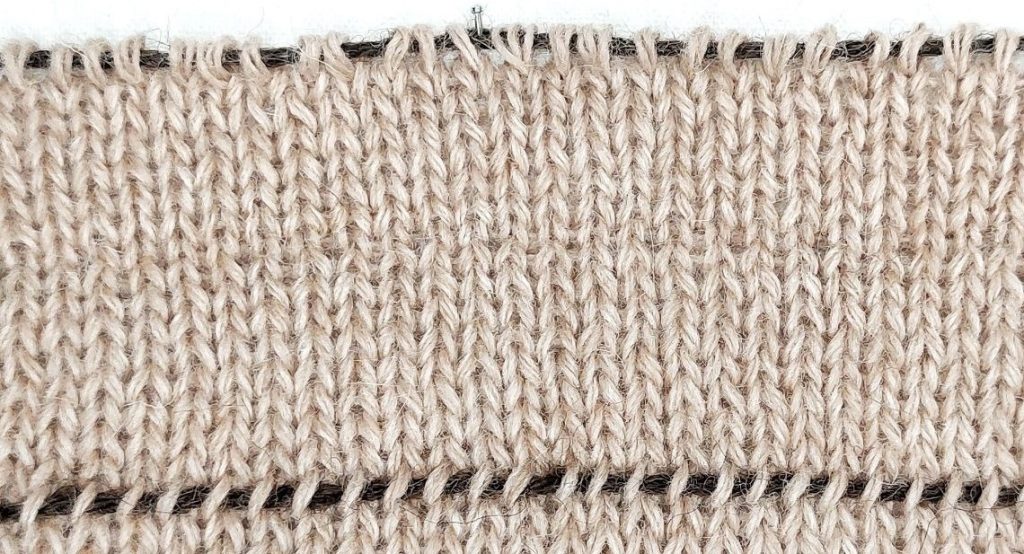
2. Horizontal chain: *1 twisted knit stitch, 1 knit, turn the first stitch to the left knitting needle in right side (before work). Repeat from * to the end.

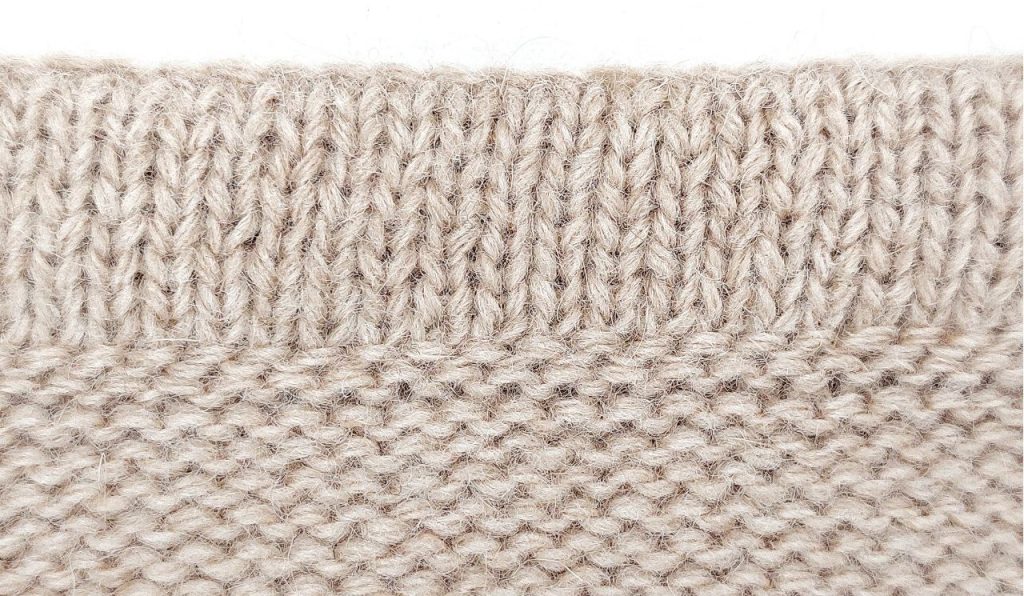
3. Work two rows / rounds with the slipped stitches. The edge of the hem can be sharp (work purl stitches) or rounded (work knit stitches).
Row / Rnd 1: *1 knit (purl), slip 1 stitch. Repeat from * to the end.
Row / Rnd 2: *slip 1 stitch, 1 knit (purl). Repeat from * to the end.
Options of linking
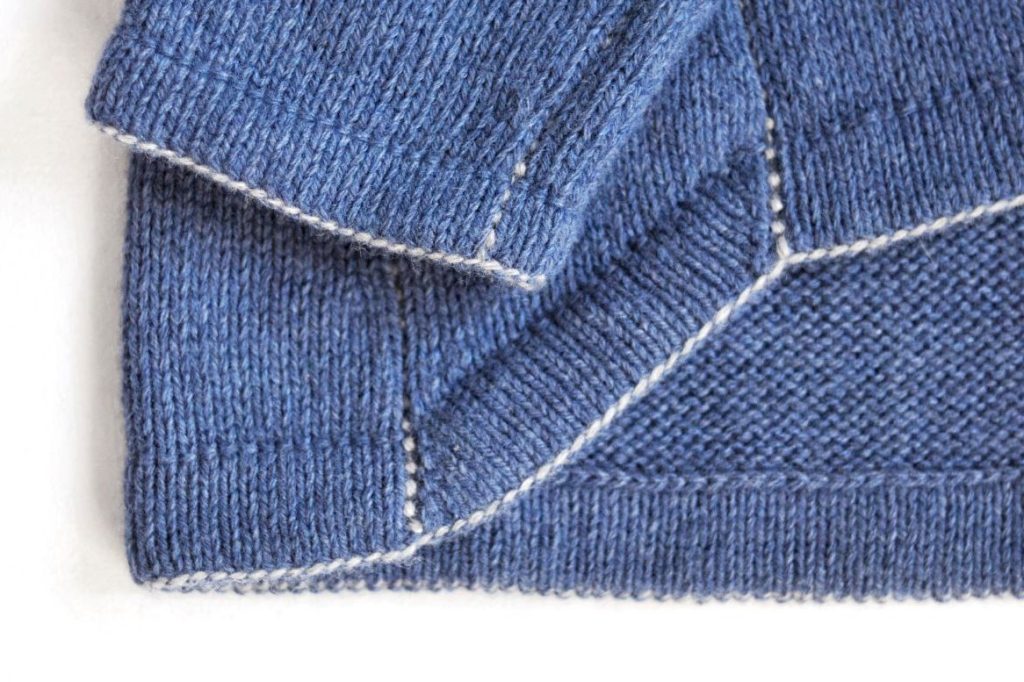
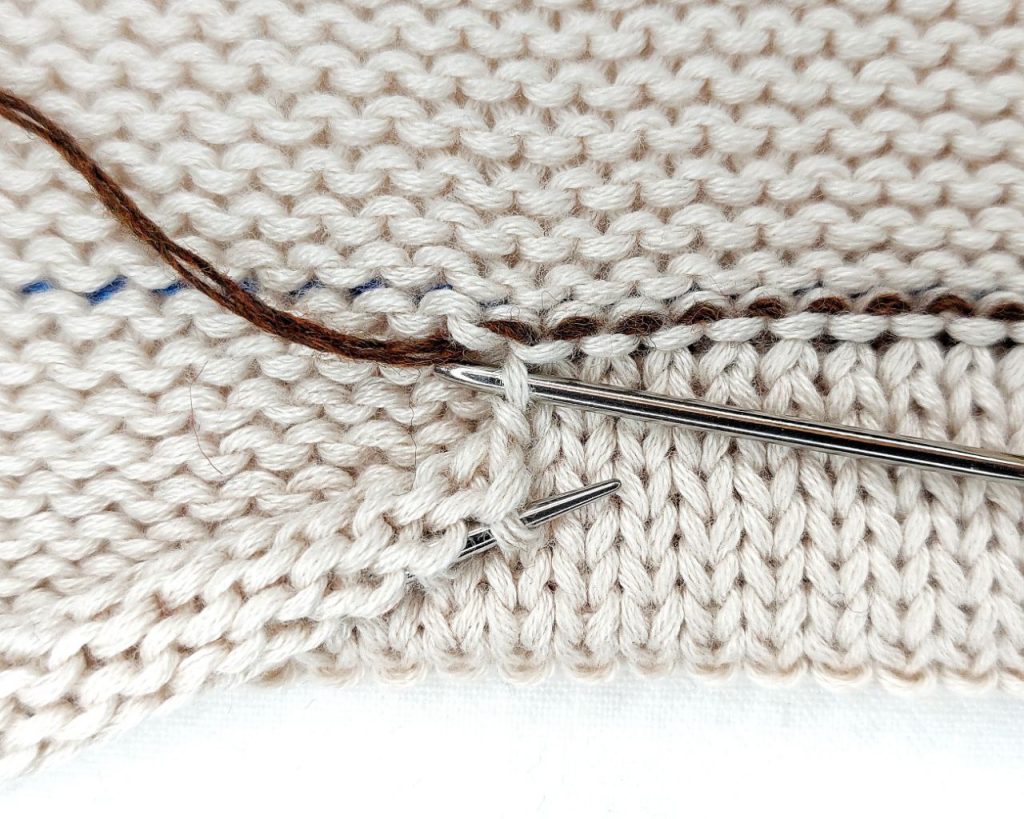
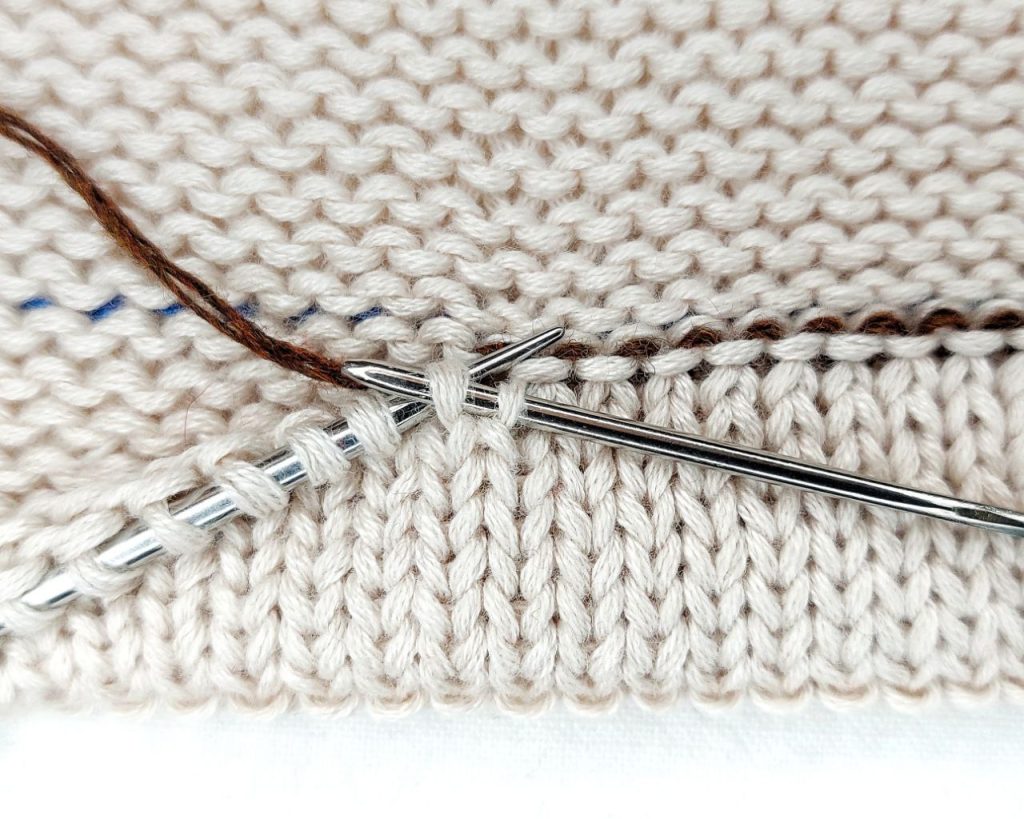
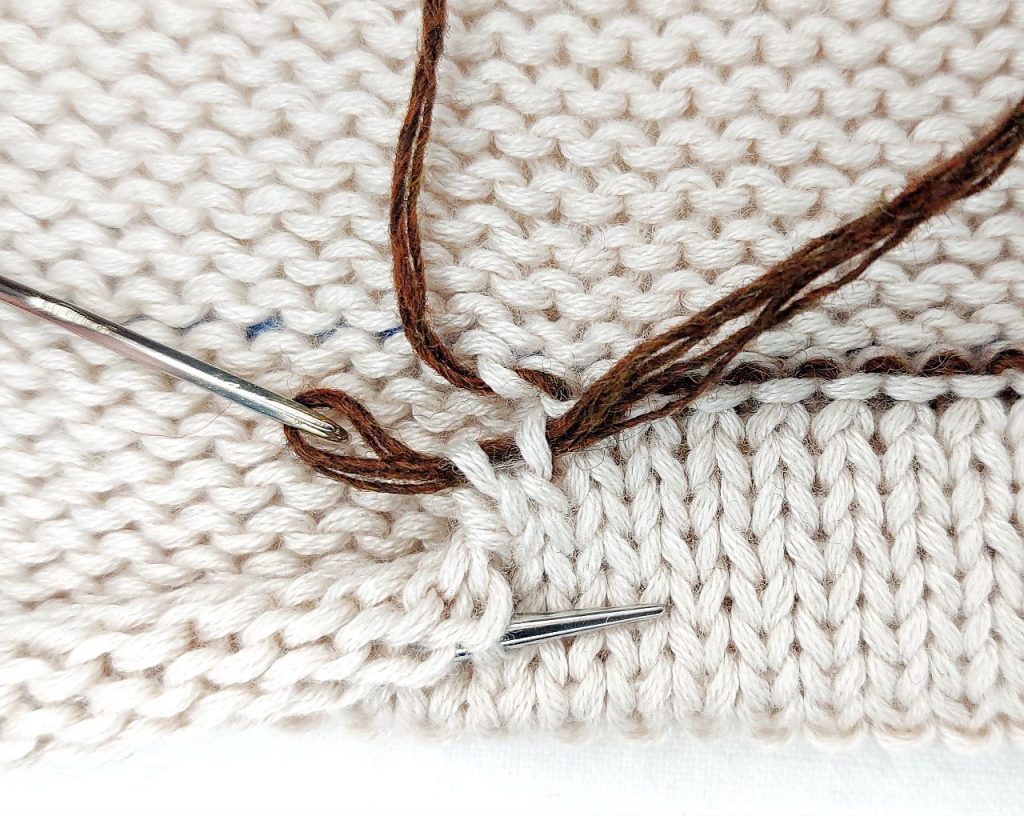
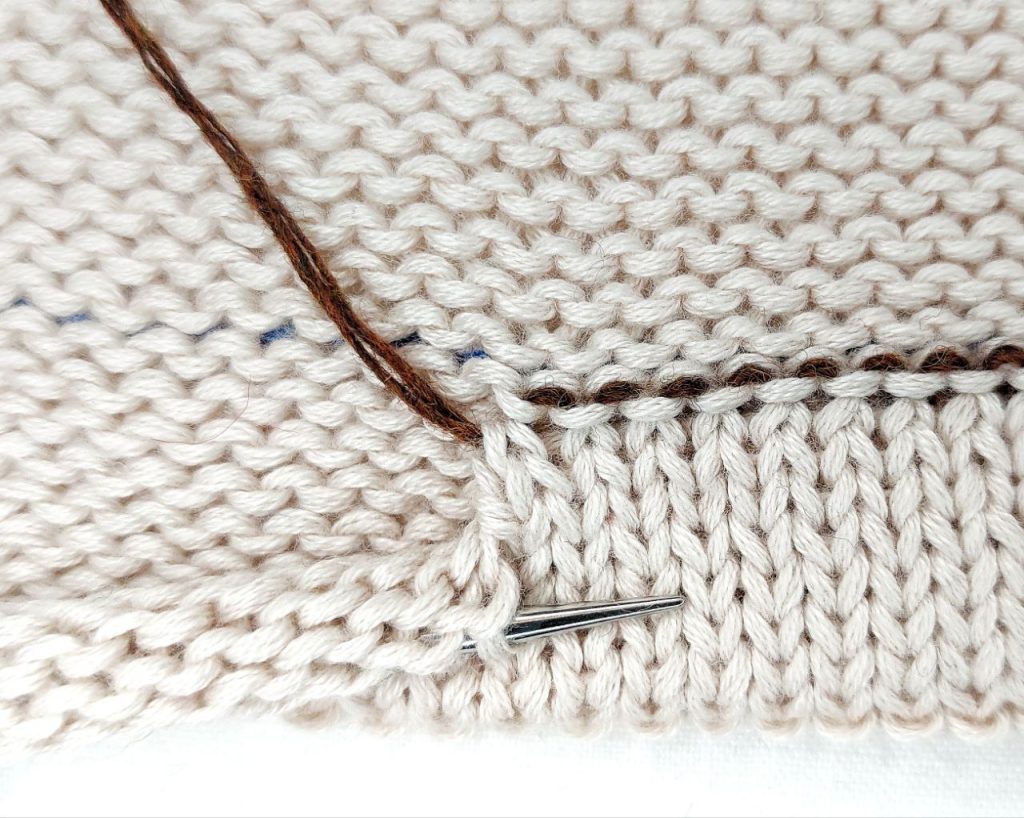
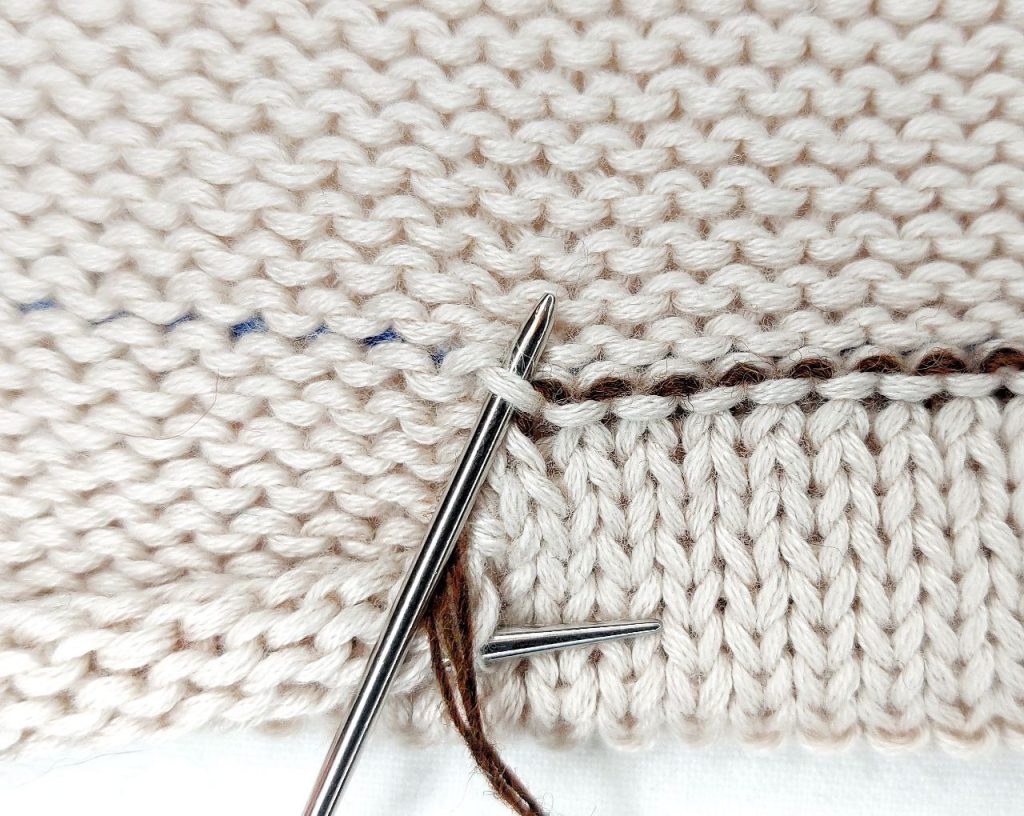
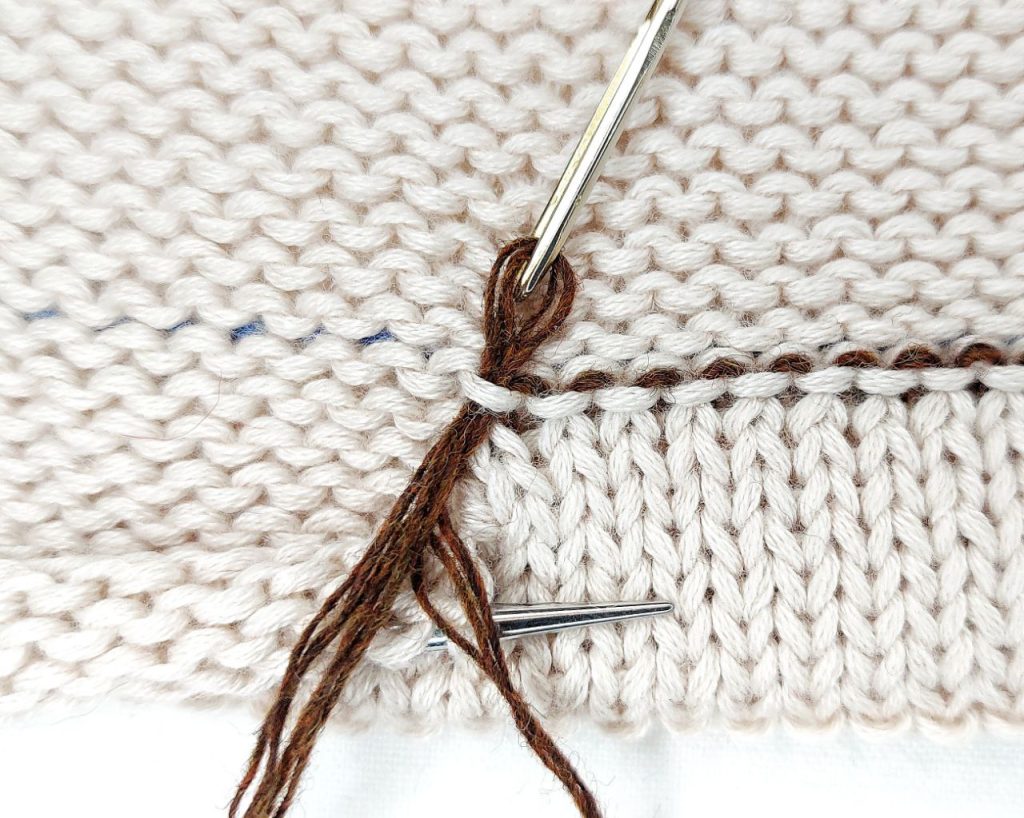
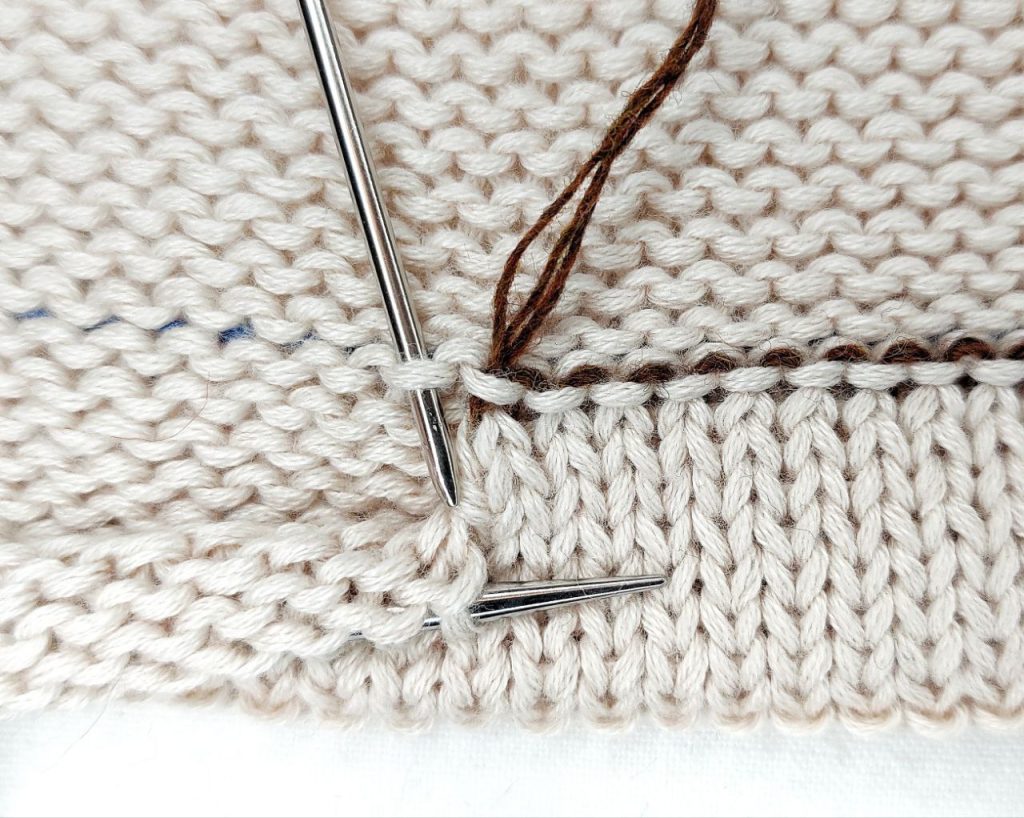
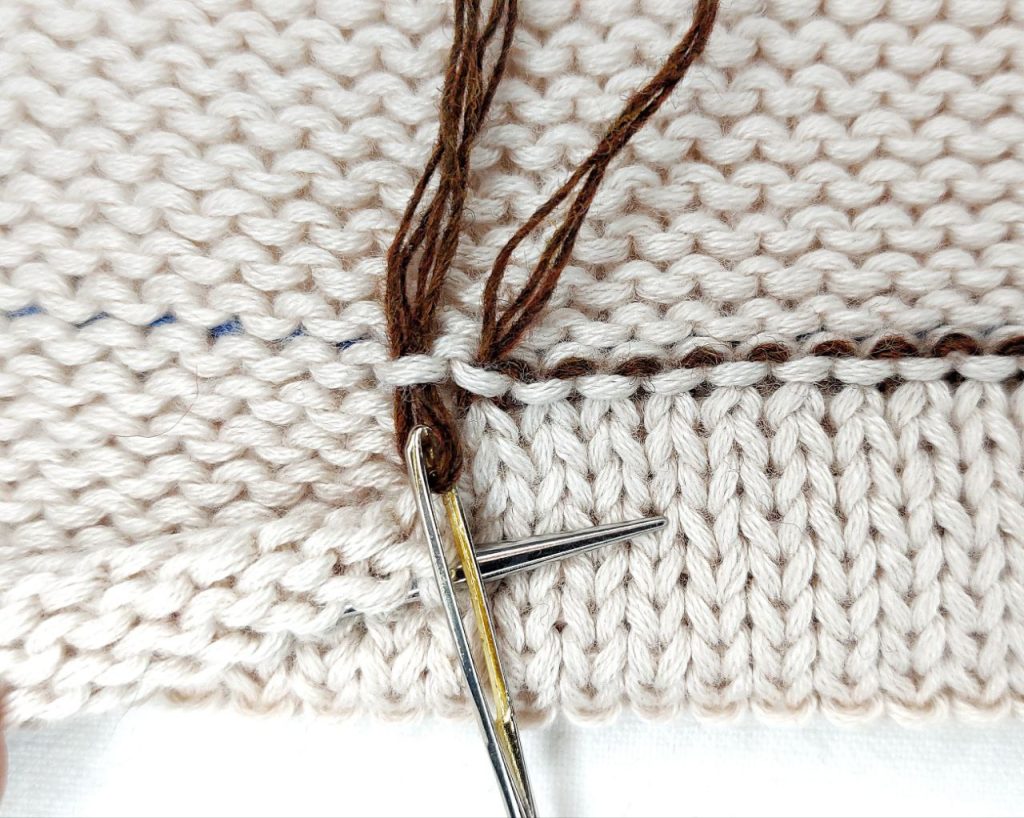
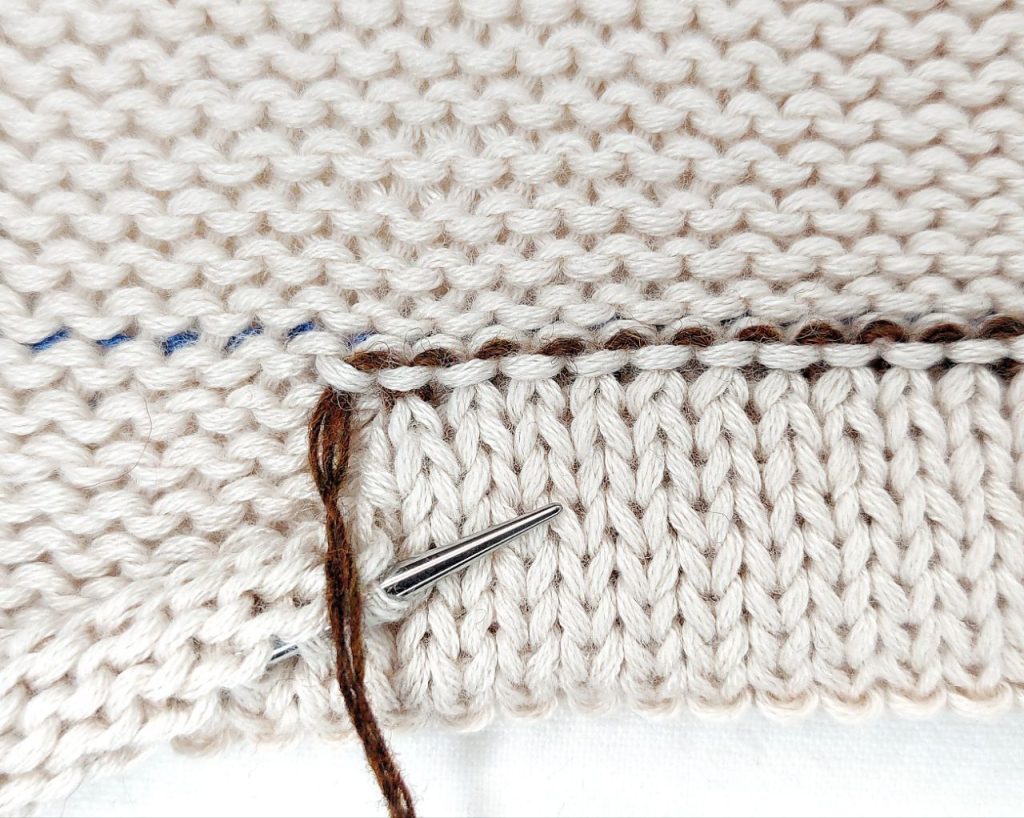
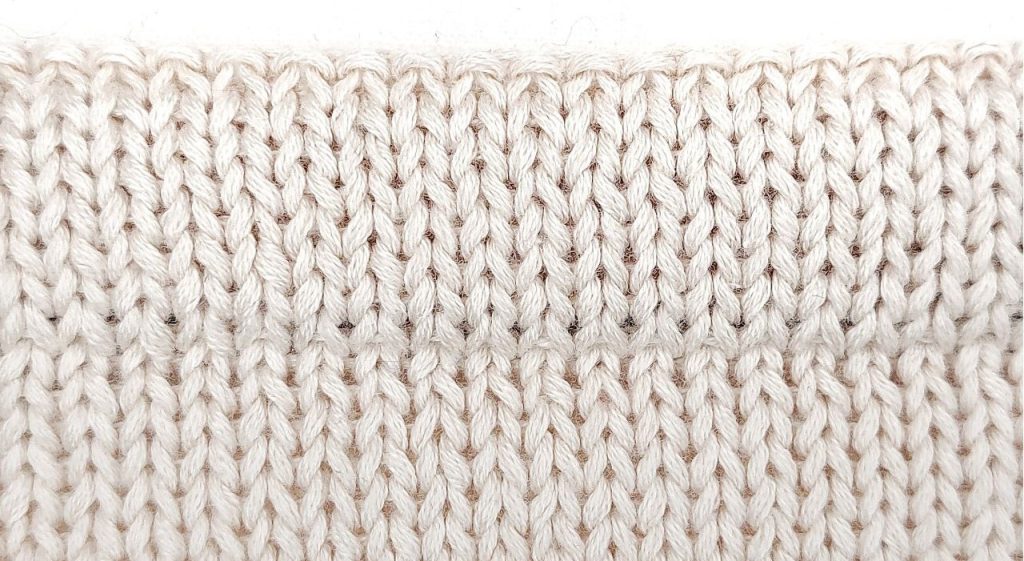
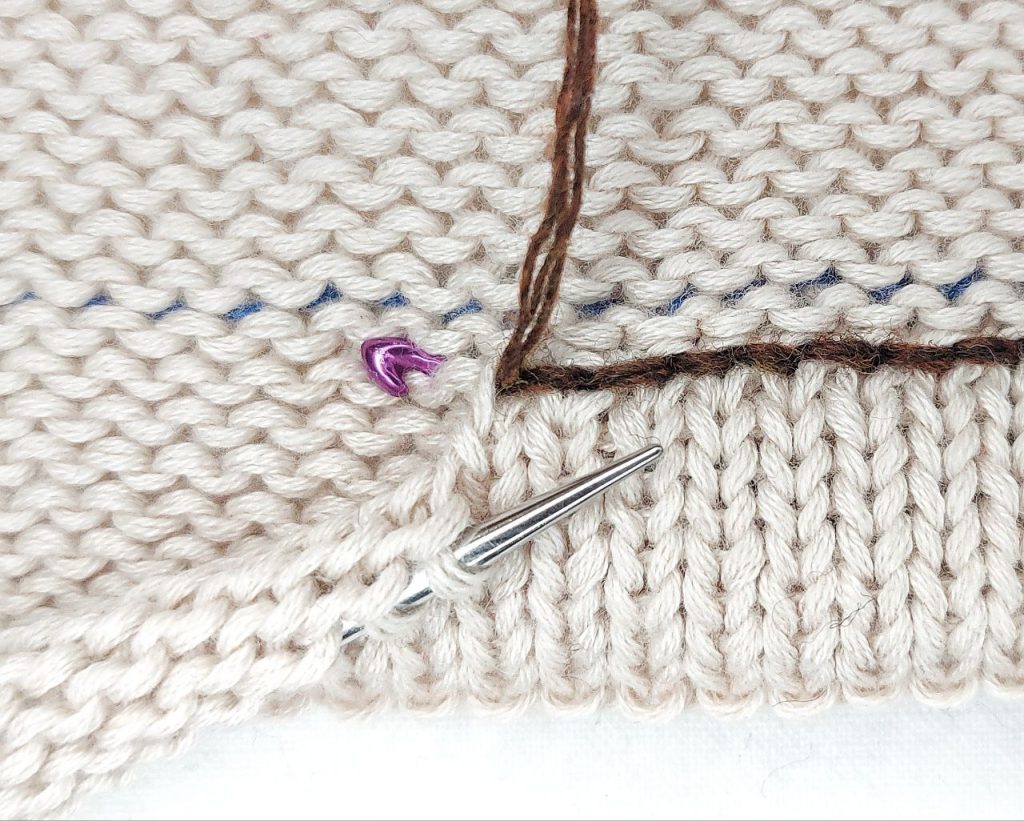
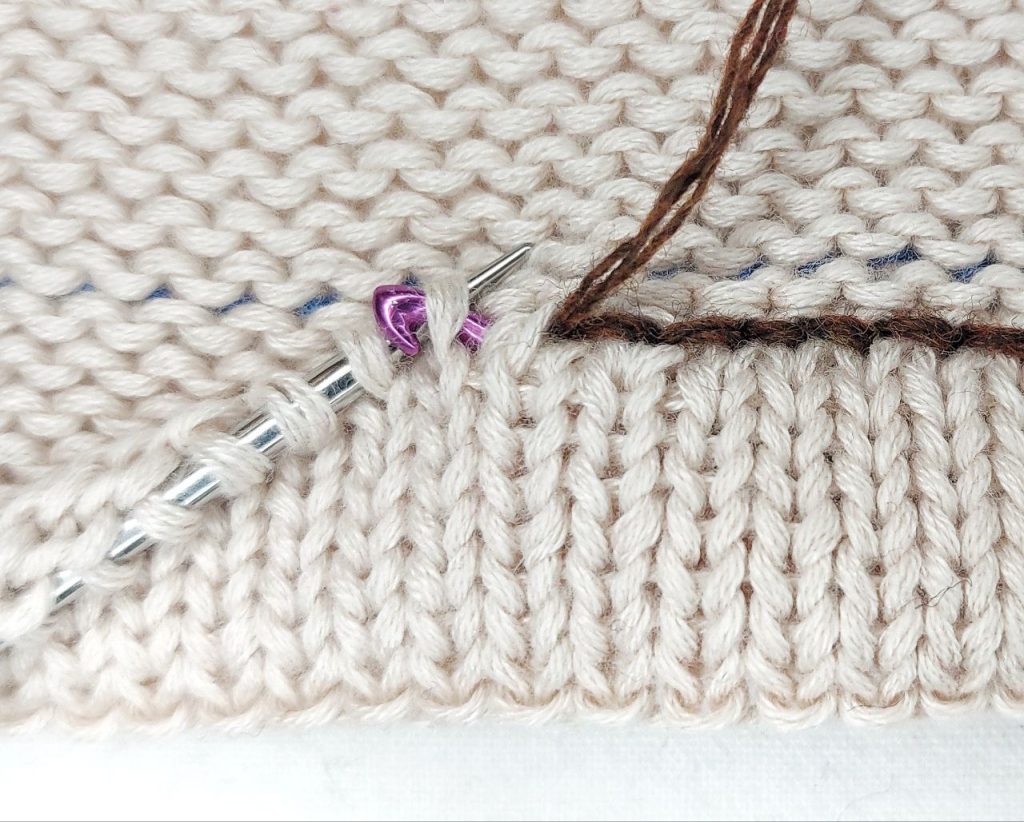
1. Graft the open stitches of the hem inner part to the reverse stocknette side of the main body, matching stitch for stitch. Grafting is done on the wrong side. On the main body, follow the line of the purl stitches.
First, measure the working yarn 3.5…4 times longer than the width / circumference of the main body edge, cut it and tuck the yarn into the eye of the needle.


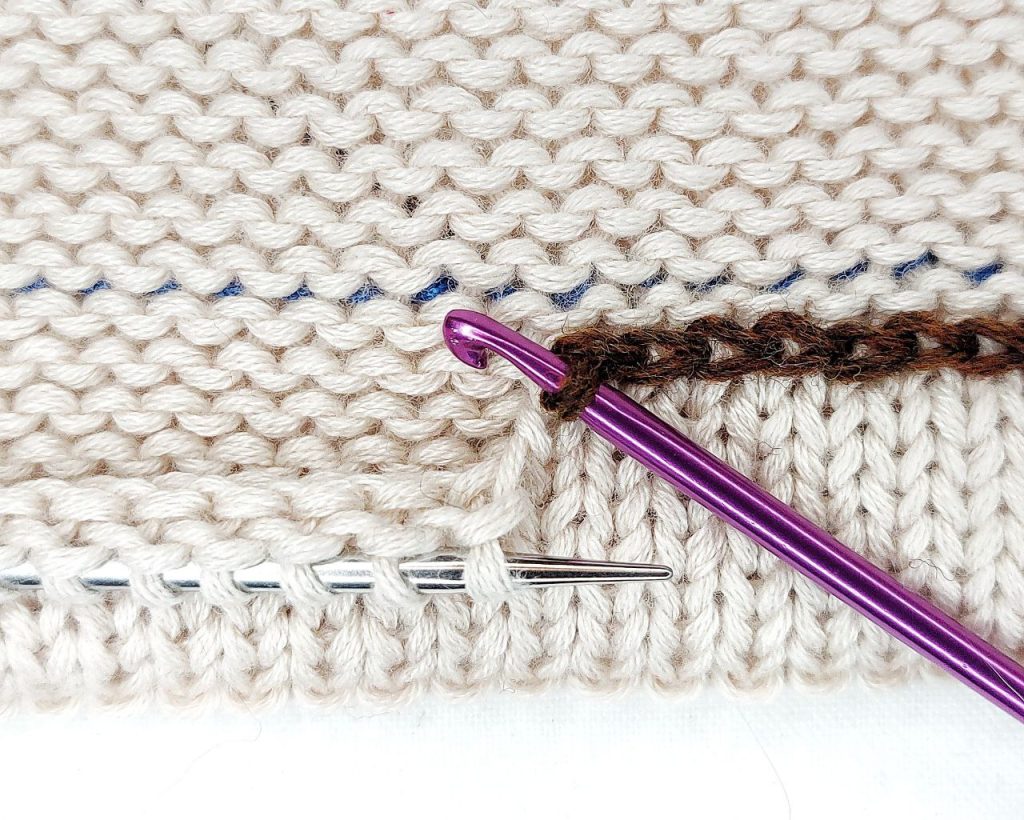
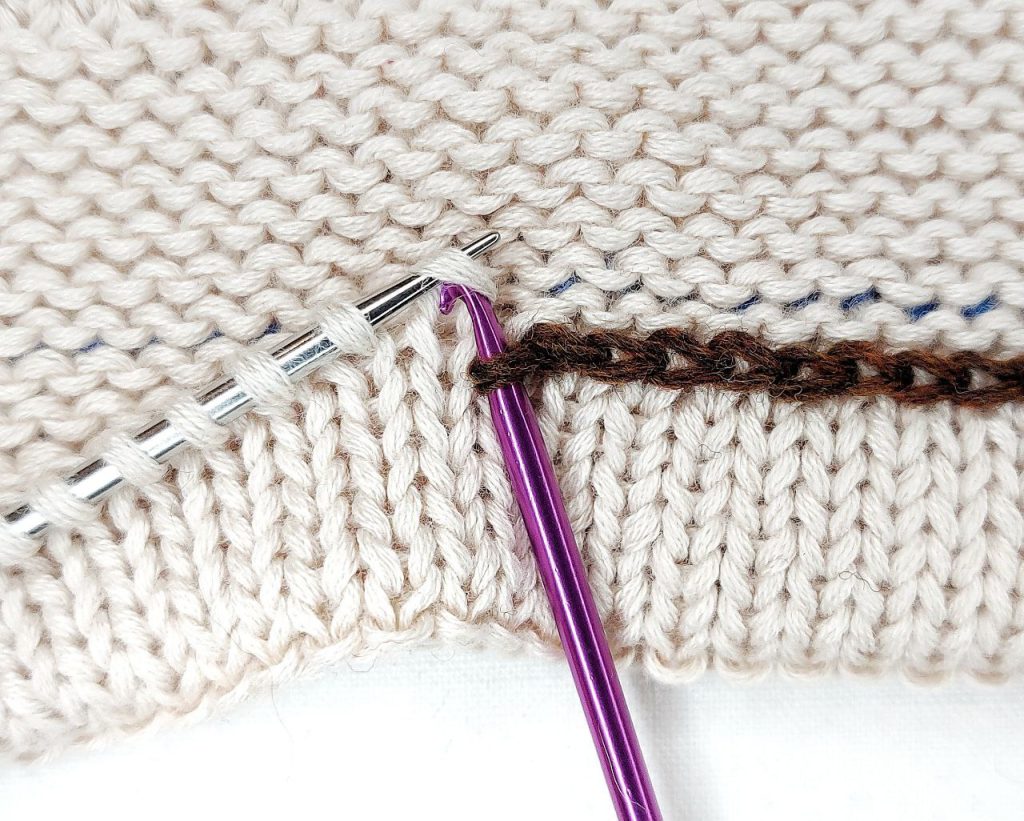
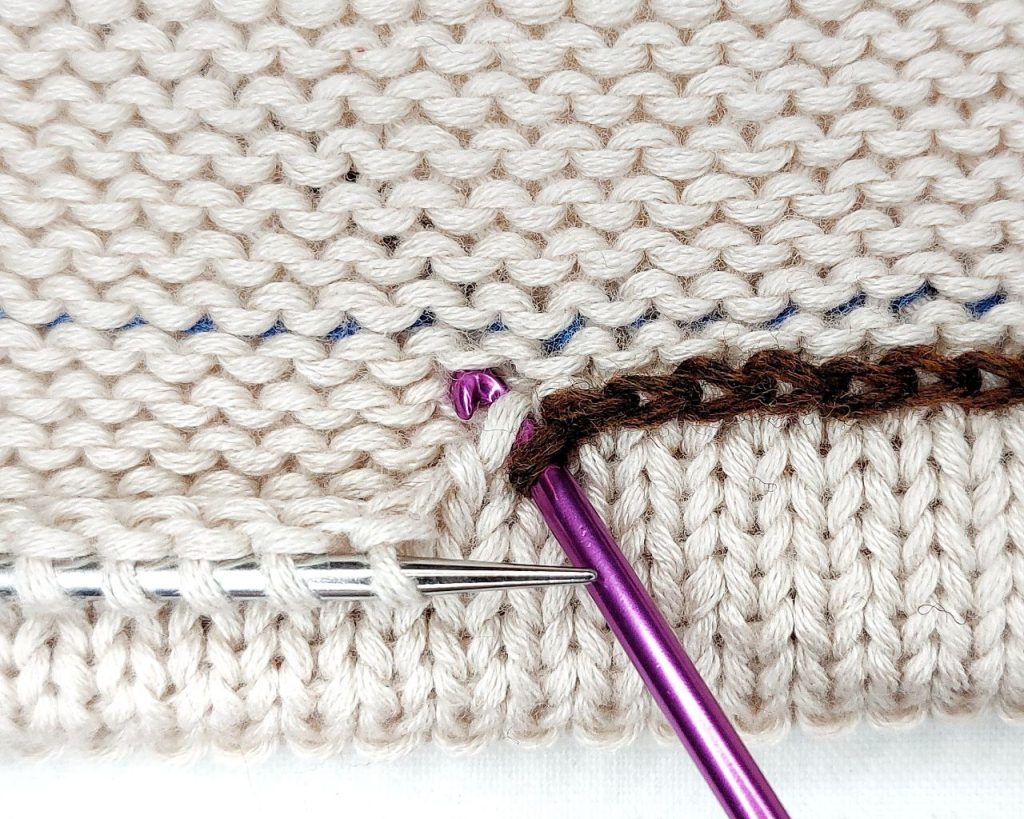
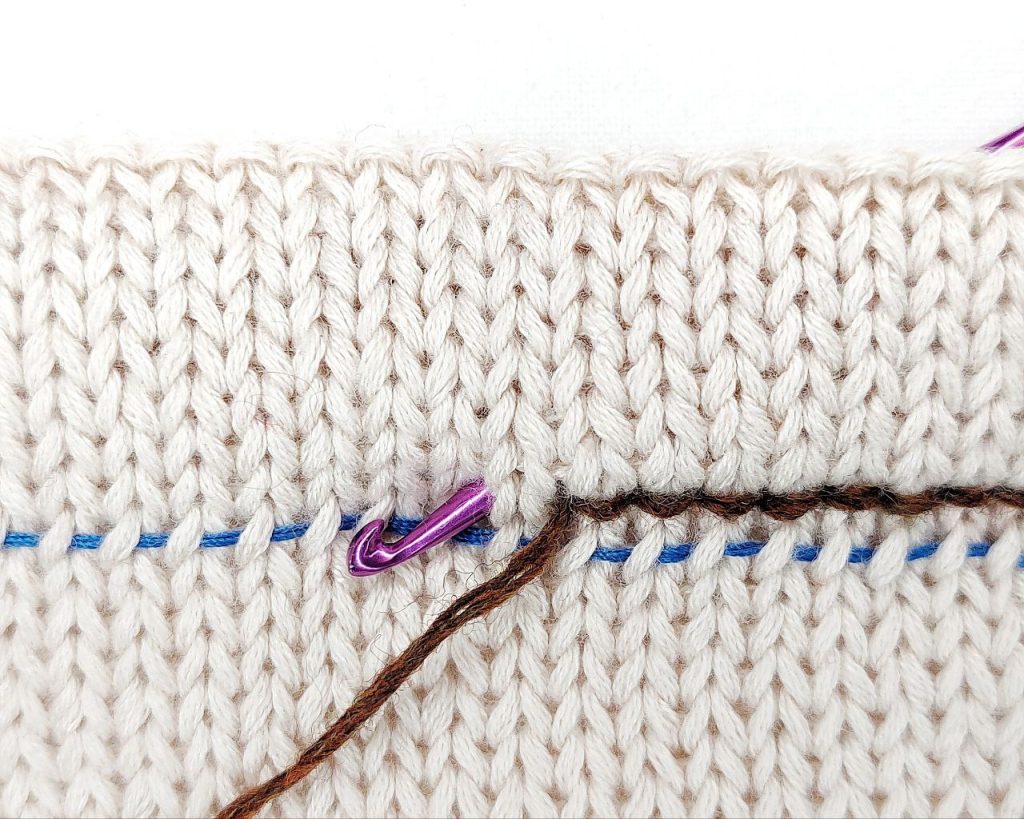
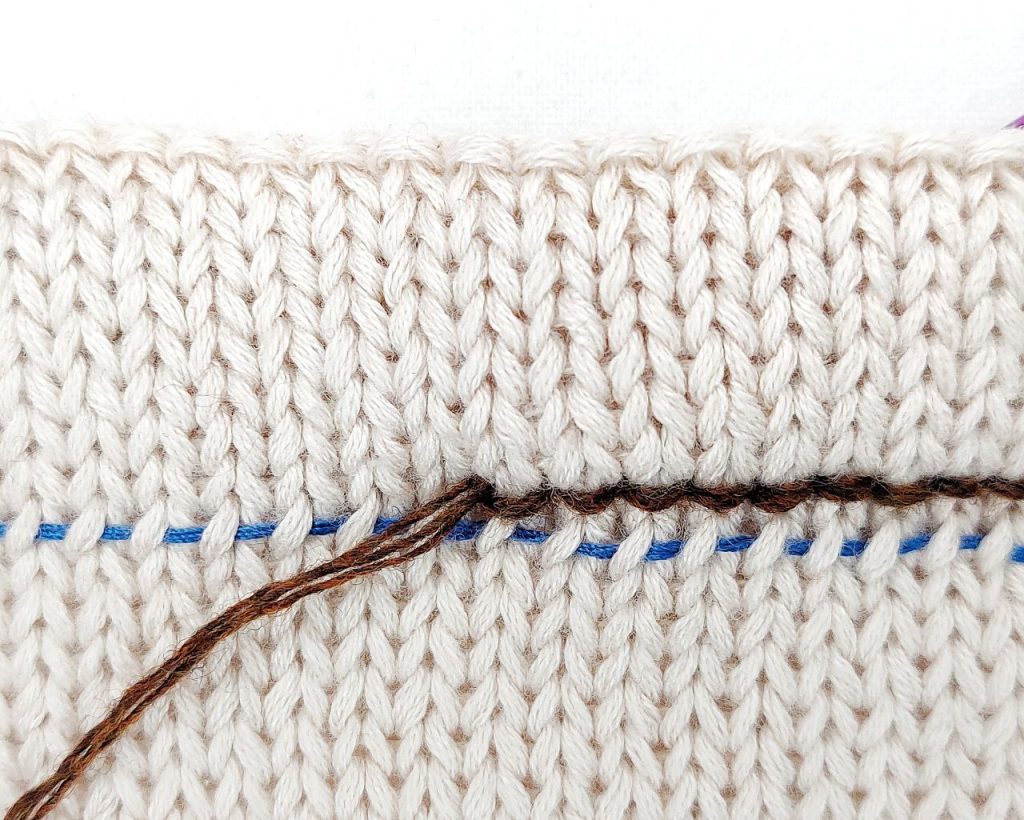
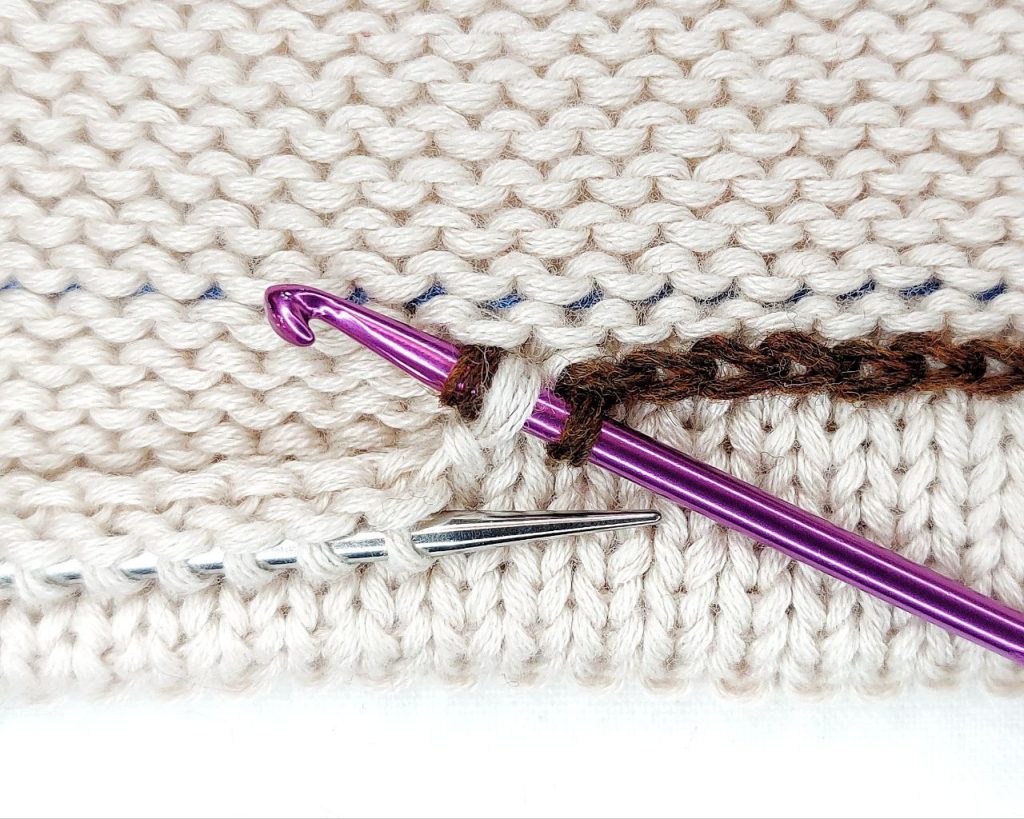
2. Linking with a chain seam on the right side using a crochet hook.
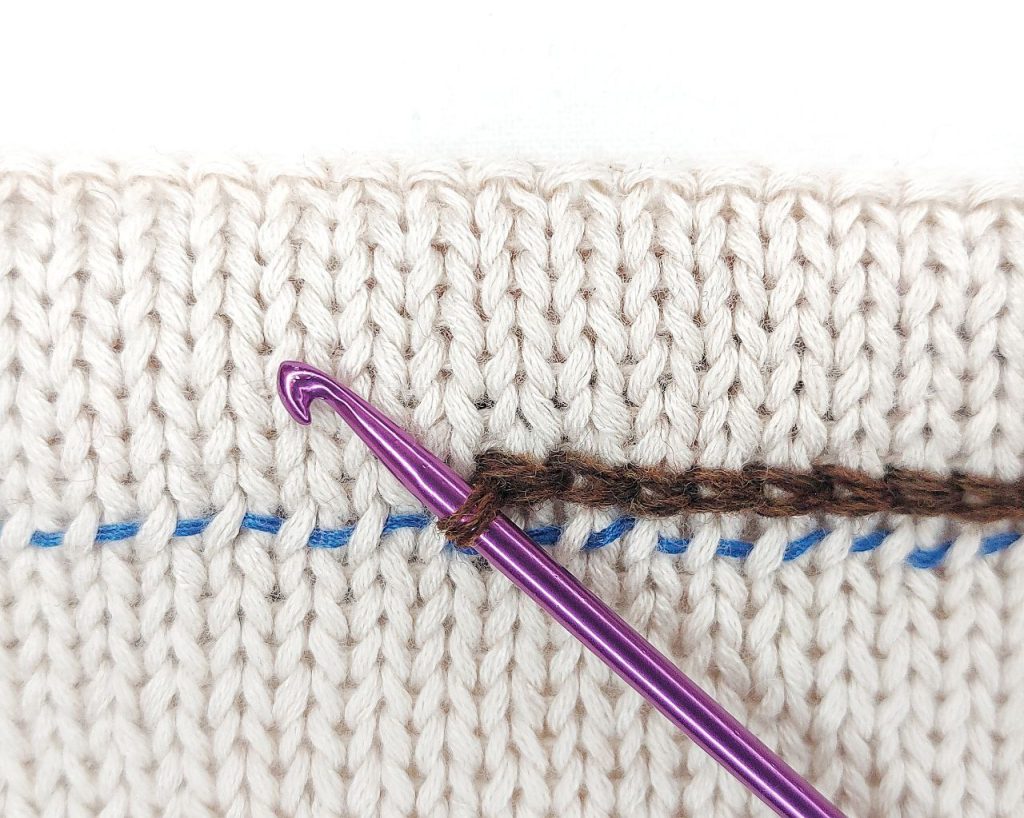
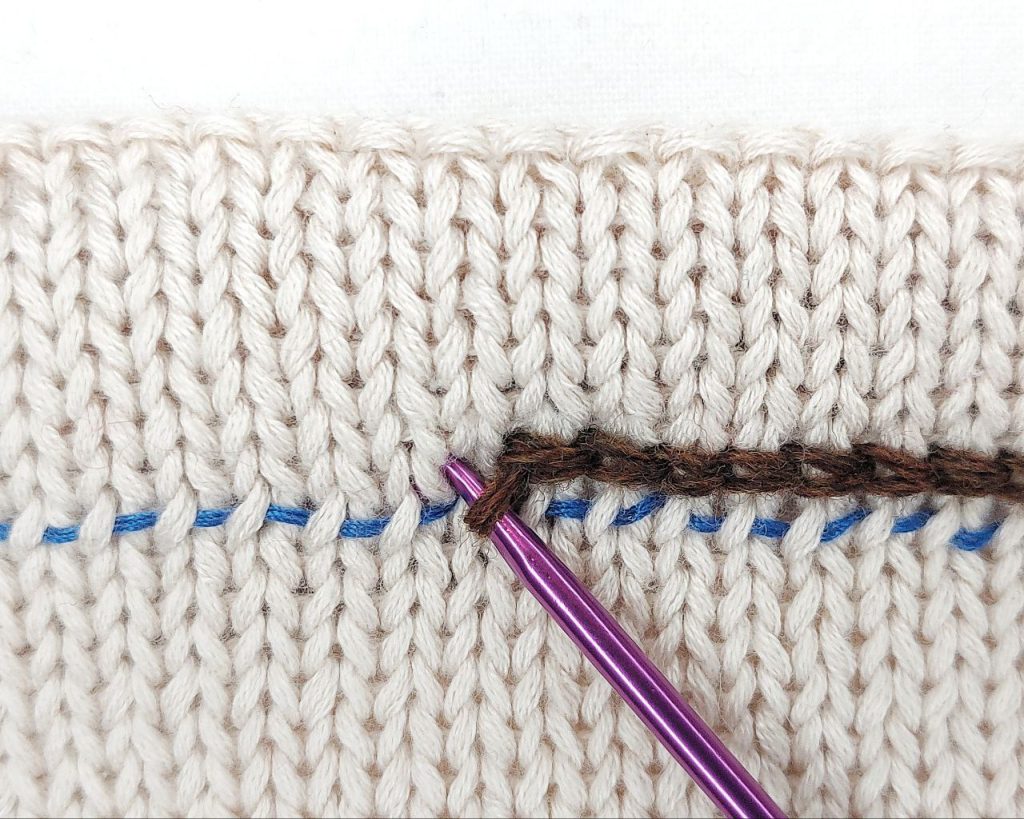
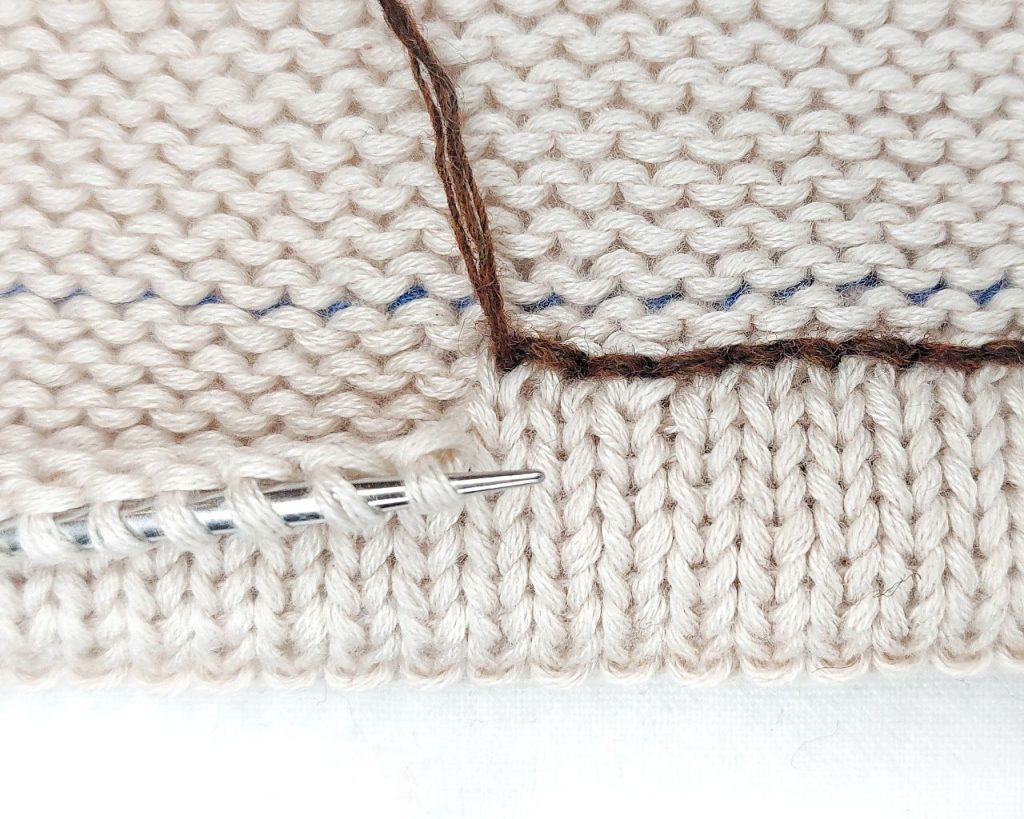
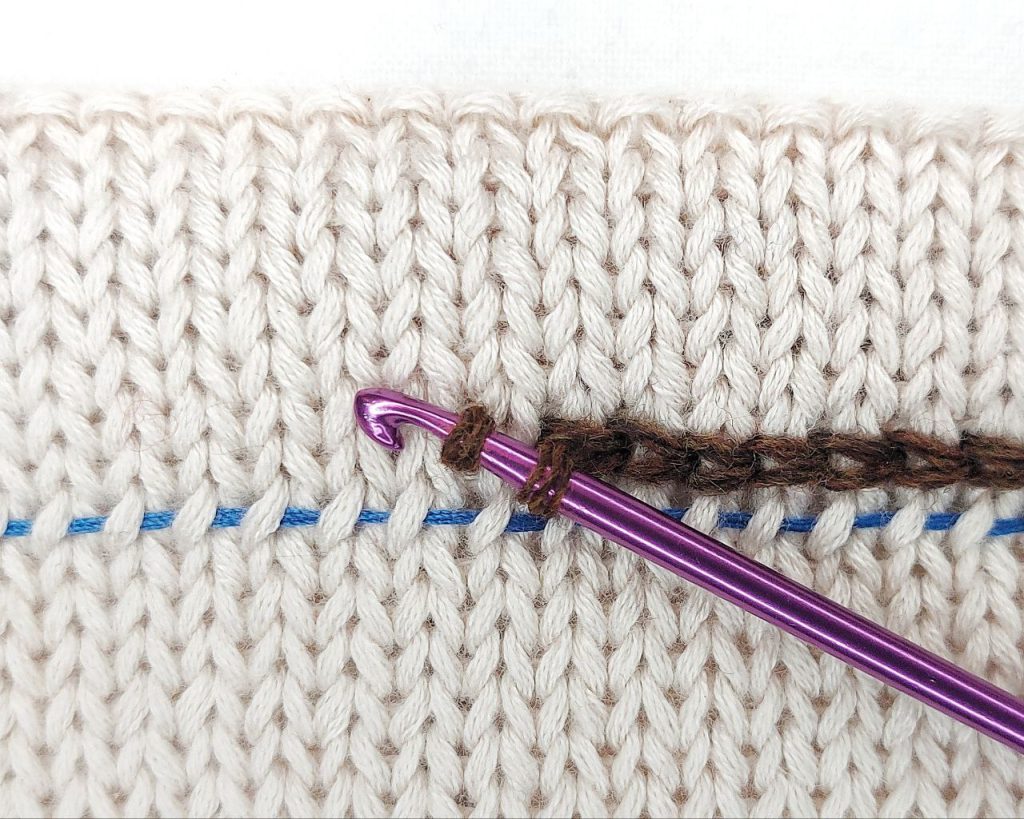
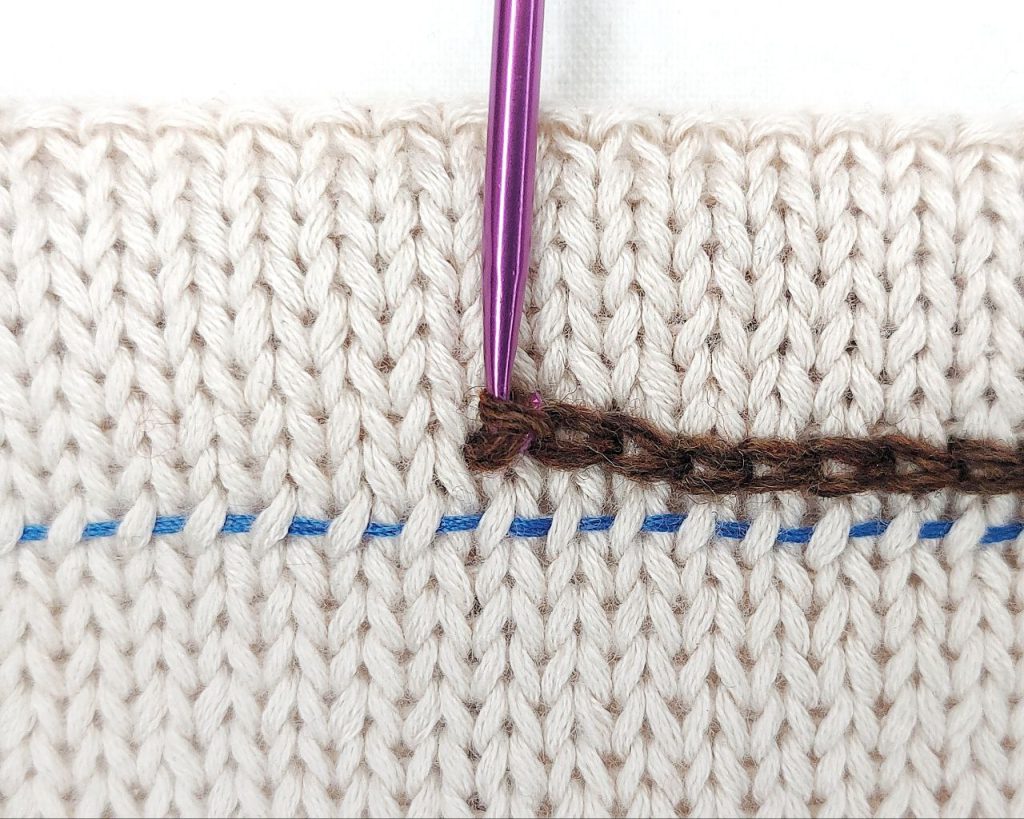
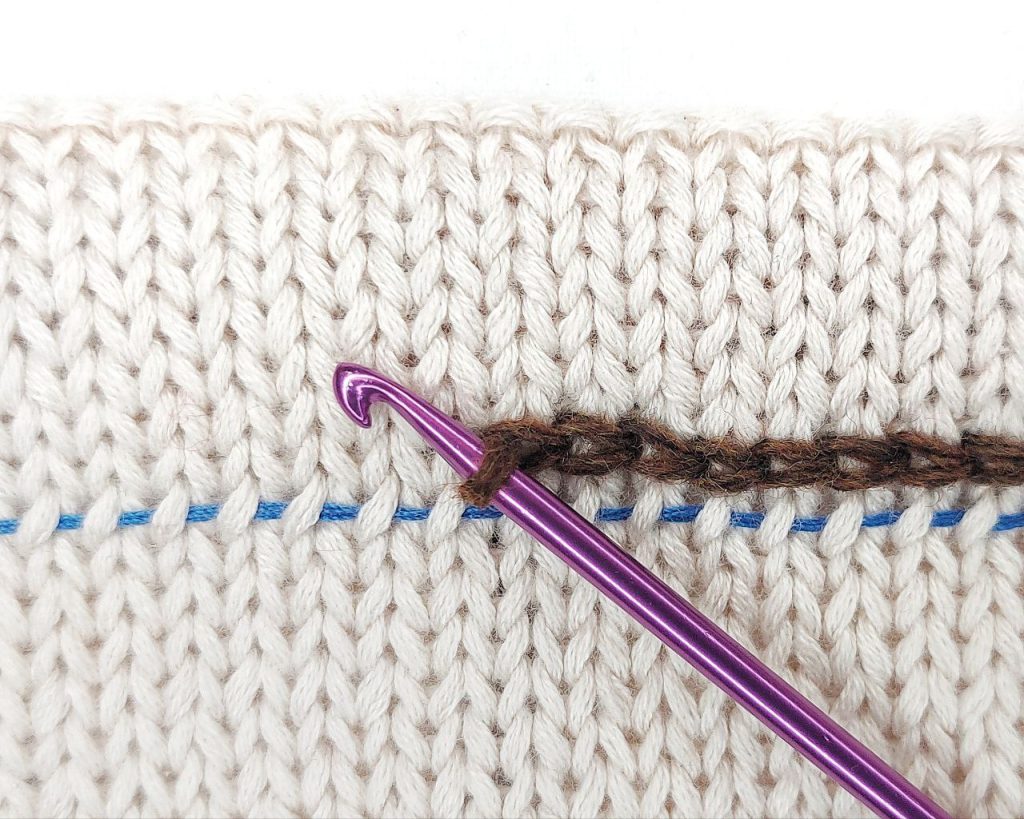

(circular knitting)
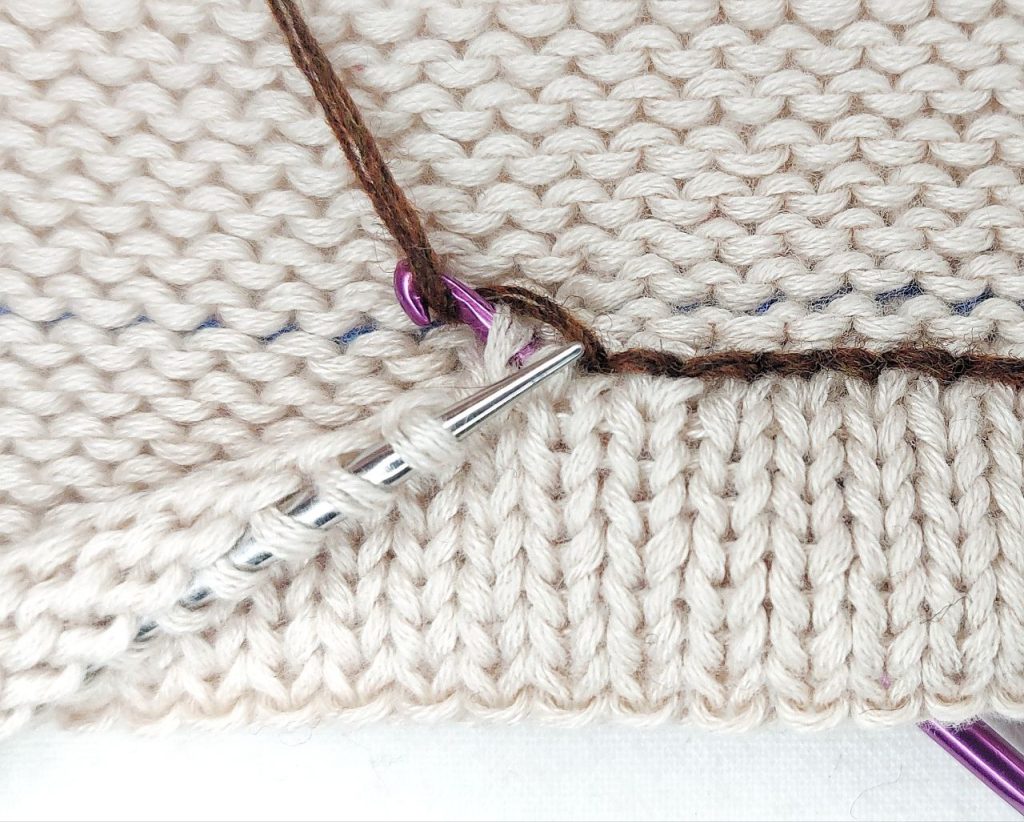
3. Linking with a chain seam on the wrong side using a crochet hook.
First, measure the working yarn 3.5…4 times longer than the width / circumference of the main body edge, cut the yarn and move it to the right side.

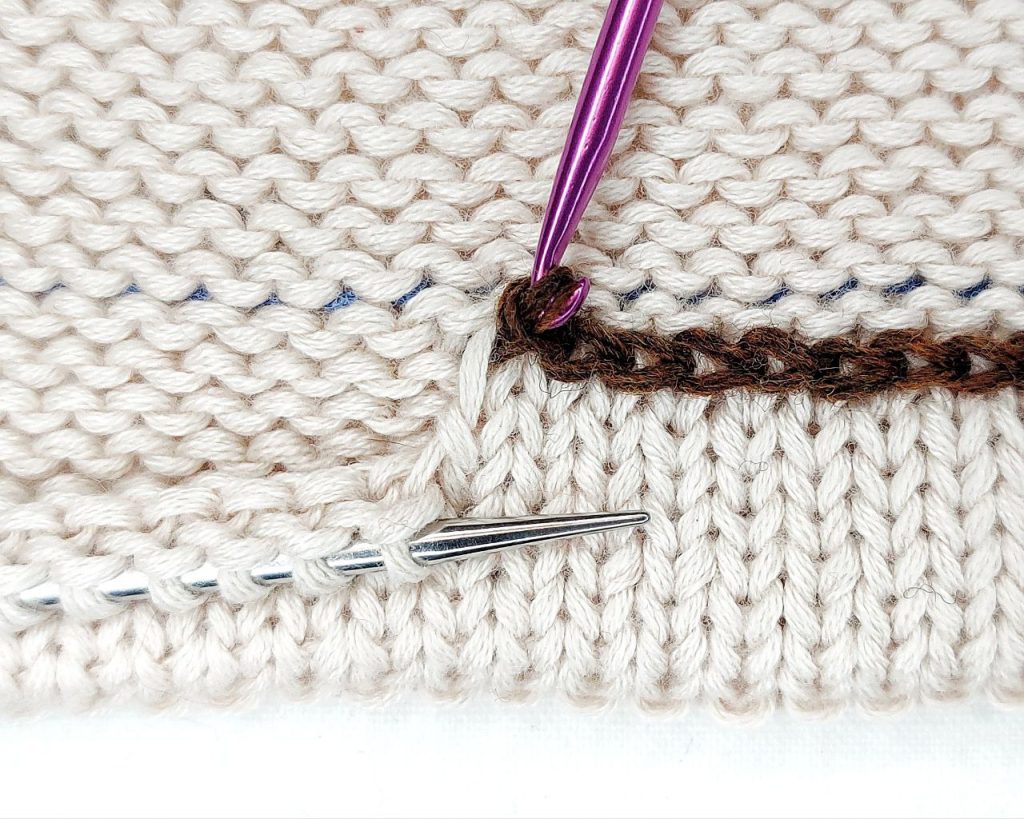

(circular knitting)
If you want to get a solid edge that will not stretch, bind off the stitches of the main body before working the hem. Then, pick up the stitches along the bound off edge and work the hem according to the presented algorithm.
If you want to reduce the width / circumference, evenly decrease several stitches before binding off.
(you will need to select the desired subtitle language)
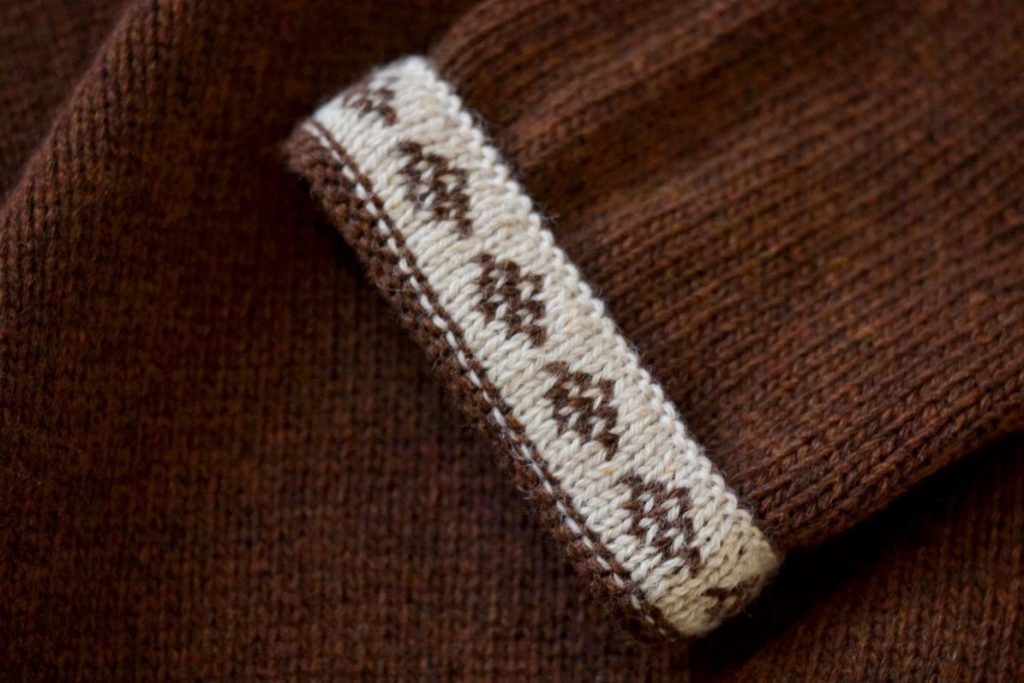
This publication provides a general algorithm for the knitting hem with a fold and shows only a part of fairly concise options for it. If you want to accent the design of the hem, draw attention to it, in the process of knitting you can use yarn of different colors, various bend lines, and also supplement parts of the hem with jacquard or patterns.